# Create a Web flow in 5 minutes or less
A flow is a sequence of steps that you can use to validate the identity of your users. You can create a flow to perform identity validations such as a user's document identification, collect your user's digital signature or other validations available in our [validation suite](https://docs.validations.truora.com).
**Note:** If you have a free trial account please see [Digital Identity Verification Flow](/guides/di_dashboard/) guide.
## Creating a flow
To create a flow using the Digital Identity Verification dashboard, follow these steps:
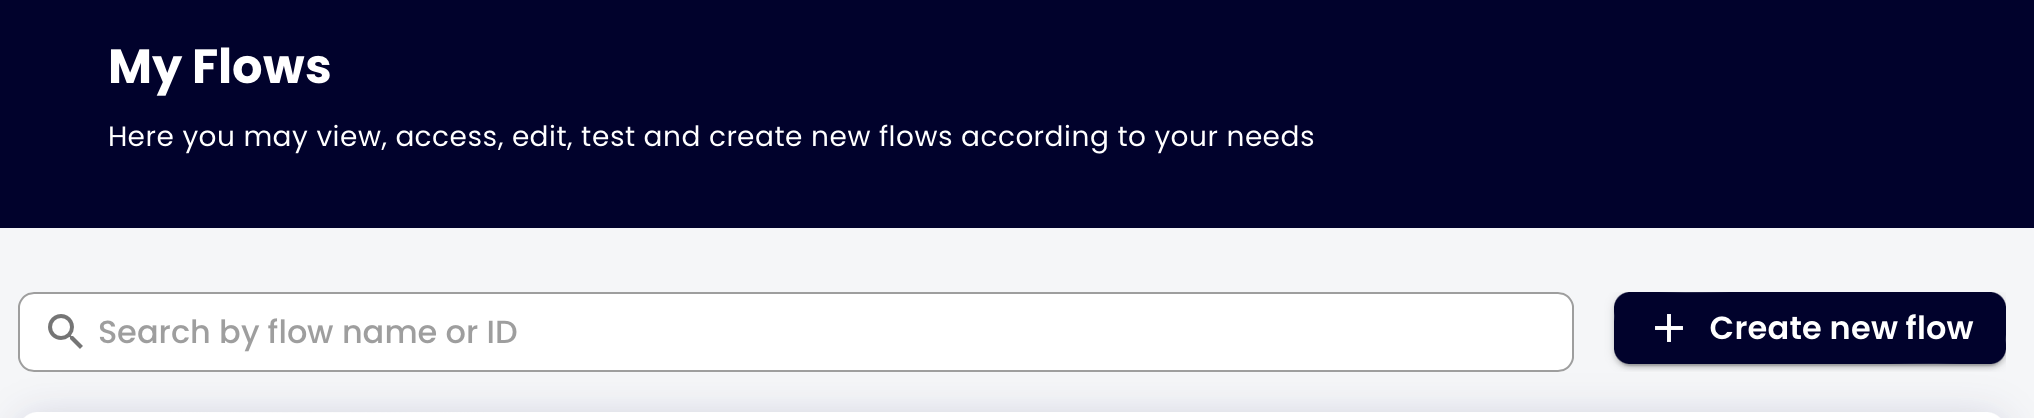
1. Once you are in our product [dashboard](/guides/dashboard/), click the **Open** button in the **Digital Identity Verification** product.
2. Select **My Flows**.
3. Click on the **Create New Flow** button.
{{ }}
4. Give a name to your flow.
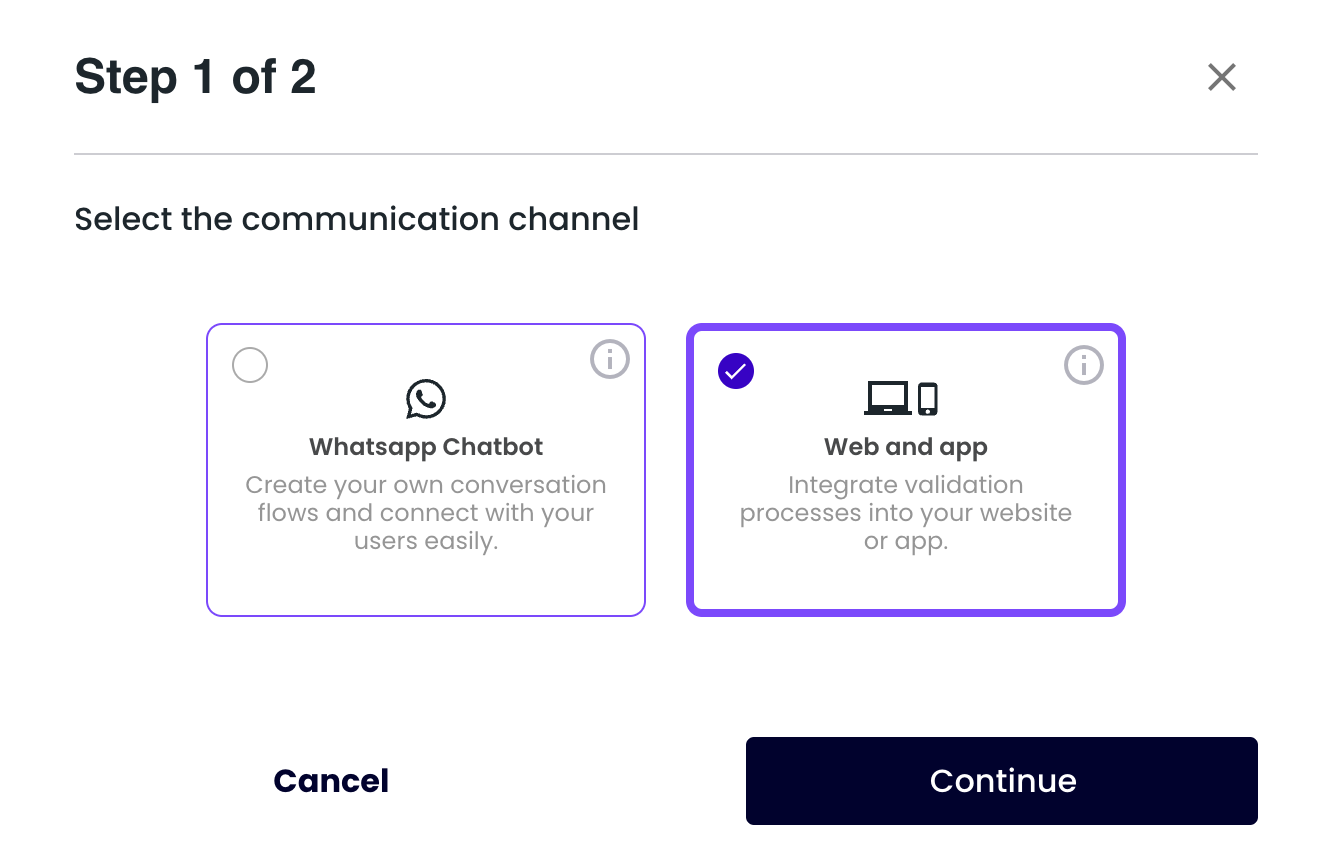
5. Select the comunication channel you want to use to interact with your users.
6. Click on the **Continue** button.
{{
}}
4. Give a name to your flow.
5. Select the comunication channel you want to use to interact with your users.
6. Click on the **Continue** button.
{{ }}
7. Select the template **Blank Template**.
{{
}}
7. Select the template **Blank Template**.
{{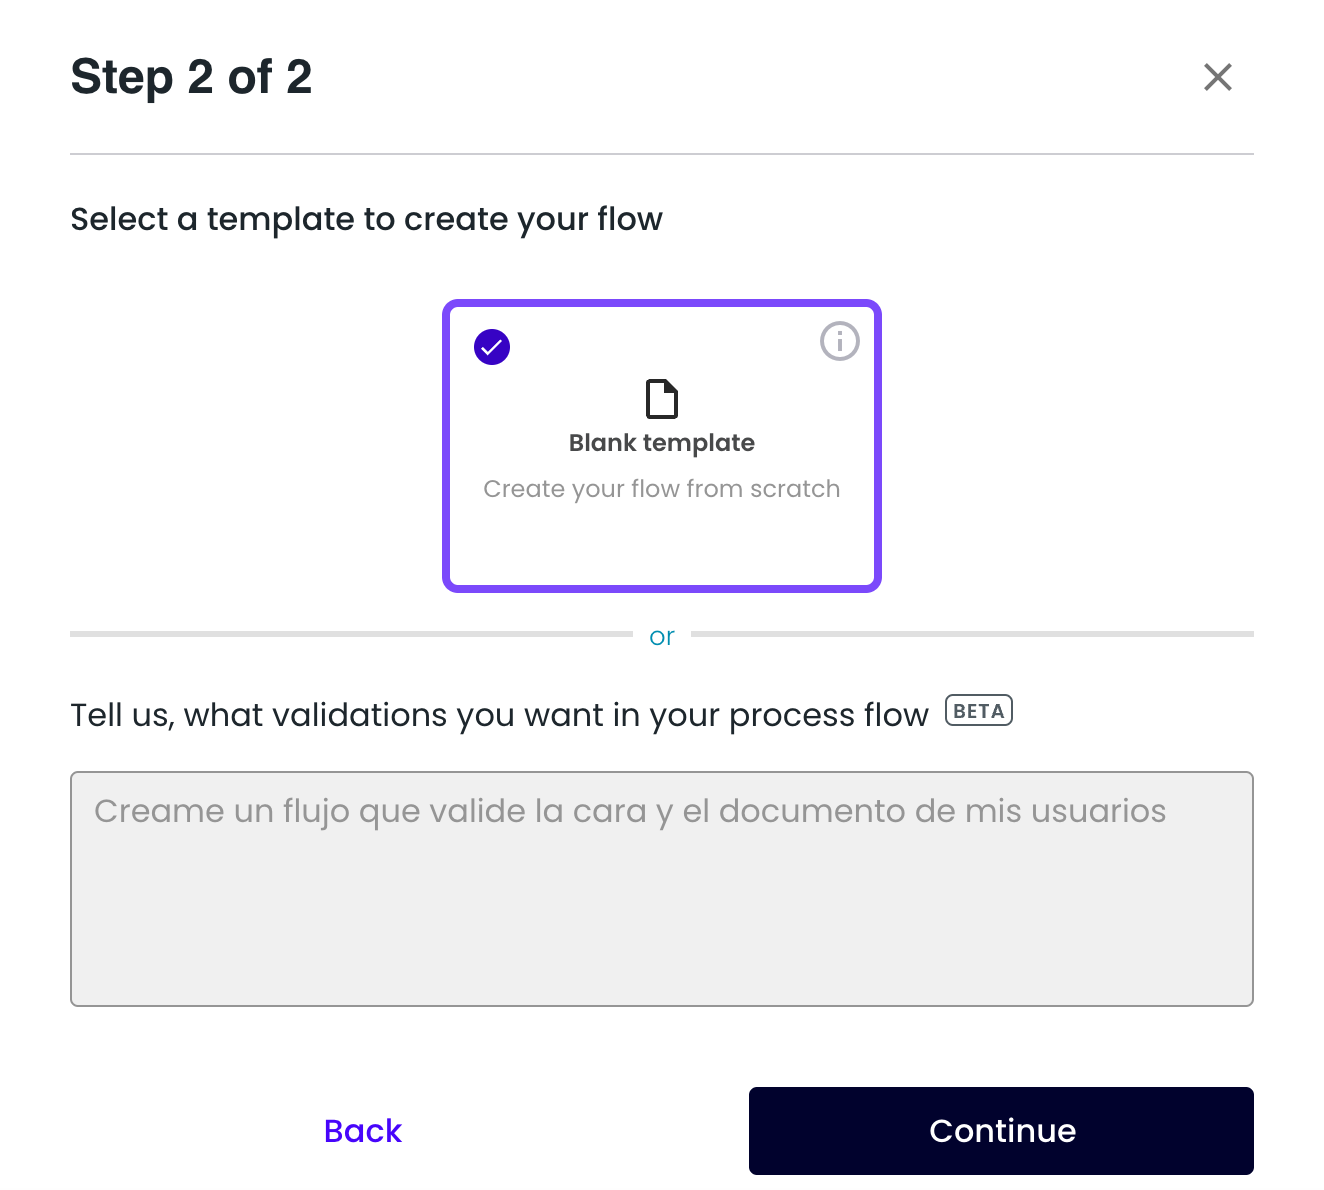 }}
8. Click on the **Continue** button.
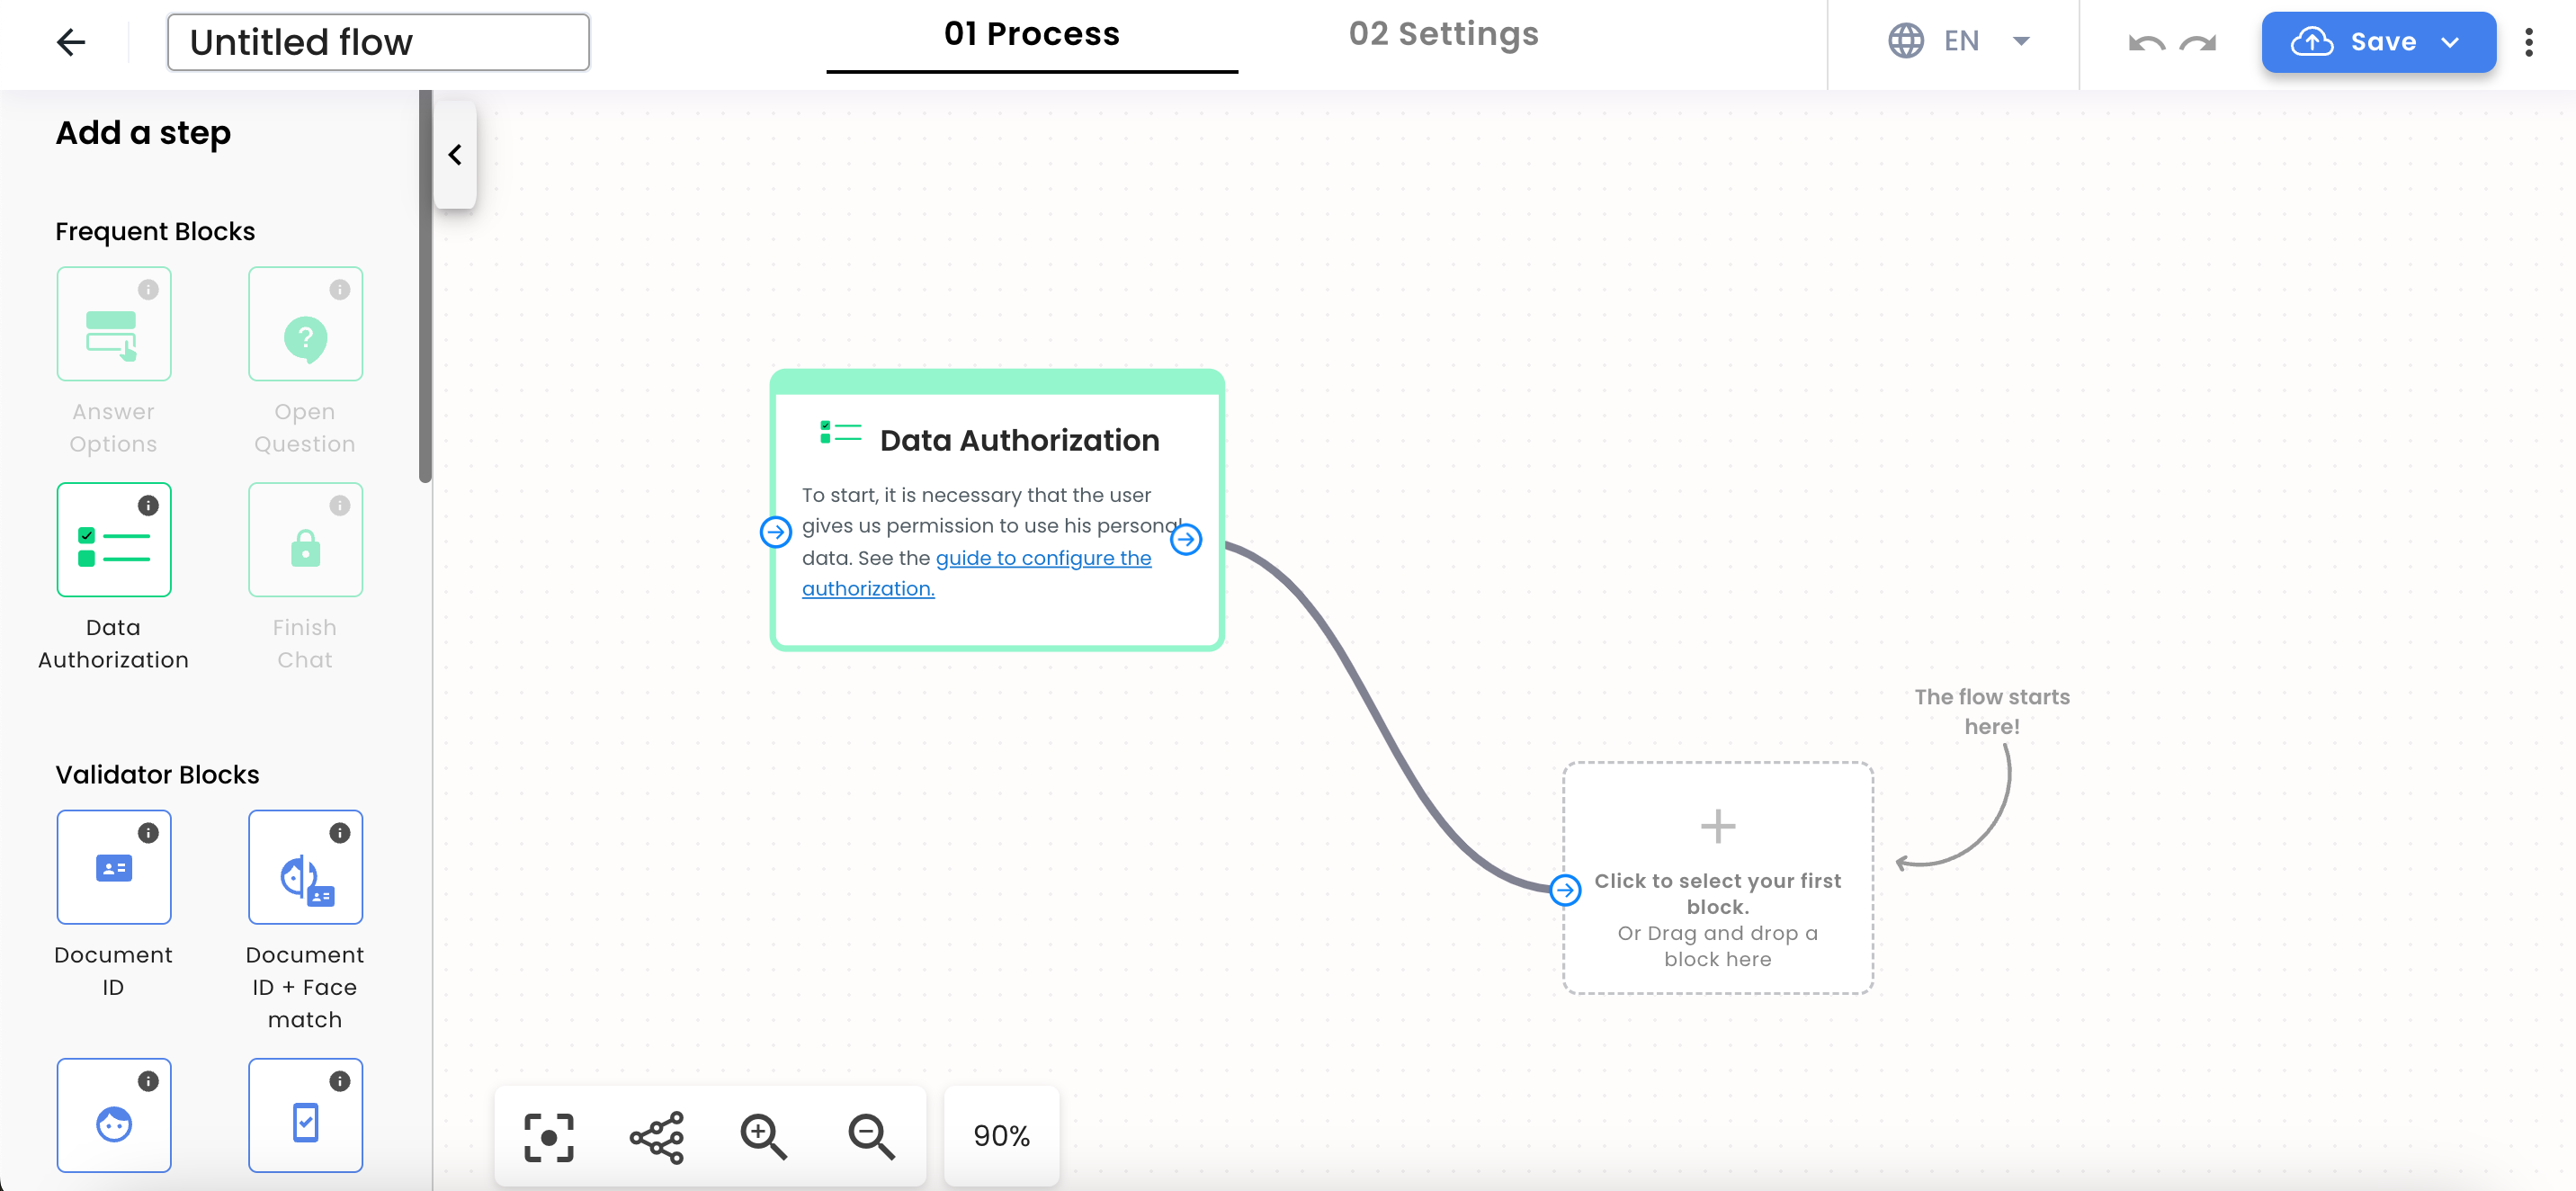
9. In the tab **Flow creation** add the steps you want to use in your flow considering your use case using our drag & drop flowbuilder's steps. For example, you can add a step to data authorization or steps to perform the validations like document ID, face match, email or phone number.
{{
}}
8. Click on the **Continue** button.
9. In the tab **Flow creation** add the steps you want to use in your flow considering your use case using our drag & drop flowbuilder's steps. For example, you can add a step to data authorization or steps to perform the validations like document ID, face match, email or phone number.
{{ }}
## Saving your flow template
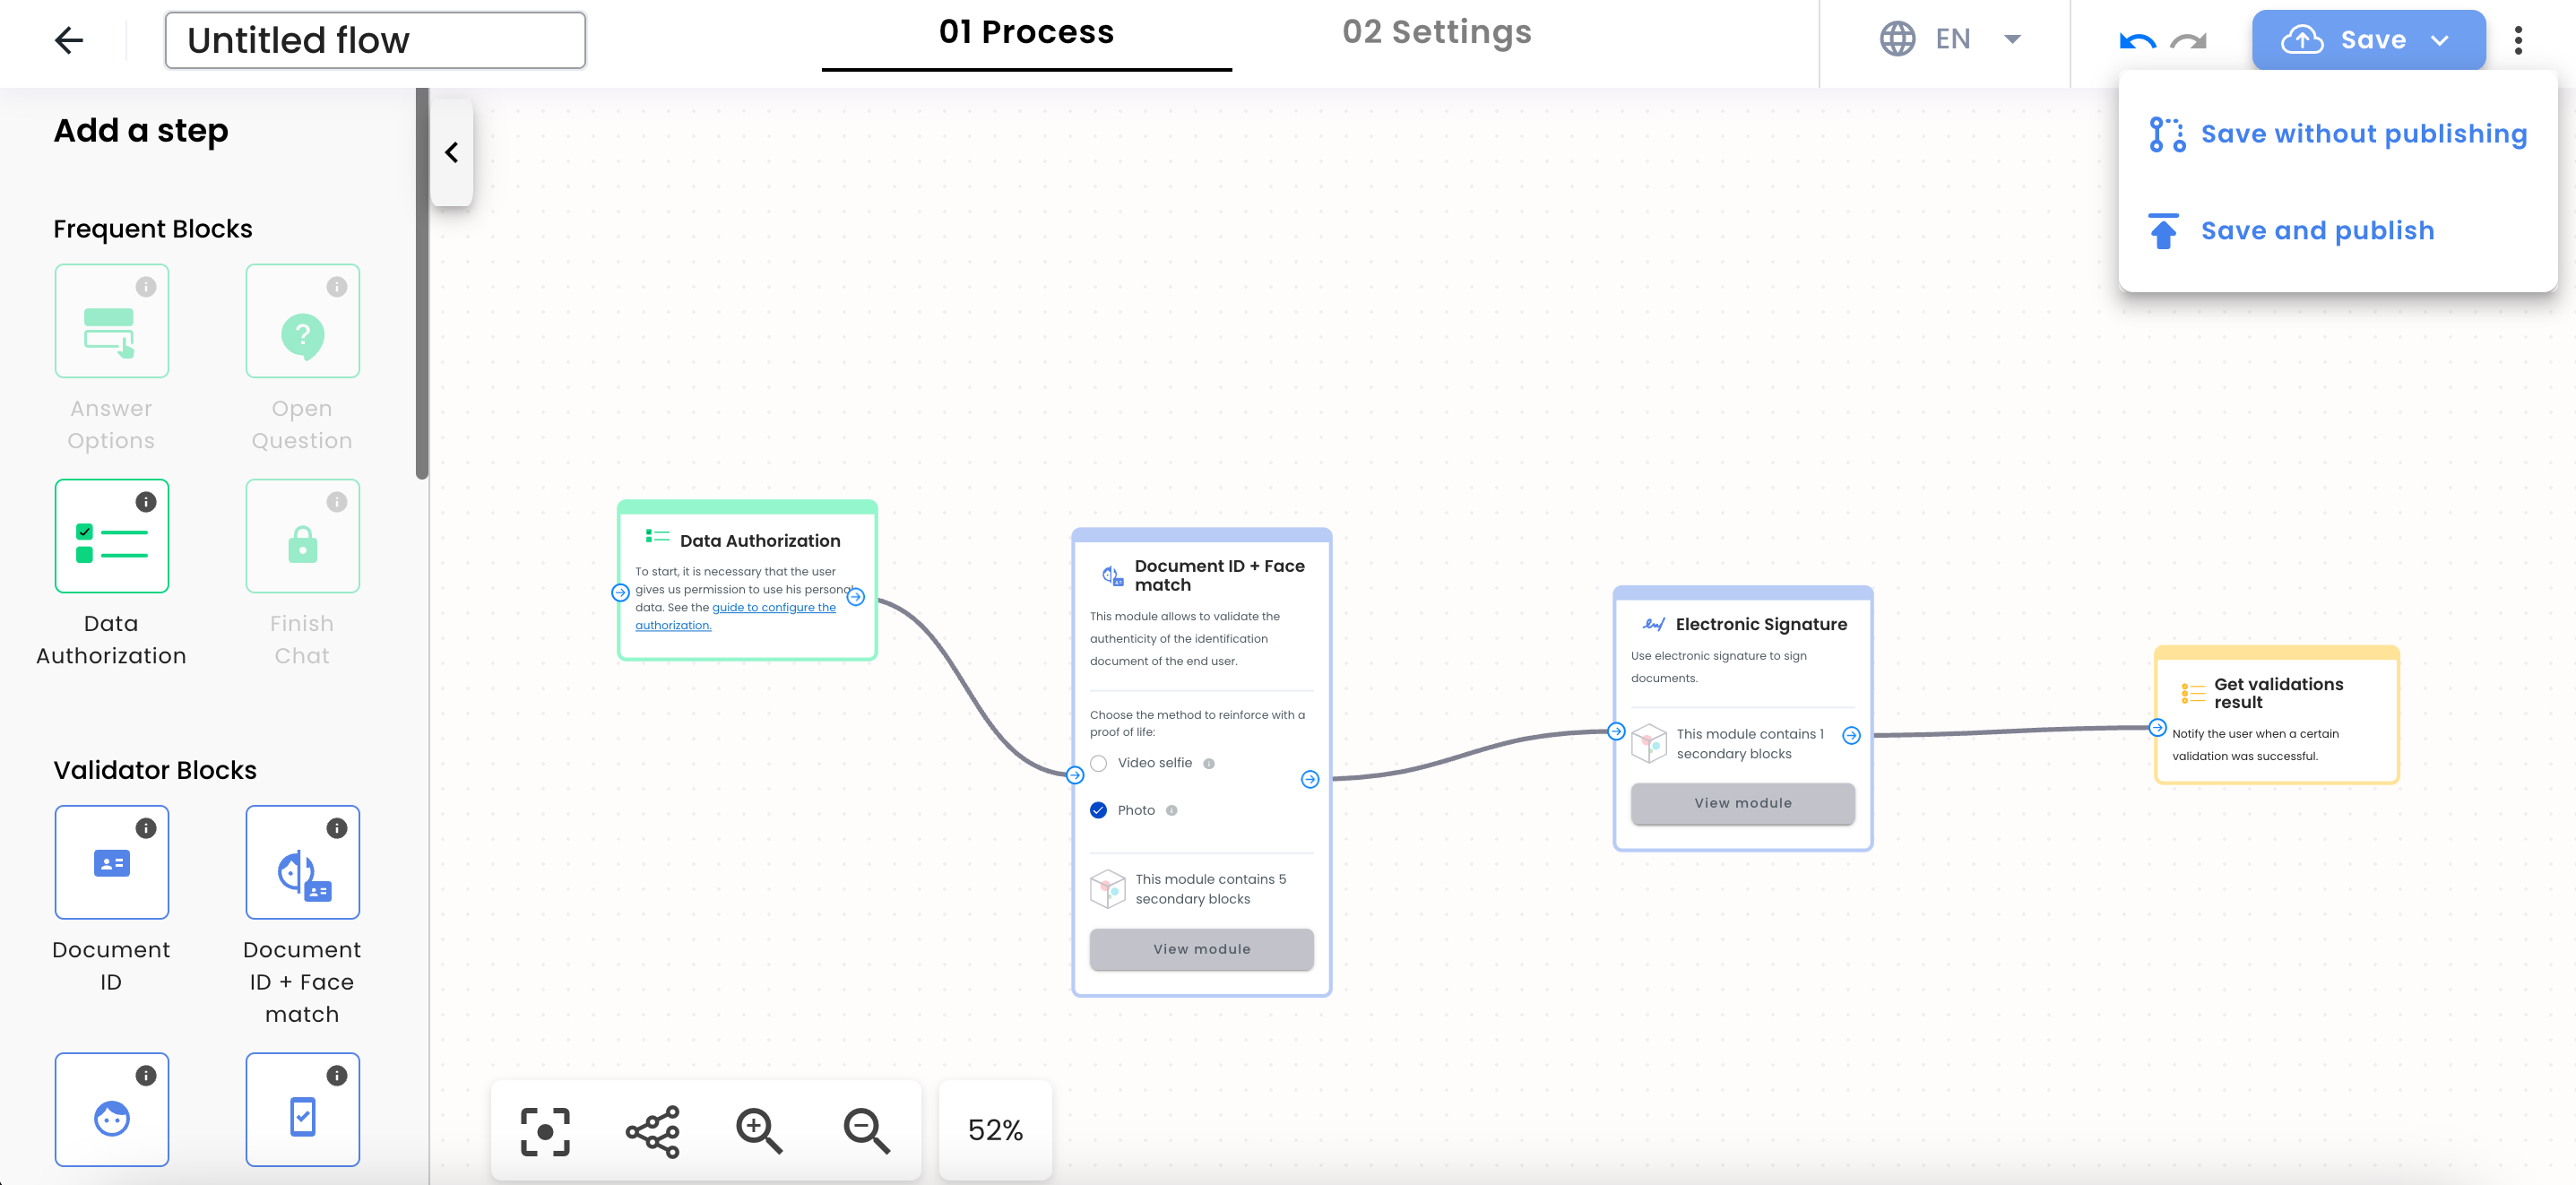
Once you have created and configured your flow template, you can:
* Save it as a draft (option **save without publishing**)
* Save the template and publish it
* Save the template as a copy
* Test the flow template
{{
}}
## Saving your flow template
Once you have created and configured your flow template, you can:
* Save it as a draft (option **save without publishing**)
* Save the template and publish it
* Save the template as a copy
* Test the flow template
{{ }}
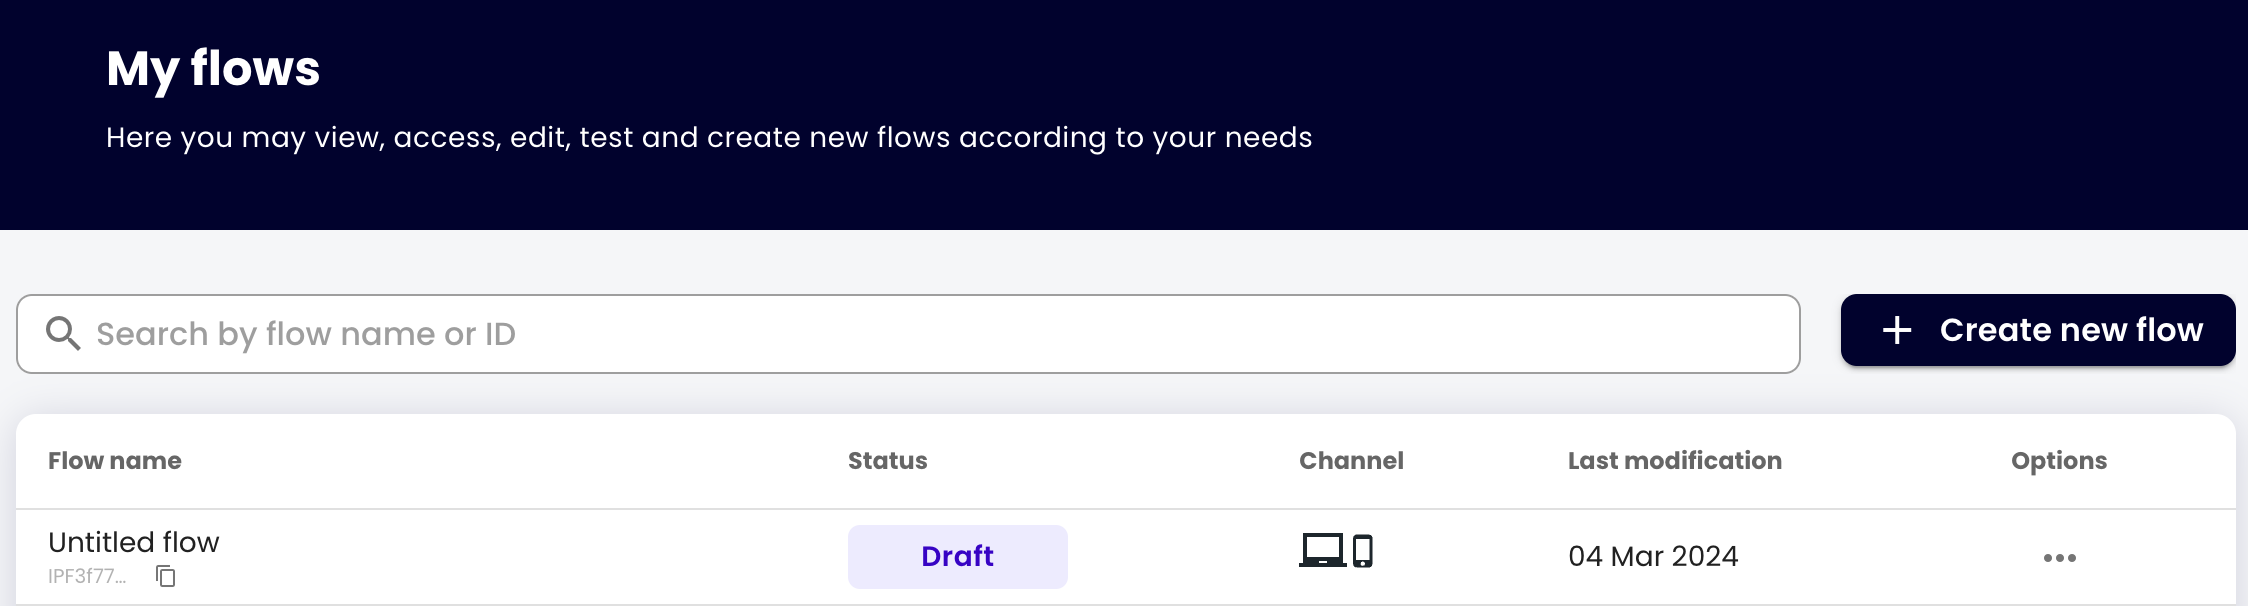
Once you have save the flow , the ``Flow ID `` is generated. You can see it in **My Flows**:
{{
}}
Once you have save the flow , the ``Flow ID `` is generated. You can see it in **My Flows**:
{{ }}
## Configuring your flow template
Configure your flow using the **Configuration tab**.
### Configure the flow template using Web or iFrame
In the event you selected a the communication channel [**Web**](/guides/web_integration_token/), [**iFrame**](/guides/iframe_integration/) and [**Web App**](/guides/Webview/) a window like the following will open where you can configure the flow.
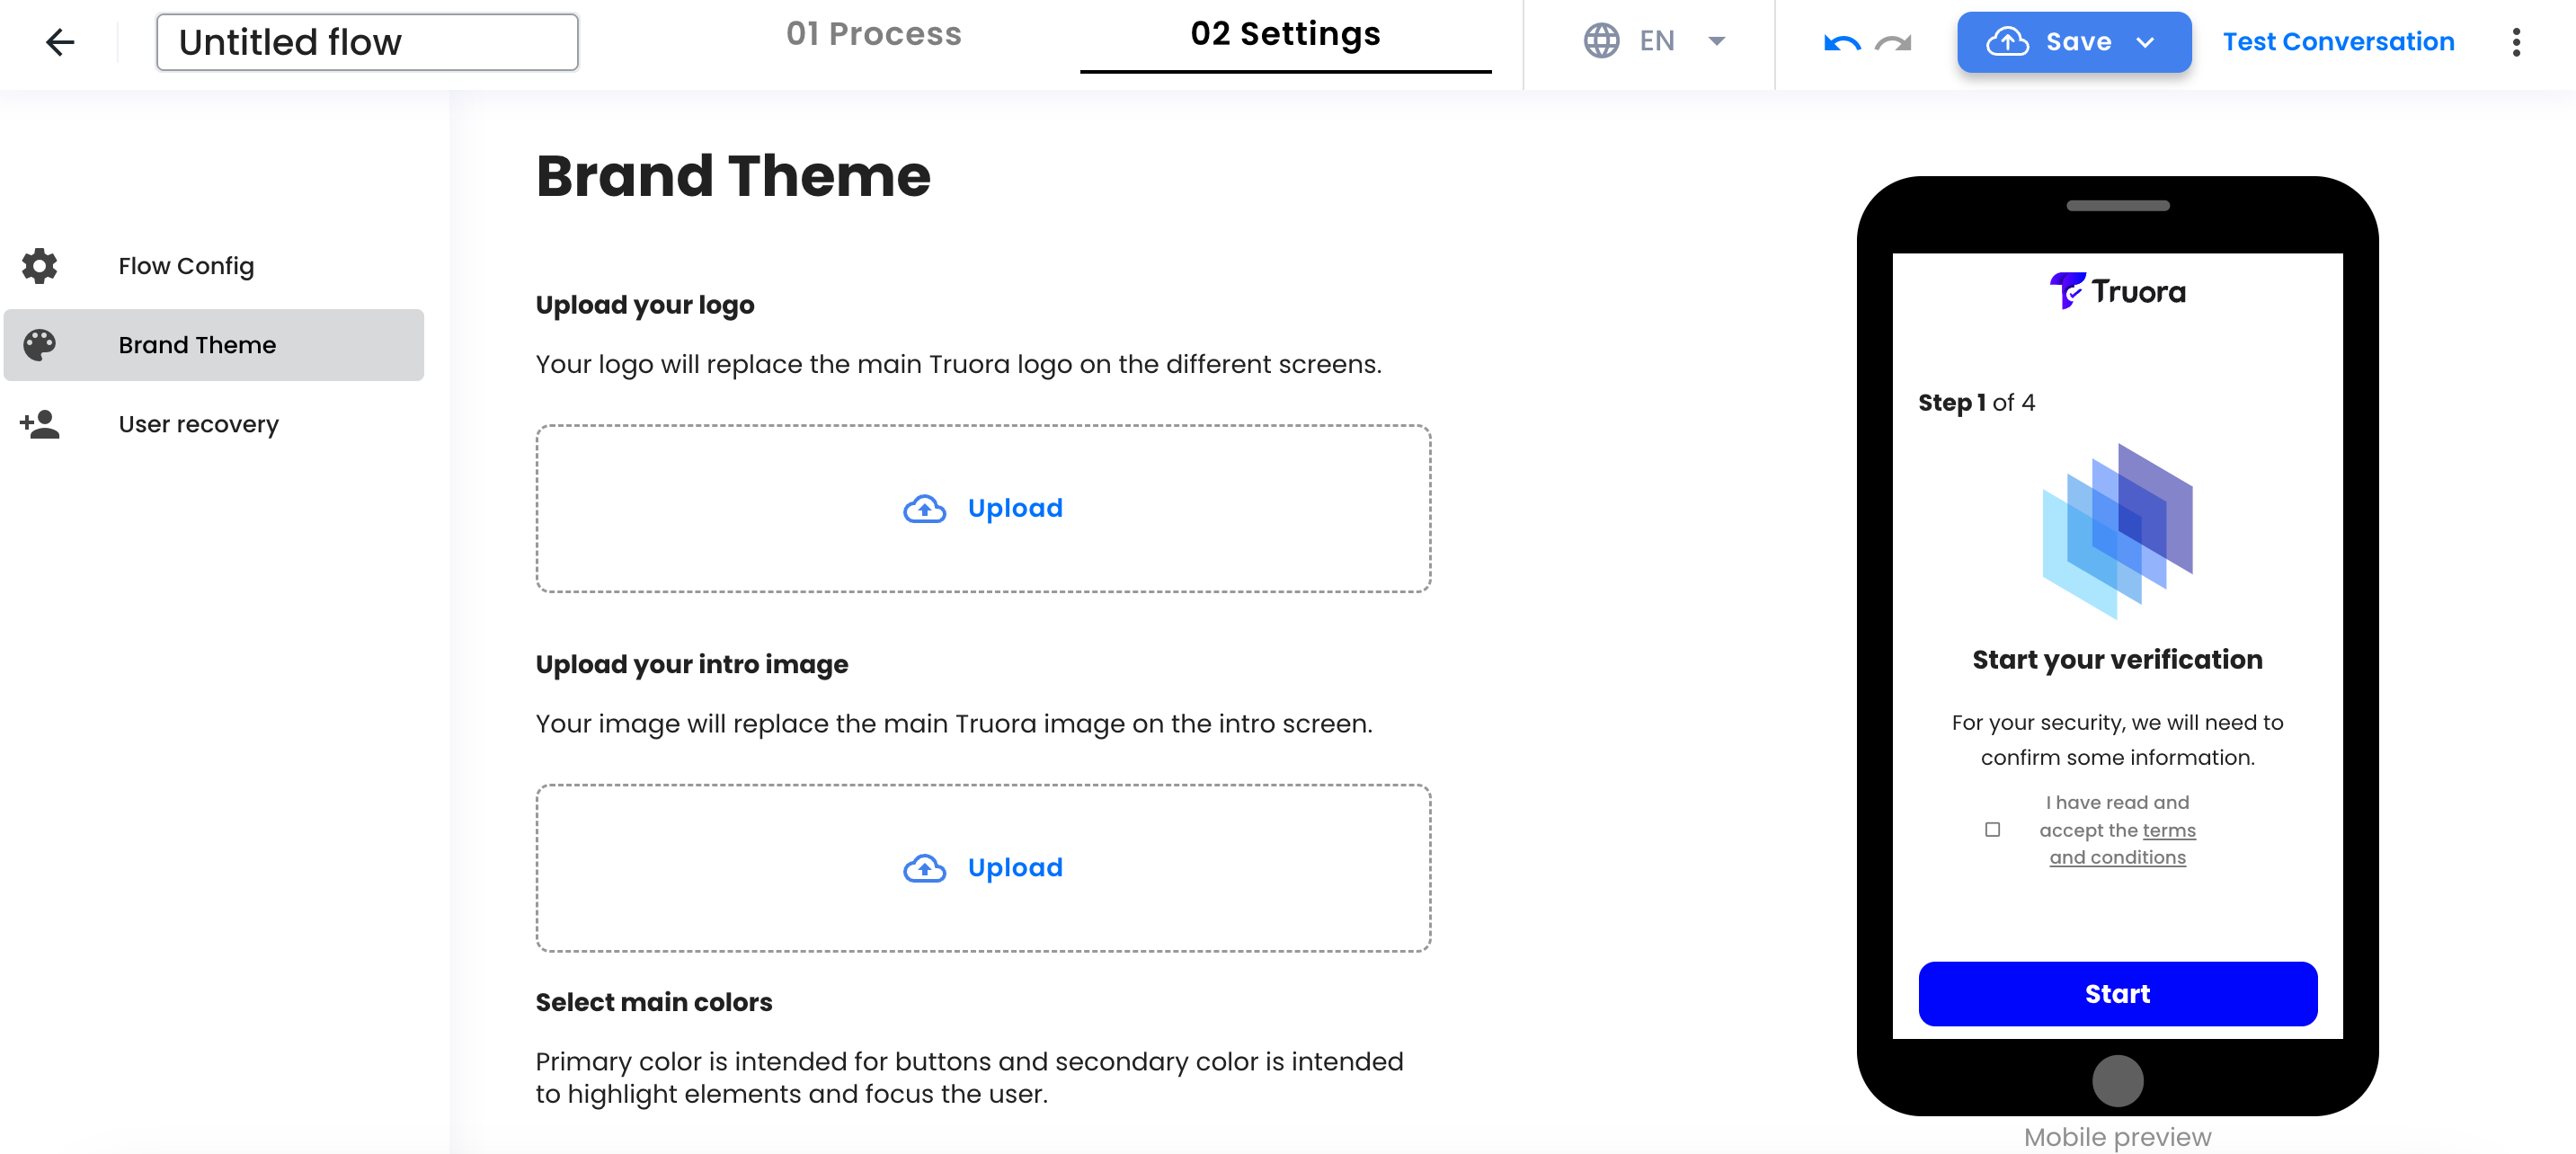
* Click the **Brand theme** button, to configure your flow's look and feel.
{{
}}
## Configuring your flow template
Configure your flow using the **Configuration tab**.
### Configure the flow template using Web or iFrame
In the event you selected a the communication channel [**Web**](/guides/web_integration_token/), [**iFrame**](/guides/iframe_integration/) and [**Web App**](/guides/Webview/) a window like the following will open where you can configure the flow.
* Click the **Brand theme** button, to configure your flow's look and feel.
{{ }}
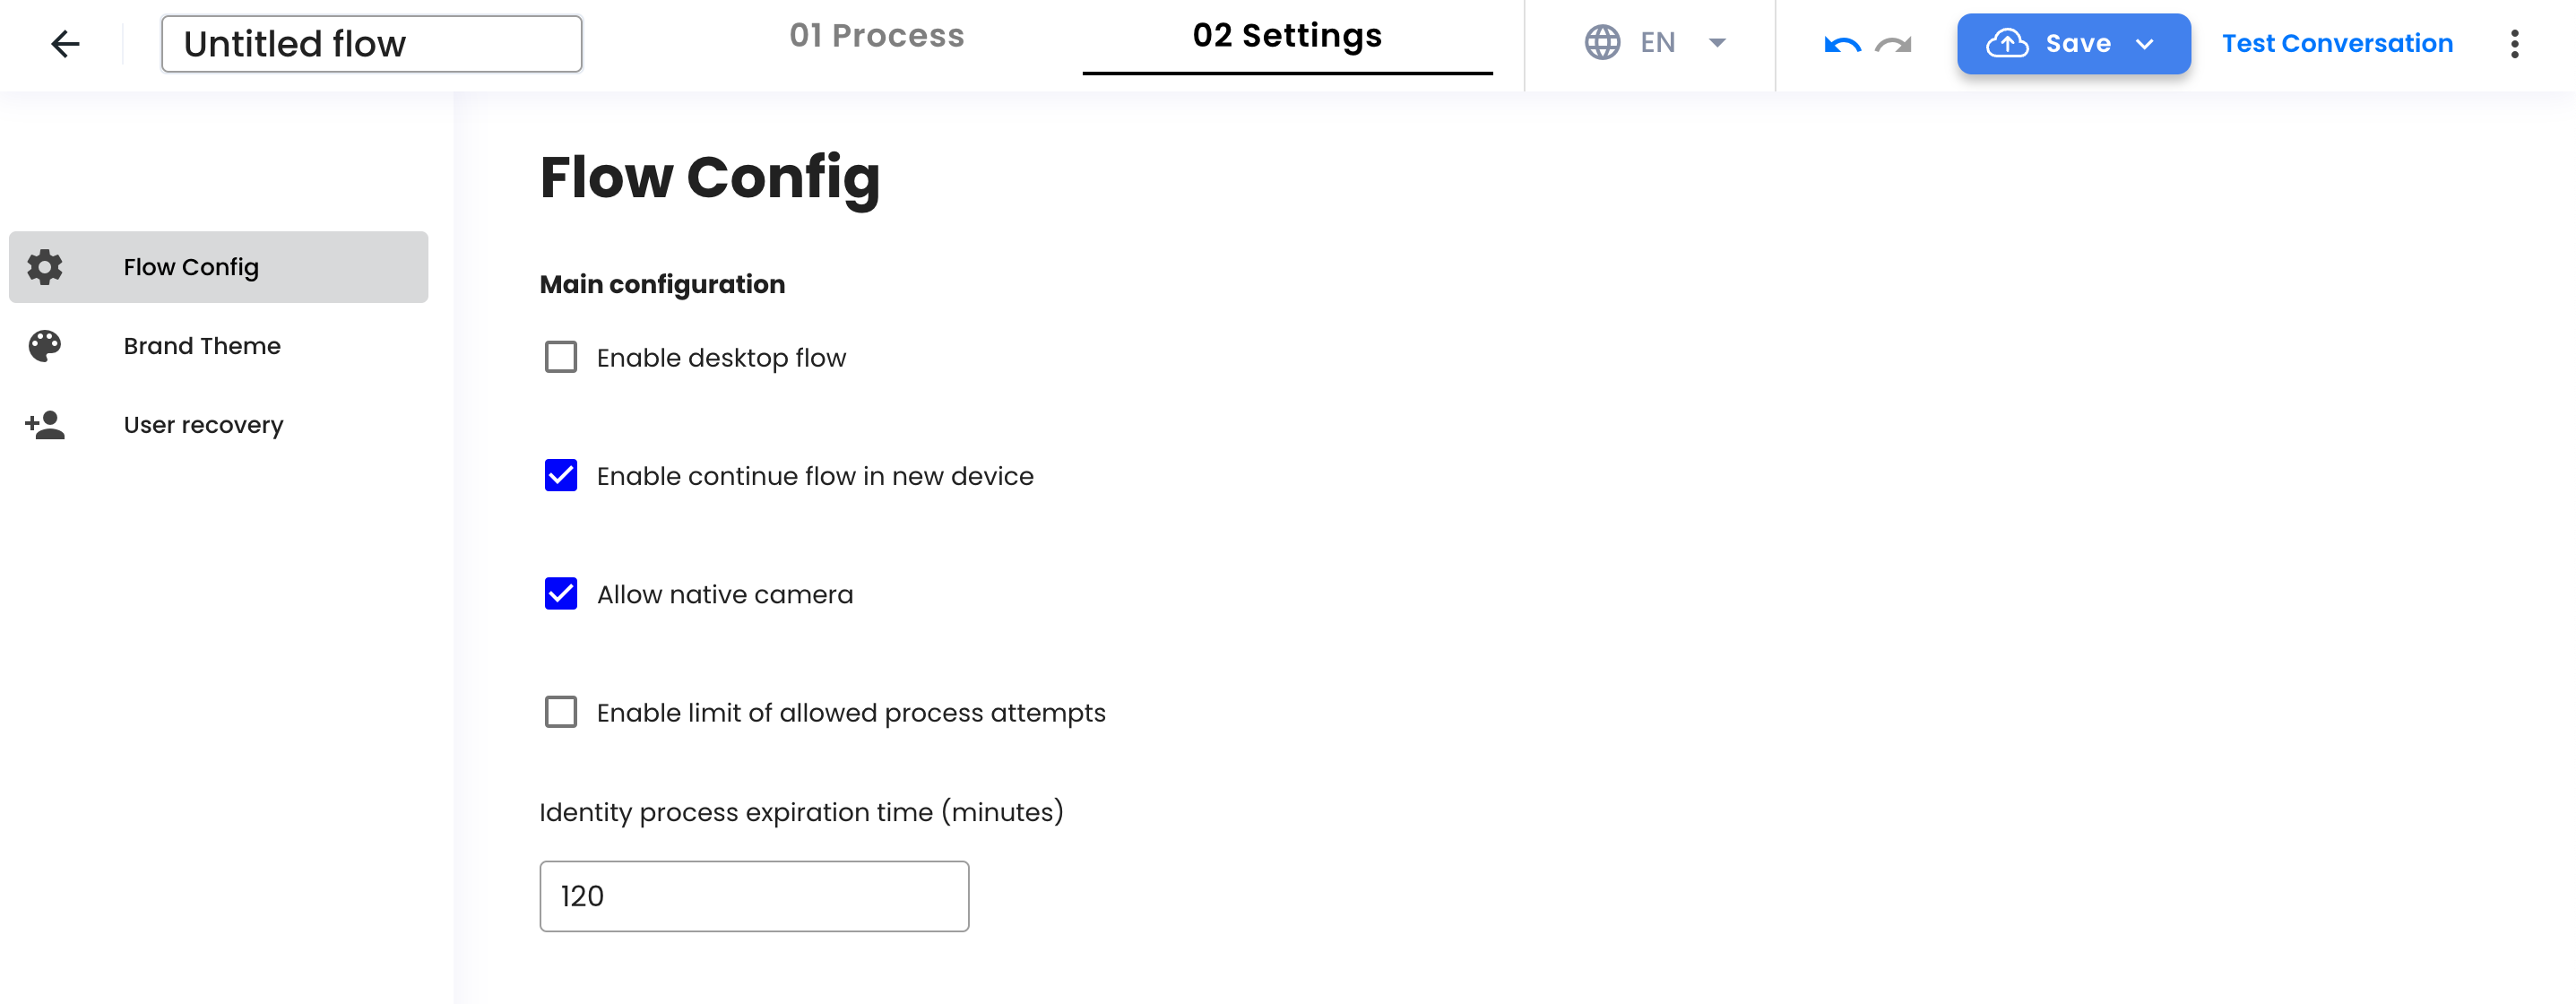
* Click the **Flow config** button, to configure the flow's behavior. You can enable the following option:
- That the identity process continues on a desktop PC.
- That the user can continues the flow on a new device.
- Allow native camera.
Under **Flow config**, you can also set the expiration options:
* **Access link expiration** (`access_link_expiration_config`): You can set optional limits, per channel, on how long access or invitation links remain valid. For web or API integration, this also controls how long the related session token path lasts when set by flow configuration. Values are set in minutes and can be configured per channel within a supported range (for example, 5 minutes up to 48 hours per channel). Preview flows may use default link and token behavior.
* **Identity process expiration** (`time_to_live`): how long the user has to **complete** the identity process after it starts. The default is 2 hours and the maximum is 1 day. This is not the same as link or session lifetime.
For limits, API field names, and the full list of options, see [Customize Web Flow](/guides/customize_web_flow/).
{{
}}
* Click the **Flow config** button, to configure the flow's behavior. You can enable the following option:
- That the identity process continues on a desktop PC.
- That the user can continues the flow on a new device.
- Allow native camera.
Under **Flow config**, you can also set the expiration options:
* **Access link expiration** (`access_link_expiration_config`): You can set optional limits, per channel, on how long access or invitation links remain valid. For web or API integration, this also controls how long the related session token path lasts when set by flow configuration. Values are set in minutes and can be configured per channel within a supported range (for example, 5 minutes up to 48 hours per channel). Preview flows may use default link and token behavior.
* **Identity process expiration** (`time_to_live`): how long the user has to **complete** the identity process after it starts. The default is 2 hours and the maximum is 1 day. This is not the same as link or session lifetime.
For limits, API field names, and the full list of options, see [Customize Web Flow](/guides/customize_web_flow/).
{{ }}
## Testing the flow template
Once you have configured your flow template, you can test it using the browser. To do this, follow these steps:
* First **save and publishing**
* Click the **Test conversation** button in the upper right side of the screen
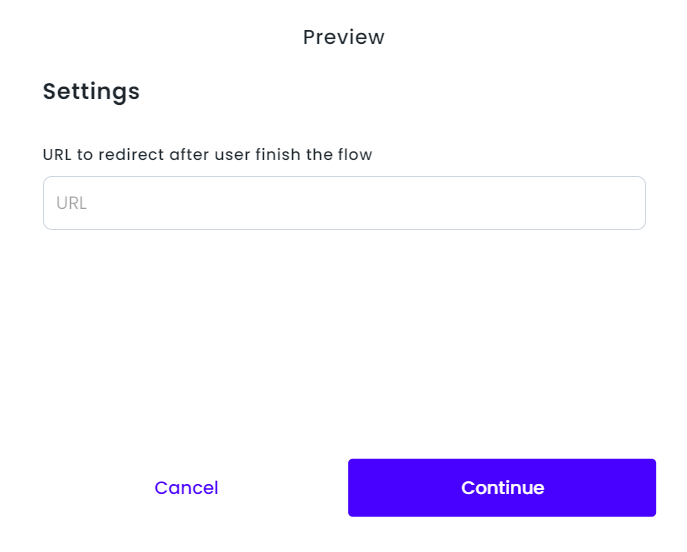
* Insert URL to redirect after user finish the flow
* Click the **continue** button
{{
}}
## Testing the flow template
Once you have configured your flow template, you can test it using the browser. To do this, follow these steps:
* First **save and publishing**
* Click the **Test conversation** button in the upper right side of the screen
* Insert URL to redirect after user finish the flow
* Click the **continue** button
{{ }}
* Copy the autogenerated link and paste it in a new tab in your browser or
* Click the **Open preview** button
{{
}}
* Copy the autogenerated link and paste it in a new tab in your browser or
* Click the **Open preview** button
{{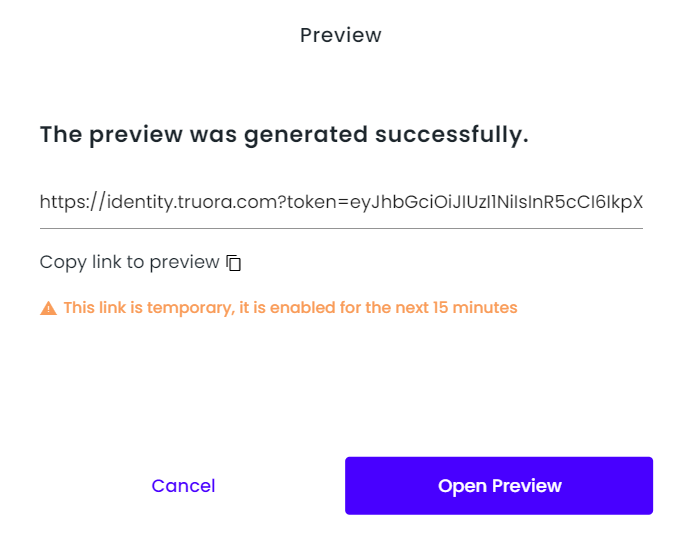 }}
**NOTE:** The identity process expiration time has a **shelf life of 15 min by default**.
## Web Integration the flow template
To integrate the flow template, you need to generate a token and a final link for each user to perform validations. You can see all the information in this [**guide**](/guides/web_integration_token/)
## Get Results of process
- You can get the process (or flow) results with a query to the truora's API or from the dashboard. For more information, please see [**Guide to Get Results**](/guides/get_result/).
- To get process (or Web flow) result automatically, you must subscribe webhooks. For more information, please see [**Webhooks guide**](/guides/webhook_rule).
## Browser compatibility
The table below lists the minimum versions of web browsers which are supported on:
### Computers
{{
}}
**NOTE:** The identity process expiration time has a **shelf life of 15 min by default**.
## Web Integration the flow template
To integrate the flow template, you need to generate a token and a final link for each user to perform validations. You can see all the information in this [**guide**](/guides/web_integration_token/)
## Get Results of process
- You can get the process (or flow) results with a query to the truora's API or from the dashboard. For more information, please see [**Guide to Get Results**](/guides/get_result/).
- To get process (or Web flow) result automatically, you must subscribe webhooks. For more information, please see [**Webhooks guide**](/guides/webhook_rule).
## Browser compatibility
The table below lists the minimum versions of web browsers which are supported on:
### Computers
{{}}
| Browser| Version |
|---------|--------|
| Chrome | 53 (Released 2016-08-31) |
| Edge | 79 (Released 2020-01-15) |
| Firefox | 36 (Released 2015-02-24)* |
| Opera | 40 (Released 2016-09-20) |
| Safari | 14 (Released 2020-09-16) |
{{
}}
### Mobile phones
{{}}
| Browser| Version |
|---------|--------|
| Chrome Android | 53 (Released 2016-08-31) |
| Firefox for Android | 36 (Released 2015-02-24)* |
| Opera Android | 41 (Released 2016-10-25) |
| Safari on iOS | 14.3 (Released 2020-09-16) |
| Samsung Internet | 6.0 (Released 2017-08-23) |
| WebView Android | 53 (Released 2016-09-07) |
{{
}}
*Some versions may have restrictions, so if you have any questions, please ask us.