# Authorization
> **In simple terms:** Before you can verify someone's identity, you need their permission to use their personal data. This guide shows you how to add a permission screen to your flow where users must agree before continuing.
`Authorization` is a verification that allows you to obtain the **explicit authorization** of your users for performing a certain flow and using their data according to the terms.
## Flow Configuration
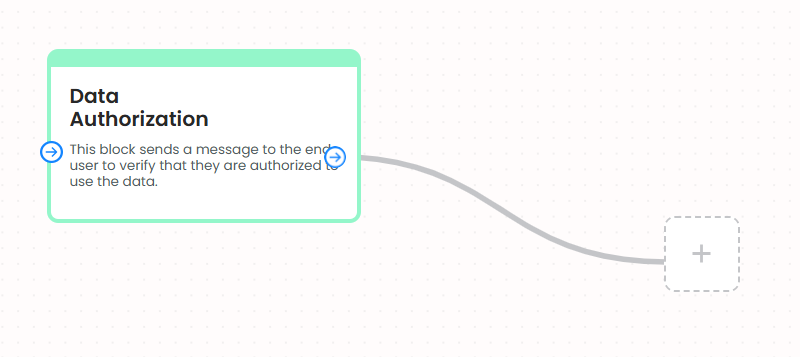
You can find the Authorization block in the Frequent Blocks section of the Flow Builder. It will be added by default at the beginning of the flow just for `Web and app` flows.
> Note: This block must precede any other verification blocks.
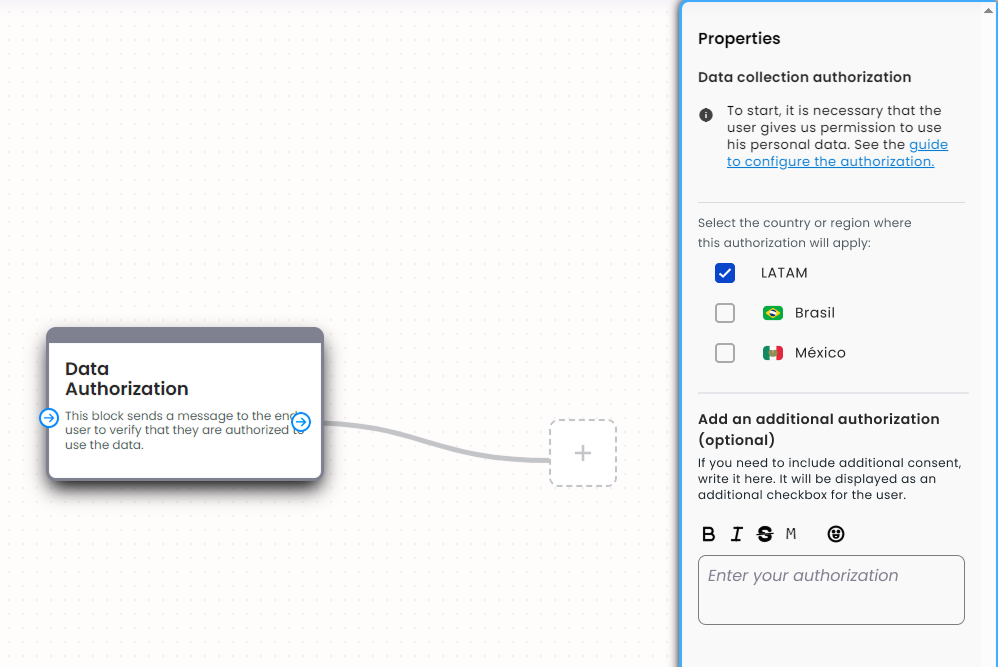
Select the authorization block and in the properties panel on the right side, you can:
- Select the region or country(ies) where you need to collect authorization.
- Optionally, add custom authorization text if your use case requires additional consent.
By default, LATAM is selected, which includes Colombia, Chile, Peru and Argentina. You can deselect it by clicking the checkbox, or select other country. Brazil and Mexico require a different authorization link, so they must be selected separately.
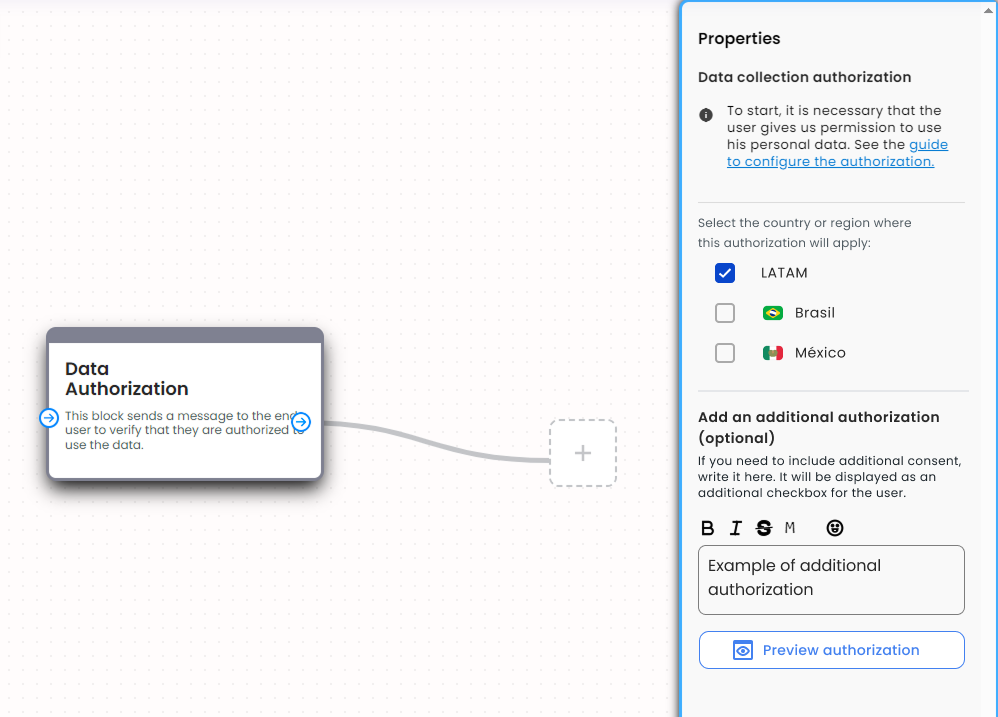
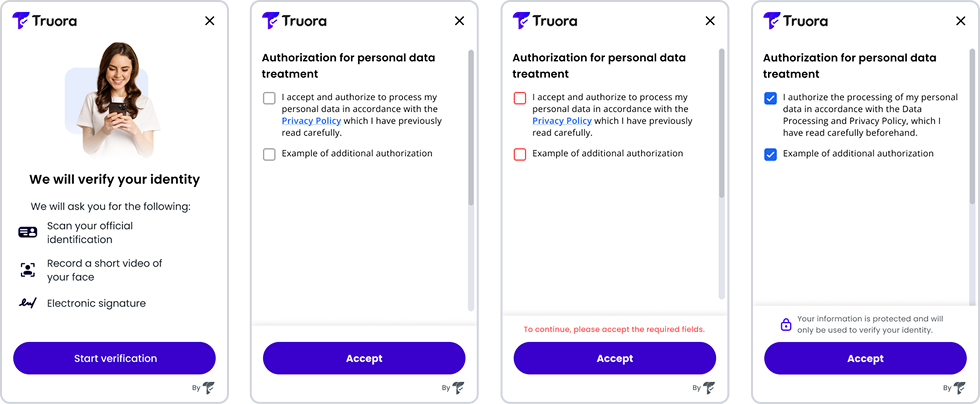
You can add an additional authorization by typing in the text box. An extra check will be added for this, and the authorization will move to a full screen that will be displayed after the home screen.
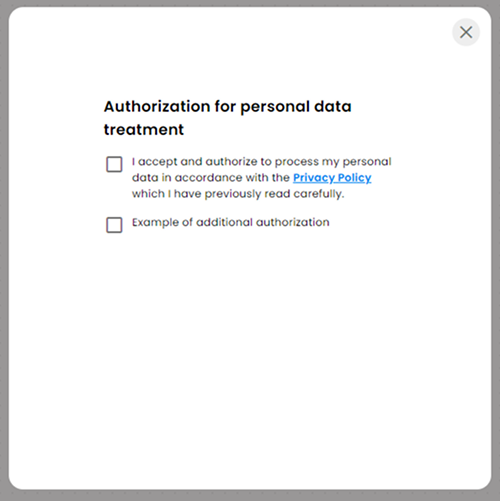
By clicking on the View `Preview authorization` button, you can see an example image of how the user would see the authorization screen with the two checkboxes. This screen would appear after the initial screen of the validation process.
> Note: In case you obtain your users' agreement in any other way and do not want this verification to be shown, please contact us so that we can consider whether your process meets the requirements and consider making it optional for you.
## User Experience
This verification will be present in all processes performed by your users.
To move forward in the flow you have defined for them, it will be mandatory that they grant data treatment permissions.
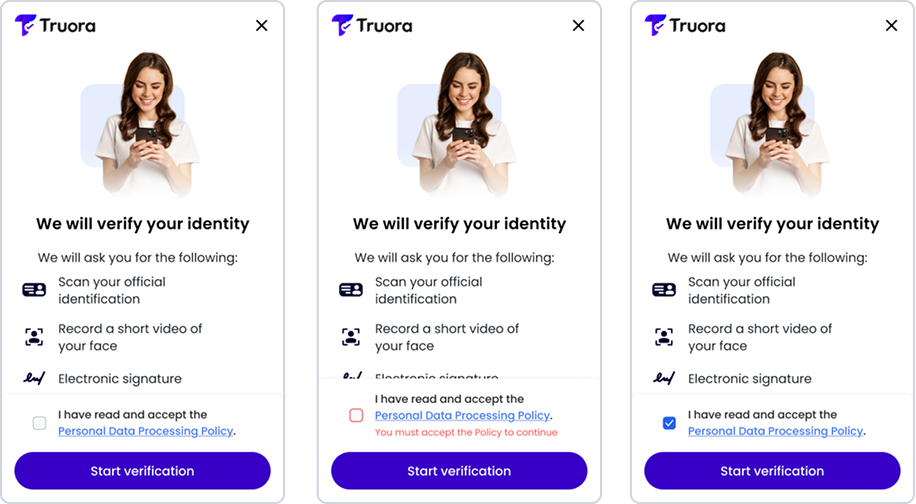
Unified authorization view with the initial screen.
The button is not disabled, but if the user clicks it without checking the box, we give feedback in red that the policies need to be accepted. Keep in mind that unified authorization with the initial screen will appear if no other box has been added.
Authorization view with additional checkbox.
By adding an extra box, the authorization will move to another screen after the initial screen.
Once your users have granted authorization they can continue with the process you have designed for them by clicking ‘Accept’.