Customize your web flow
This guide will show you how to configure the behavior and appearance of a web flow through our flowbuilder.
Once you have created a flow, click on 02 Settings. There, in the sidebar menu, you can select Flow Config, Brand Theme and User recovery which will be described in the next sections:
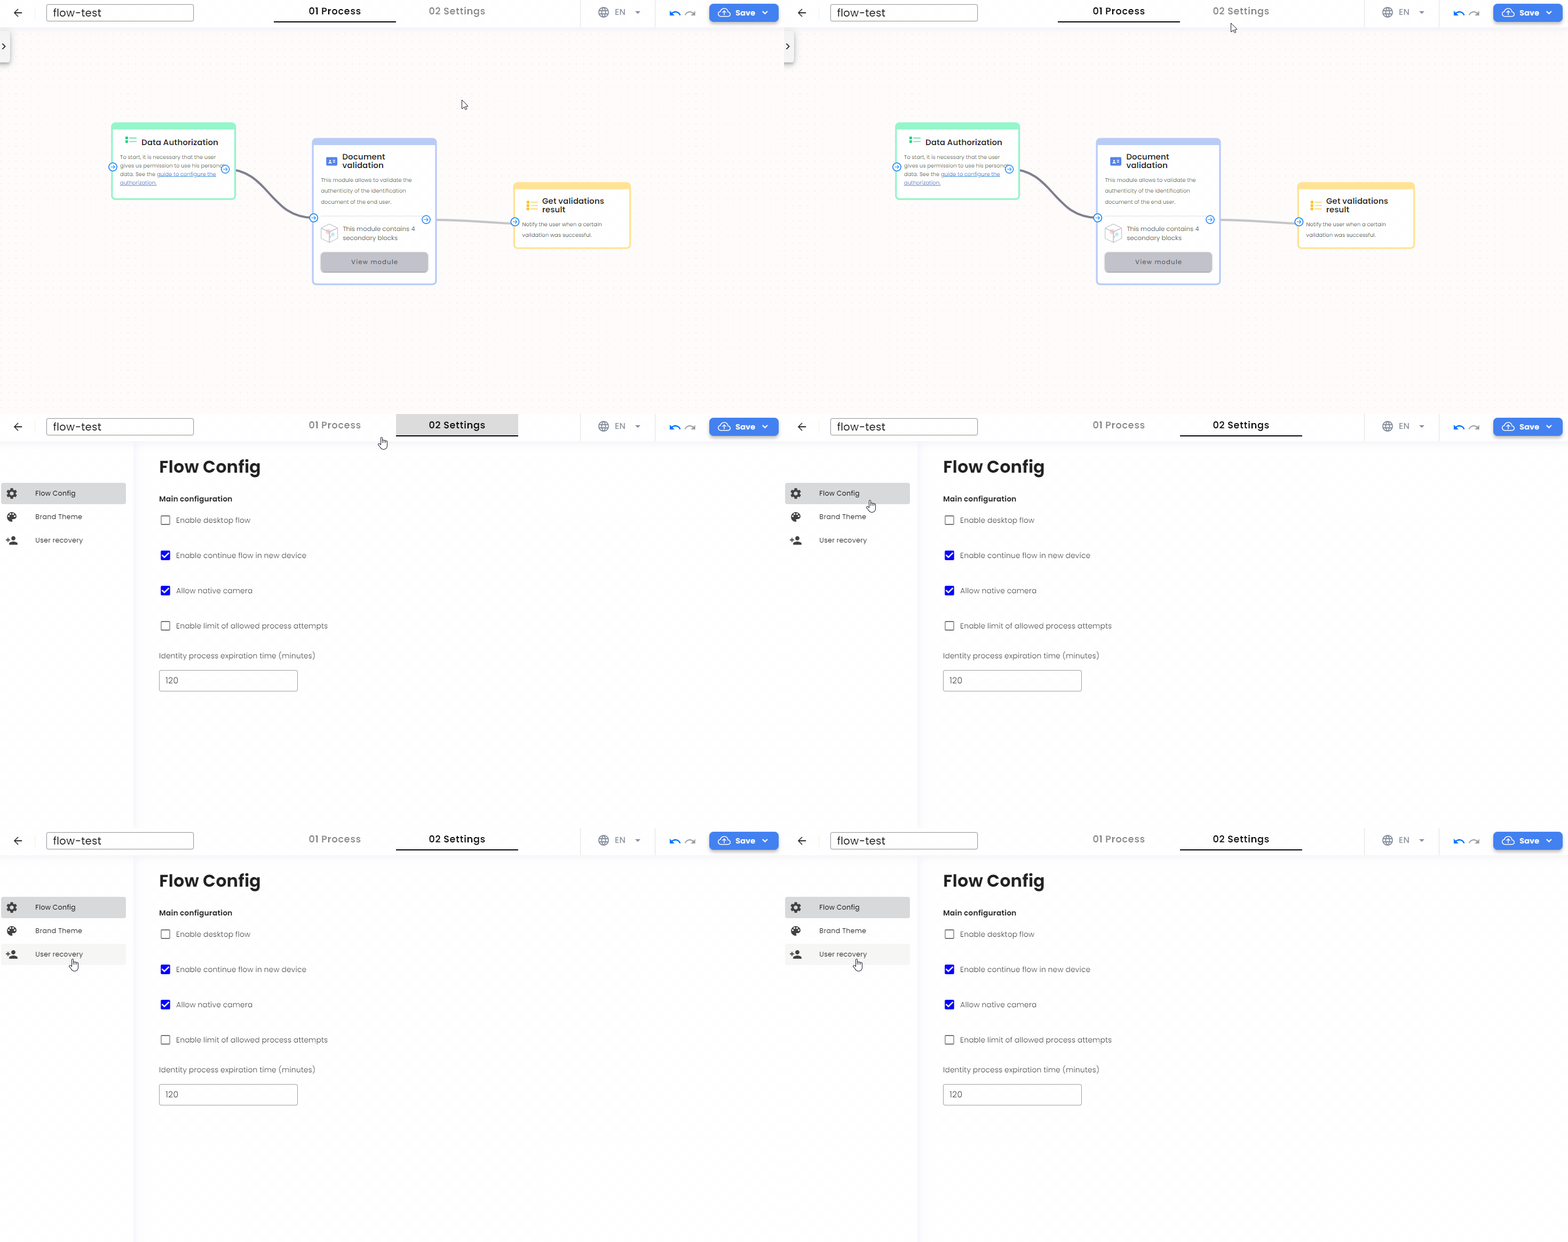
Flow config
Click the Flow Config button, to configure the flow’s behavior. You can enable the following options:
-
Enable desktop flow: Allows the user to continue the identity process on a desktop device.
-
Enable continue flow in new device: Allows the user to continue the identity process on a new device.
-
Allow native camera: Allows the use of the native camera (even if the user has disabled camera permissions, they will still be able to access the device’s native camera and return to the flow).
-
Enable limit of allowed process attempts: Limit the number of processes a user can perform. If you select this box, you can choose one of the following options:
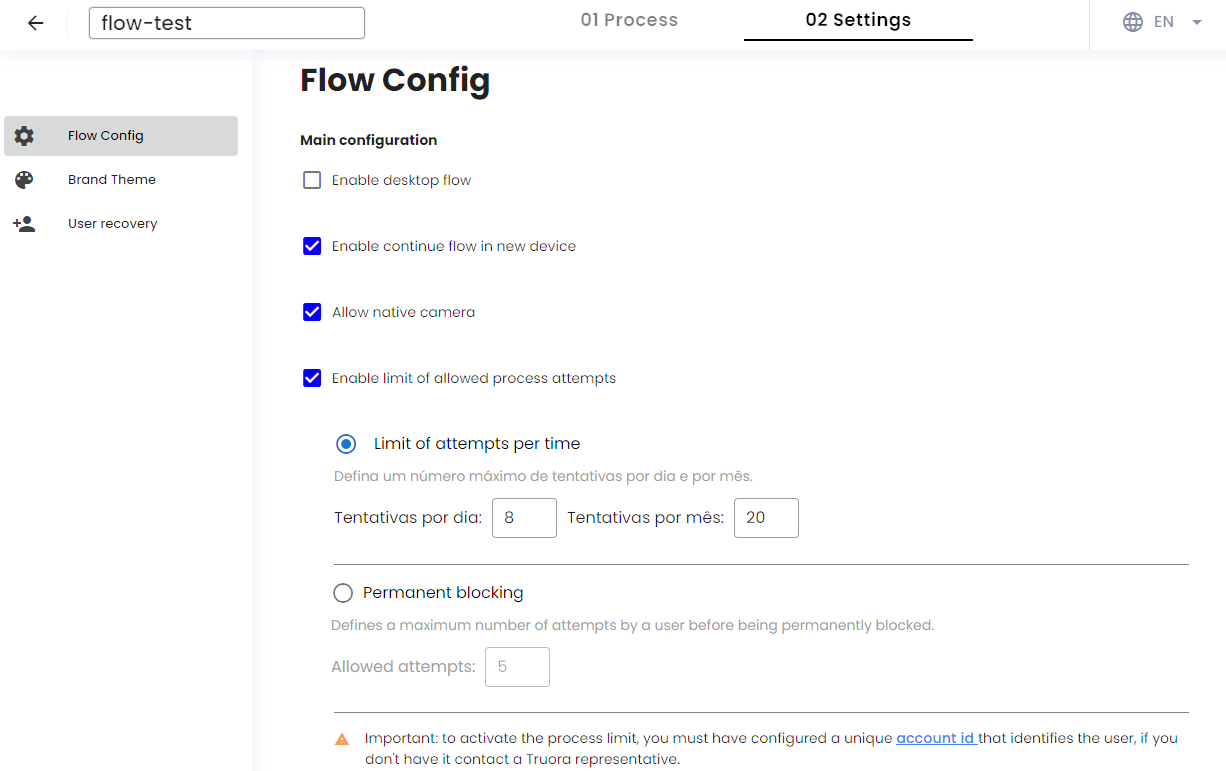
- Limit of attempts per time: You can set the amount of attempts a user can perform per day and per month.
- Permanent blocking: You can limit the amount of attempts a user can perform before being permanently blocked.
Remember you can enable only one of the two options. Once the limit you chose is reached, the user must wait until the next day or month to be able to perform a process again or in case Permanent block was selected, the person will need to contact to customer service.
To use this configuration remember that you must have configured a unique account id for each user.
Note: The maximum number of processes per day is 72 and per month is 2160.
-
Interface to perform the identity process(NEW - EXPERIMENTAL)
: Allows you to choose the interface for the user to perform the identity process.
- Default: The user will perform the identity process using the classic(default) user interface.
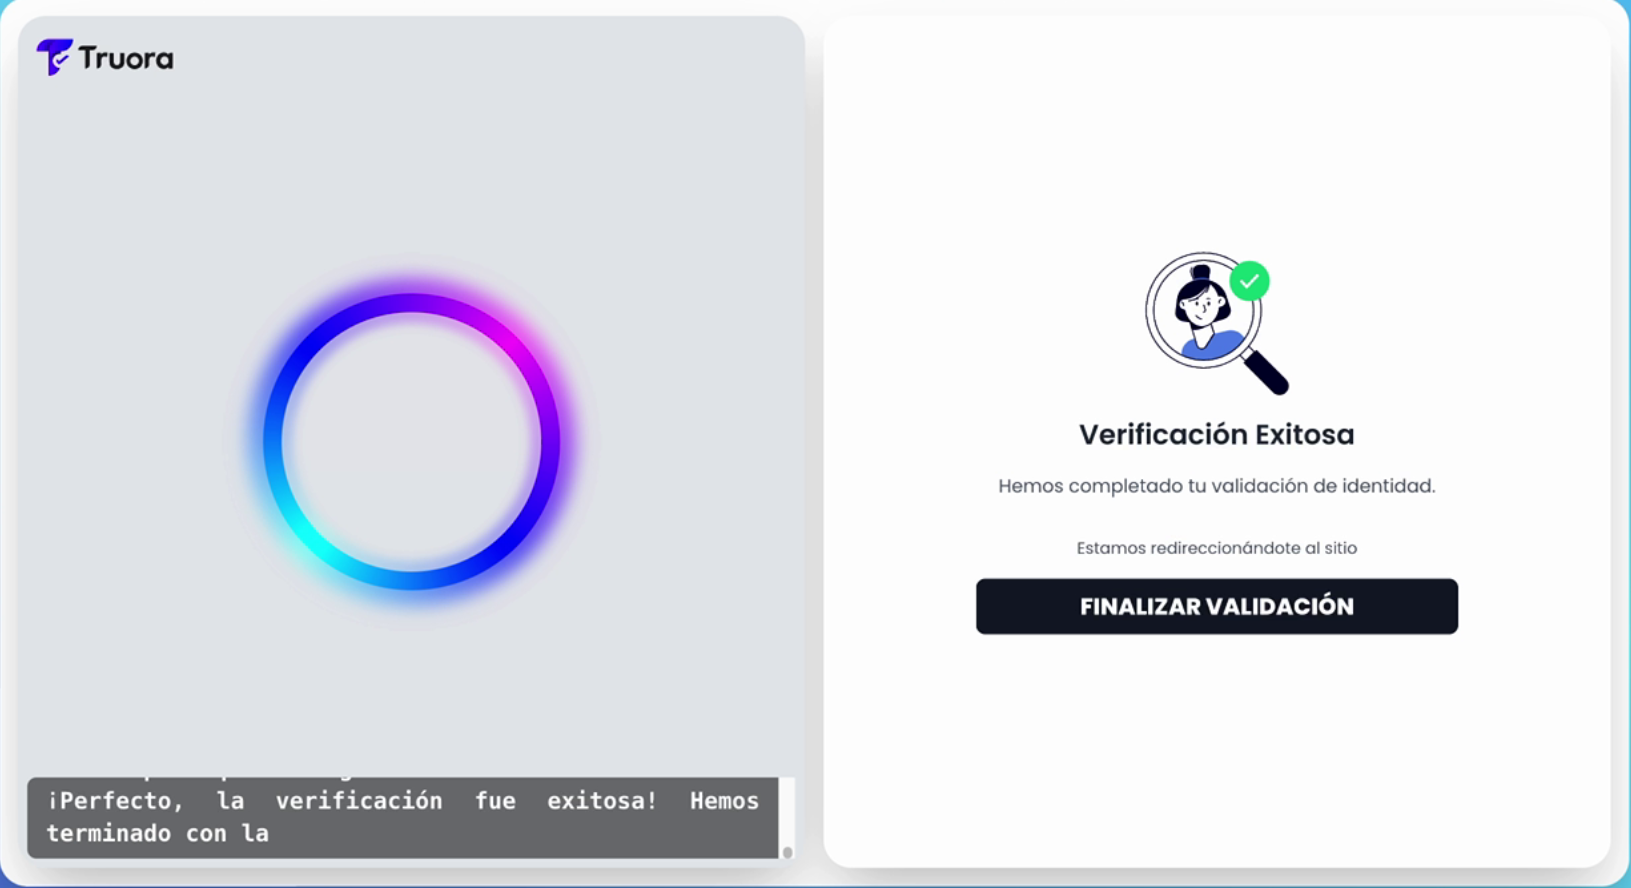
- Video Call Agent(NEW - EXPERIMENTAL): The user will perform the identity process using the brand new Video Call interface with an AI agent.
-
Realistic Avatar(This feature has an additional cost): The user will interact with an AI avatar.

-
Animated Circle: The user will interact with an AI animated circle.
-
AI Agent Type: It allows you to choose between Gemini and OpenAI.(OpenAI is the recommended option)
-
AI Agent Instructions: It allows you to add behaviour rules or instructions to the AI agent without getting out of the identity process scope. For example, you can tell the agent it is representing your company name.
-
-
Identity process expiration time: Set the expiration time of the identity process. The maximum expiration time you can set is 1440 minutes (24 hours). If you don’t set it, the default expiration time is set to 120 minutes (2 hours).

Brand theme
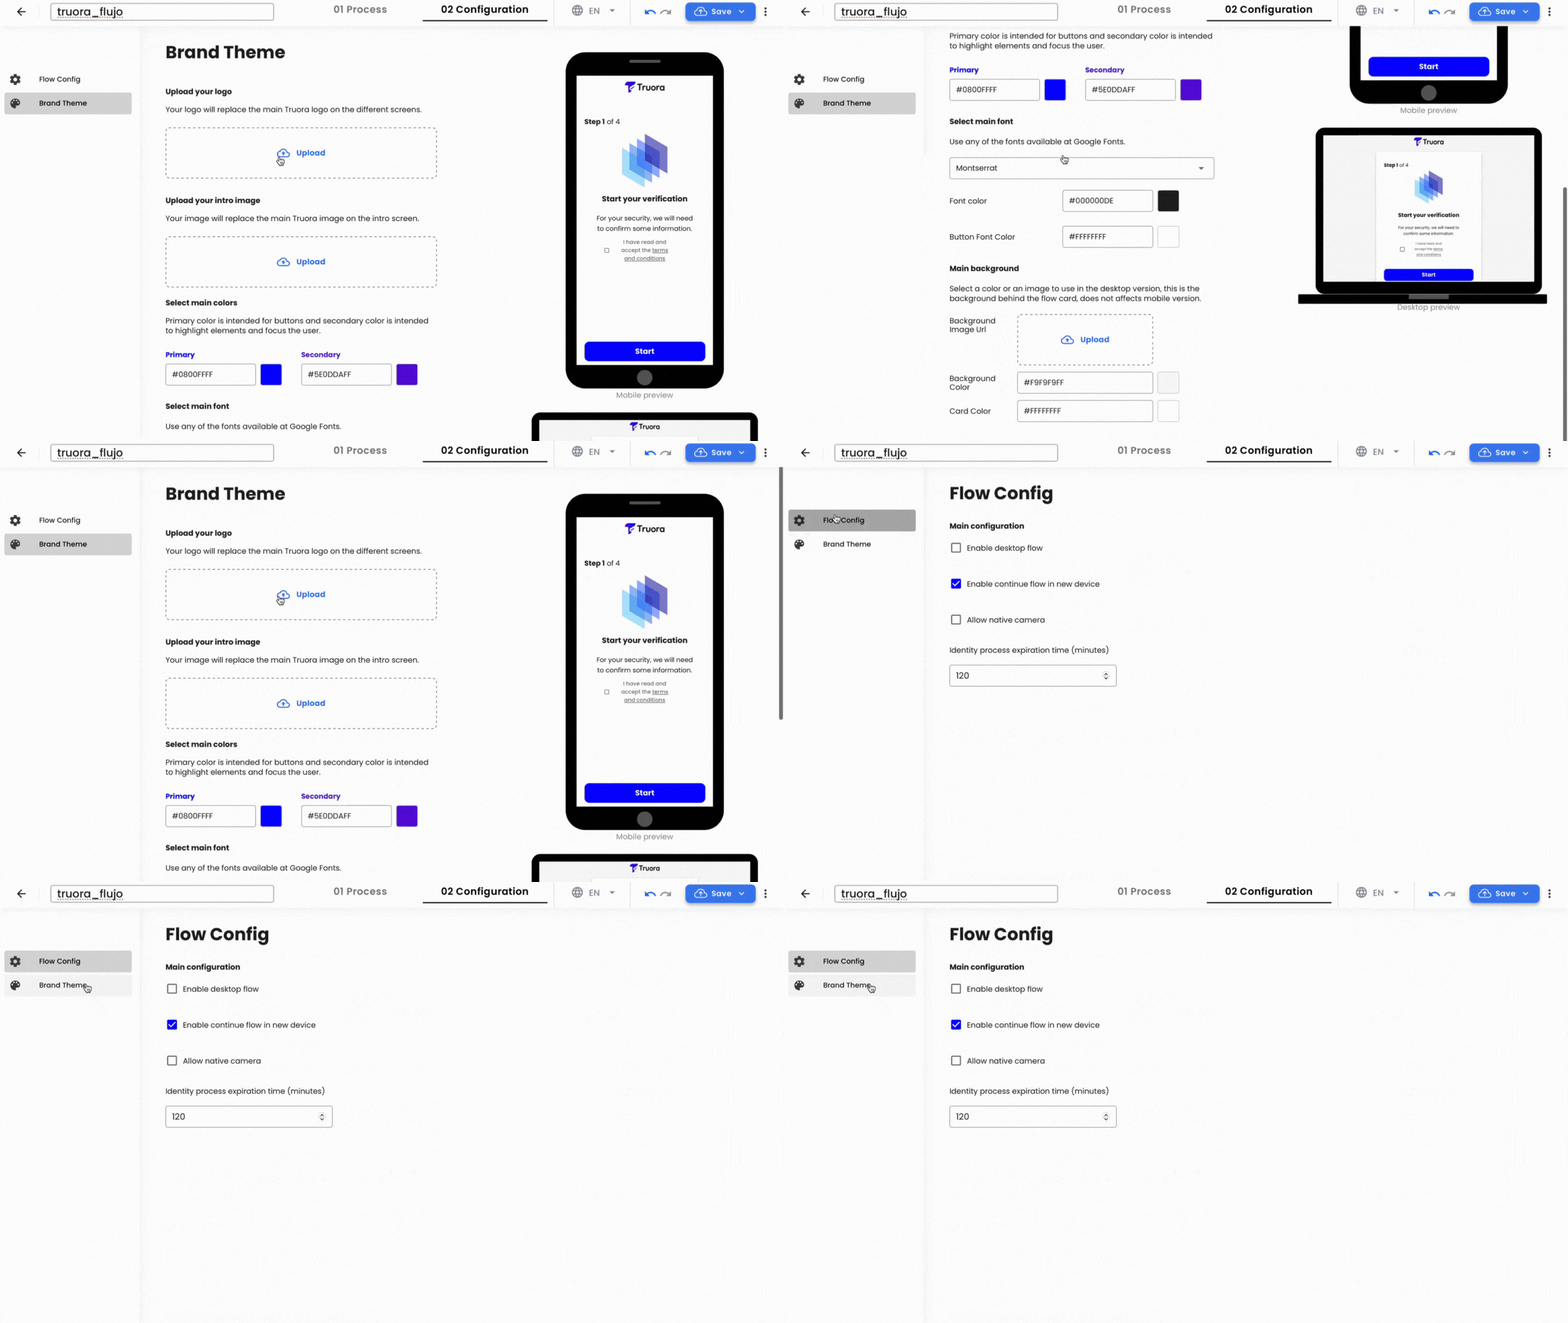
Click on Brand Theme to configure the appearance of your flow. With this feature, you can customize the following options:
Images
- Upload your logo: This is the logo displayed at the top.
- Upload your intro image: This is the image in the center of the screen.
Select colors
- Primary color: Used for buttons.
- Secondary color: Used for highlighting elements and focus.
Select main font
You can select your preferred font from Google Fonts and customize colors:
- Font color: The main font color on the screen.
- Button Font Color: The font color inside buttons.
Main Background
This will affect only the desktop view:
- Background Image: Allows you to place an image as a background (behind the main card).
- Background Color: The color covering the screen behind the main card.
- Card Color: The color used for the main card which shows the flow steps.
Note: To customize the theme of a flow, we accept images in PNG and JPG formats with a maximum size of 5 MB. It is essential that the images are clear and sharp. Additionally, high-resolution images are recommended to avoid pixelation and distortion in the display.
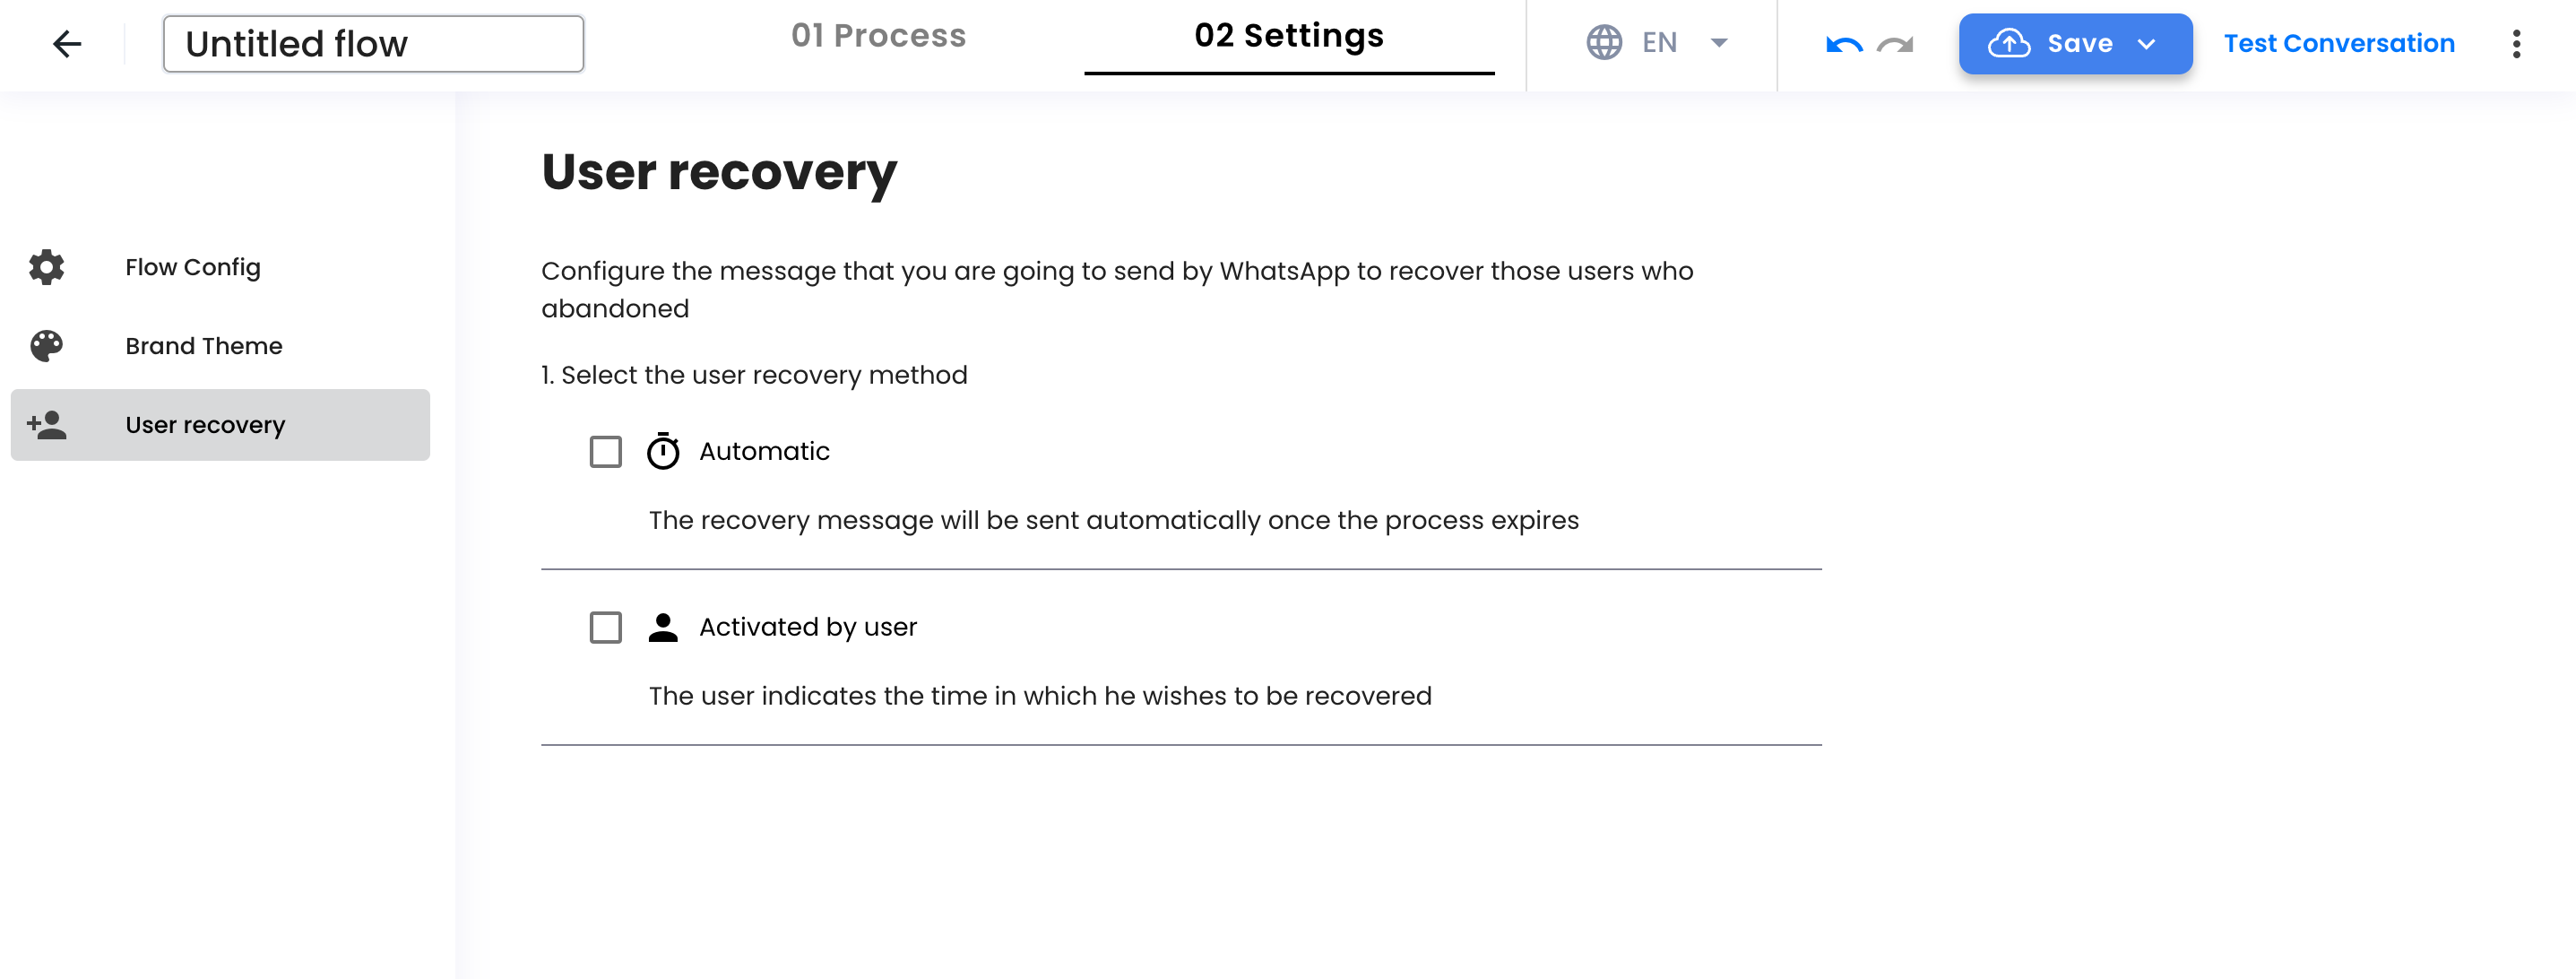
User recovery
Click the User Recovery button to configure the message that will be sent via WhatsApp to recover users who abandoned the process. For more information about configuring this feature, please refer to the guide Activate User Recovery.
Testing the flow template
Once you have configured the flow, you can start testing the flow.
Flow config via API (Advanced)
Flow configuration via API requires good understanding of APIs and authentication schemes. We strongly recommend having a developer or a tech-savvy individual assist with this process.
Be aware that any unintended changes made during this process can alter or disrupt the functionality of your Web Flow. Proceed with caution and ensure you understand each step before making modifications.
In this section we will show you the basic endpoints you need to know along with a simple example to understand how to Update a flow configuration. For this example we created a simple flow following the Create Flow guide, including a Face Validation block (Face match).
In the next steps we will:
- Get Flow: Retrieve all the information of your flow in a JSON file using this request.
- Identify Parameters: Identify which parameters need to be deleted, added, or modified.
- Update Flow: After identifying the necessary changes, update the JSON file accordingly and make the Update Flow request to successfully update your flow.
Prerequisites
Before you begin, make sure you have the following:
-
Truora API-Key: This key grants access to our services. If you don’t have one already go to Create Truora API-Key to obtain your Truora API-key.
-
Web Flow ID: You should already have created a flow. Extract your Web Flow ID from My Flows in our dashboard.
-
Postman: Use Postman or any other collaboration tool for API development. Although it is not required to perform the integration, it will help perform tests along the way.
Get Flow
The Get Flow endpoint enables you to search for an identity process flow. In the response, the general config section will display the default parameters and those set during the flow creation. This section, located at the top of the response, will help you identify which parameters need to be added or modified.
Setup main Request Headers
To configure the main request headers follow these steps:
- Create a
GETrequest to the endpointhttps://api.identity.truora.com/v1/flows/{{web_flow_id}}using theweb_flow_idfrom step 2 in Prerequisites section. - Set the Headers
Truora-API-Key: enter the value of your Truora API-Key from step 1 in Prerequisites section.
Send Get Flow request
Send the Get Flow request you just created. You will receive a response similar to the following:
v1/flows/{{web_flow_id}}
As you can see, the response includes a general “config” section with all the parameters that were set. This section, located at the top of the response, helps you identify which parameters you will need to add or modify in your flow.
Important: We highly recommend copying the whole body of the JSON response you received from the GET Flow request and saving it before making any changes. Then, proceed to modify only the necessary values to use in the next steps. This helps ensure that you’re modifying the correct parameters and minimizing the risk of errors.
Update Flow
The Update Flow endpoint enables you to update identity process flow parameters. To identify which parameters you can add, modify, or delete, first check the response you received from the GET Flow request. Then, visit the Flow Config Parameters section for details on the desired parameters, including their descriptions and data types.
For this particular example we will make the following changes:
enable_desktop_flow: change fromtruetofalse.time_to_live: change from120minutes to180minutes.force_native_camera: add this parameter set totrue.follow_up_message: change from: “Tienes un proceso activo en curso” to: “You have an active process in progress”
Extracting only the config portion, with the modifications, it should look like this now:
Remember: The entire JSON response you received from the GET Flow request must be sent in the Update Flow request. Only modify, delete, or add the necessary values for your flow.
Setup main Request Headers and Body
To configure the main request headers and body, follow these steps:
- Create a
POSTrequest to the endpointhttps://api.identity.truora.com/v1/flows/{{web_flow_id}}using the sameweb_flow_idfrom the previous step. - Set the Headers
Truora-API-Key: enter the value of your Truora API-Key from step 1 in Prerequisites section.Content-Type: the value should beapplication/json(rawJSON in Postman).
- Configure the Body of the Request:
- If using Postman, set the body type to
rawand select JSON from the format dropdown. - Include the entire JSON you received in the GET Flow request.
- Apply your specific modifications within this JSON, such as adding new parameters, modifying existing ones, or deleting certain parameters.
- If using Postman, set the body type to
It is crucial to double-check that the
web_flow_idyou include in the endpoint matches theflow_idvalue specified as the first parameter in the JSON Body of the request. If they do not match, the modifications could be applied to the wrong flow, potentially disrupting its operation. Ensure this verification step is performed before sending the request.
Send Update Flow request
Send the Update Flow request you just created. You will receive a response similar to the following, with a new version of your flow:
v1/flows/{{web_flow_id}}
Notice that all the changes have been applied, and additionally, the fields version, update_date and version_start_date have been updated.
Fields that we set to true, like force_native_camera will now be visible in the “config” list, while those we set to false, like enable_desktop_flow, will no longer be visible in the “config” list.
After this, the flow will be updated with the changes specified in the JSON Body, and you should be able to test the flow again.
Flow Config Parameters
Below is a detailed description of the configuration parameters for the flow. Click on each parameter to expand its description and data type, allowing for a comprehensive understanding of its purpose and usage.
If you have any questions or doubts about the functionality or setting of the parameters, please contact Support.
-
Type: boolean
Description: Allow the user to use the device's native camera for the process.
-
Type: boolean
Description: Indicates whether users who are redirected to a different device to finish the digital identity validation must return to the initial device. false by default.
-
Type: string
Description: Interface to perform the identity process.
Enum: default, video_call_agent
-
Type: string
Description: Model provider for the video call agent.
Enum: openai, gemini
-
Type: string
Description: Type of the video call agent.
Enum: animated_circle_avatar, realistic_avatar
-
Type: string
Description: Instructions for the video call agent.
-
Type: boolean
Description: Indicates whether Automatic User Recovery is enabled. This feature sends an automatic WhatsApp notification to prompt the user to resume the process if they abandon it before completion.
-
Type: boolean
Description: Indicates whether User Recovery Activated by User is enabled, allowing users to postpone a verification process to a specific time.
-
Type: boolean
Description: Indicates whether the flow is enabled for desktop. false by default.
-
Type: boolean
Description: Indicates whether the re-engagement feature is to be used. Whatsapp integrations only.
-
Type: string
Format: date-time
Description: End of the range of business time in UTC. Whatsapp integrations only.
-
Type: string
Description: ID of the failure outbound message. Used when manual review is active and user recovery is enabled.
-
Type: boolean
Description: Force the use of native camera.
-
Type: integer
Description: Delay in minutes for the re-engagement feature. Whatsapp integrations only.
-
Type: string
Description: Re-engagement message. Whatsapp integrations only.
-
Type: boolean
Description: Ignore the initial default message when starting a whatsapp conversation.
-
Type: string
Description: Language of the flow interface for the user.
Enum: en, es, pt
-
Type: object
Description: Describes the messages that will be sent when the identity process changes to a final status or when all the identity verifications were submitted and the user is waiting for a final status.
-
Type: string
Description: The message that will be sent when the identity process fails.
-
Type: string
Description: The message that will be sent while the identity process is pending.
-
Type: string
Description: The message that will be sent when the identity process succeeds.
-
-
Type: object
Description: URLs where the user is to be redirected according to the outcome of the digital identity validation.
-
Type: string
Description: URL where the user is to be redirected when the digital identity validation fails.
-
Type: string
Description: URL where the user is to be redirected when the digital identity validation is pending.
-
Type: string
Description: URL where the user is to be redirected when the digital identity validation succeeds.
-
-
Type: string
Format: date-time
Description: Start of the range of business time in UTC. Whatsapp integrations only.
-
Type: string
Description: ID of the success outbound message. Used when manual review is active and user recovery is enabled.
-
Type: integer
Format: int64
Description: Represents the expiration time of the identity process in minutes. 120 by default, 1440 minutes (24 hours) max.
-
Type: boolean
Description: Enable feature to limit the allowed process attempts. If true, enables the limit_create_processes object.
-
Type: object
Description: Limit the number of processes a user can perform.
-
Type: integer
Description: The amount of attempts a user can perform per day. The maximum number of processes per day is 72.
-
Type: integer
Description: The amount of attempts a user can perform per month. The maximum number of processes per month is 2160.
-
Type: integer
Description: Defines the maximum number of attempts by user before being permanently blocked.
-
-
Type: object
Description: Config for recovery process.
-
Type: string
Description: ID of the identity flow.
-
Type: string
Description: Outbound message ID.
-
Type: string
Description: Company name.
-
