Digital Identity Verification Flow
Truora’s Digital Identity Verification is a tool to automate and simplify your users identity verification. It allows you to be sure that they are who they claim to be in the most efficient way.
In this guide you will find the steps you must follow to create a Digital Identity flow through our dashboard.
Note: This version of the dashboard is new and not yet enabled for all customers, if you have a different version please refer to Create a Web flow in 5 minutes or less guide.
Create Digital Identity flow
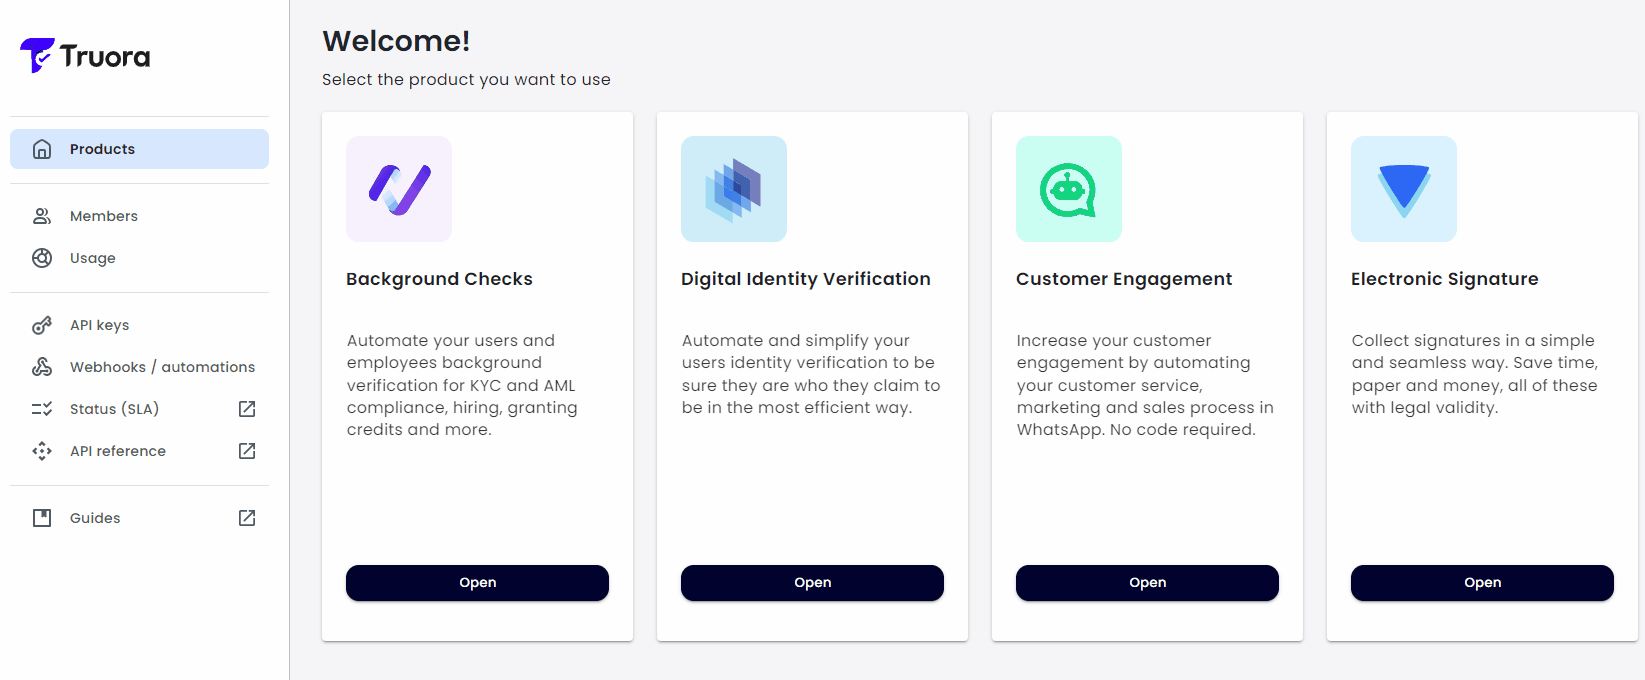
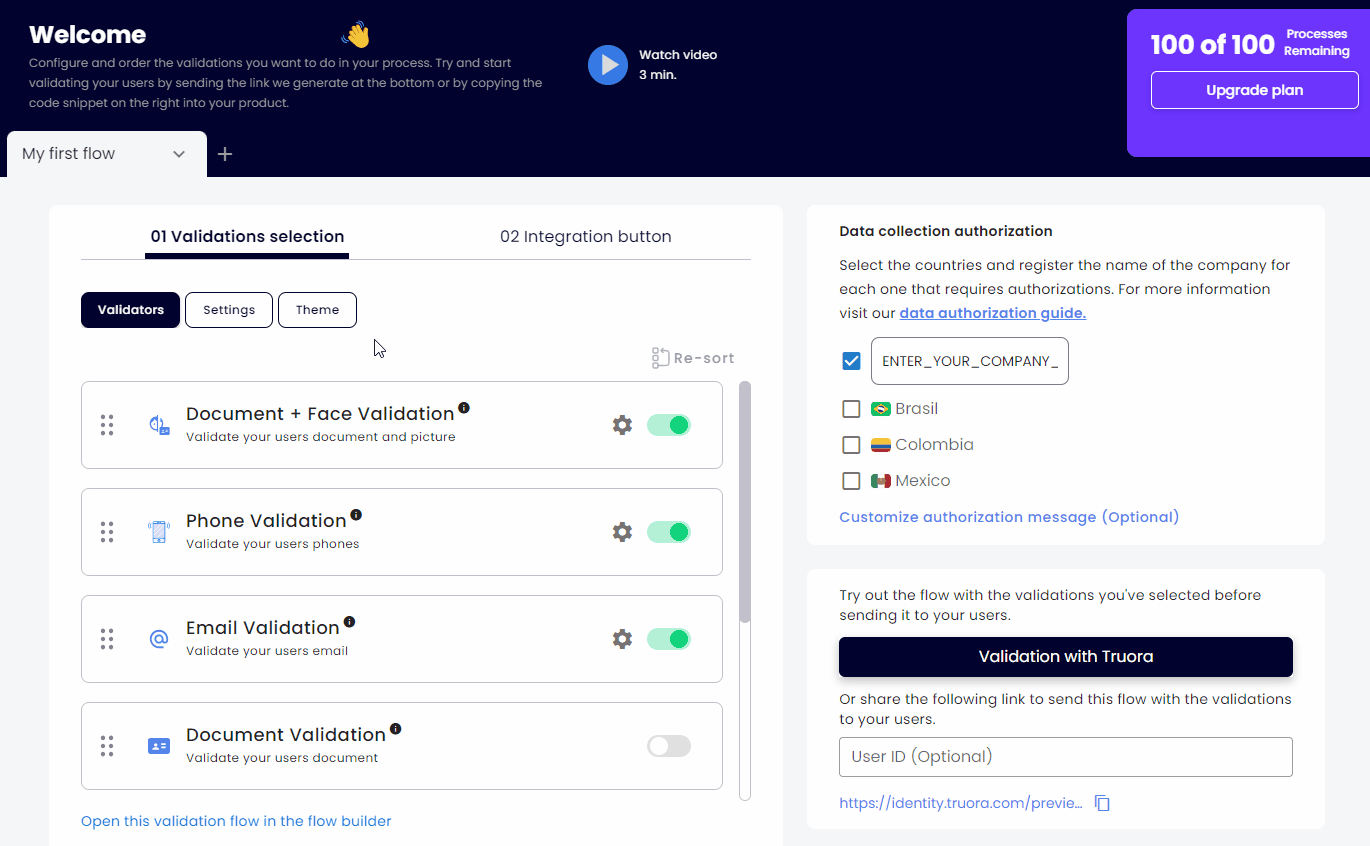
- Once logged into Truora’s platform, in the Products view, select Open on Digital Identity Verification product. This will redirect you to the Digital Identity Dashboard:
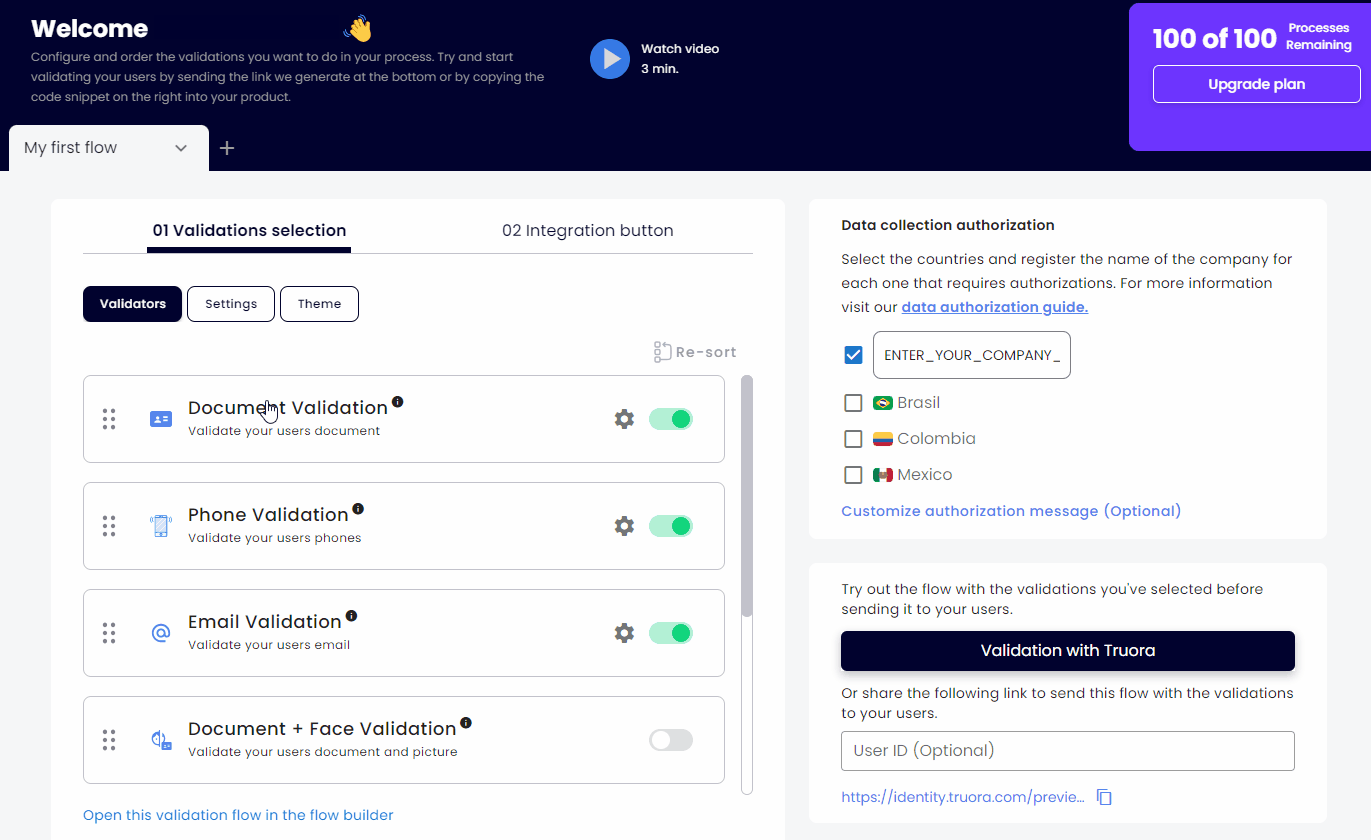
- In the Digital Identity Dashboard, you can find the validations that are available for your process. There you can:
-
Turn validations on and off, depending on your use case or needs:

-
Change the order in which you want to perform the user validations:

Process configuration
Allows you to configure the behavior of the Process. You can enable the following options:
- Continue the identity process on a desktop device.
- Continue the identity process on a new device.
- Allow the use of the native camera.
- Note:
- The user will be able to access the photos and videos stored in the device from which the validation process is being performed.
- Even if the user has disabled camera permissions, they will still be able to access the device’s native camera and return to the flow.
- Note:
- Set the expiration time of the identity process by clicking on Settings. The maximum expiration time you can set is 1440 minutes (24 hours). If you don’t set it, the default expiration time is 120 minutes (2 hours).
Validation configuration
Allows you to configure the behavior of each validation. You can enable the following options:
-
Document Validation
- Allowed retries: This setting determines the number of times a user can retry Document Validation, with a maximum value of 3 retries.
- Allowed document types: You can allow all countries and document types, or you can select the countries and document types that best fit your use case or needs.

-
Document + Face Validation
-
Percentage of similarity: This determines the required similarity, ranging from 0 to 1, between the provided picture and the selfie to pass the validation. By default, the threshold is set to 0.65.
- Note: A higher value may increase friction with the end-user, resulting in decreased customer conversion, while a lower value might increase conversion but reduce the rigor of the validation.
-
Allowed retries: This setting determines the number of times a user can retry a validation.
- Document Validation: With a maximum value of 3 retries. For more information about tips for capturing a good quality document picture, please refer to Tips for document pictures guide.
- Face Validation: Only enabled for video selfie, with a value of 2 retries by default and not configurable.
-
Allowed document types: You can allow all countries and document type, or you can select the countries and document types that best fit your use case or needs.
-
-
Email Validation
- Allowed retries: This setting determines the number of times a user can retry Email Validation, with a maximum value of 3 retries.

- Allowed retries: This setting determines the number of times a user can retry Email Validation, with a maximum value of 3 retries.
-
Phone Validation
- Allowed retries: This setting determines the number of times a user can retry Phone Validation, with a maximum value of 3 retries.

- Allowed retries: This setting determines the number of times a user can retry Phone Validation, with a maximum value of 3 retries.
-
Additional Configurations
Using our API you can configure other parameters to improve the behavior of the validators and the user experience according to your particular needs. Please see the Config Validator Guide for more information on customization.
Please Note:
- The config parameters you will see in the Config Validator Guide are global parameters for your account and will affect all the validations across your account.
- However, validations performed using the flow you created will prioritize the configuration in the Validator Block of your flow. All other parameters, not configurable within the Flow Builder, will take the global configuration values.
Test And Share Digital Identity flow
-
Test - At the dashboard bottom you will find a button that will allow you to test the flow:
-
Share - You have two options to share the flow with your users:
- Button: Click on 02 Integration button, where the Dashboard provides the code for a button that you can add to your website. You can customize the text and color of your button as well:
- Link: The dashboard provides you with a link that you can copy and share:

- Button: Click on 02 Integration button, where the Dashboard provides the code for a button that you can add to your website. You can customize the text and color of your button as well:
Get Process Result
- You can get the process results with a query to the Truora’s API or from the dashboard. For more information, please see Guide to Get Results.
- To get process result automatically, you must subscribe webhooks. For more information, please visit the Webhooks guide.