


Test your flow logic with Logic Test
Logic Test lets you validate the logic of your flow at any point, after making changes, or on an already published flow. From the flowbuilder you can simulate a real execution: configure the expected inputs of each block, run the test, watch the execution path block by block (including which branch a conditional takes), and inspect the outputs of each executed block.
This is different from testing the visual experience as a user would see it. For that, use the client view option. Use Logic Test when you want to validate rules, conditionals, integrations, and data transformations.
Access Logic Test
- Open your flow in the flowbuilder.
- In the top header, click the Test button.
- Select Logic test (use Client view only if you want to preview the flow as an end user would see it).
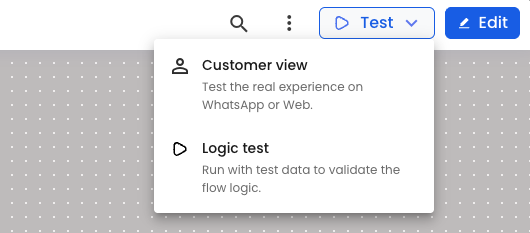
- A new test view opens showing the same flow structure. This view is dedicated to execution and debugging — you will not edit the flow design here, only test it.
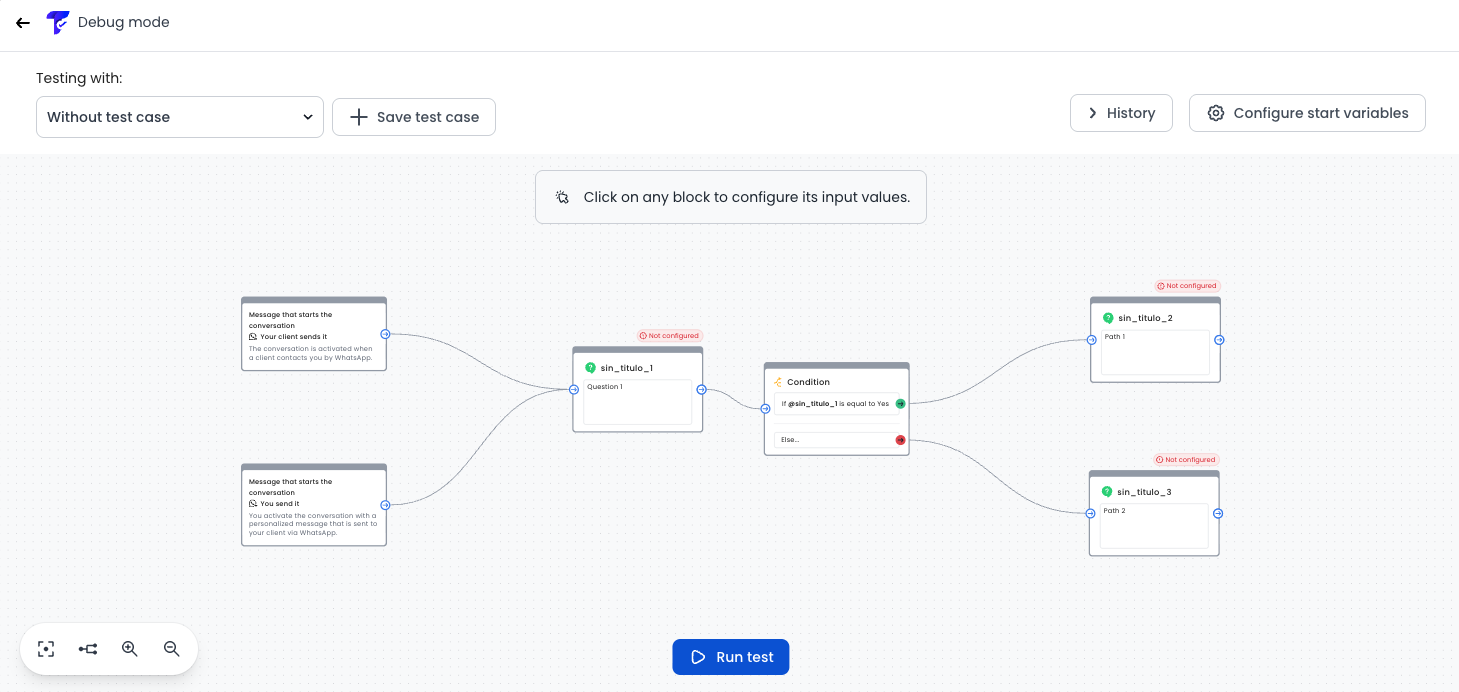
Configure expected inputs per block
Each block in your flow may require inputs to execute (for example: text typed by a user, a selected option, an uploaded file, document images, etc.).
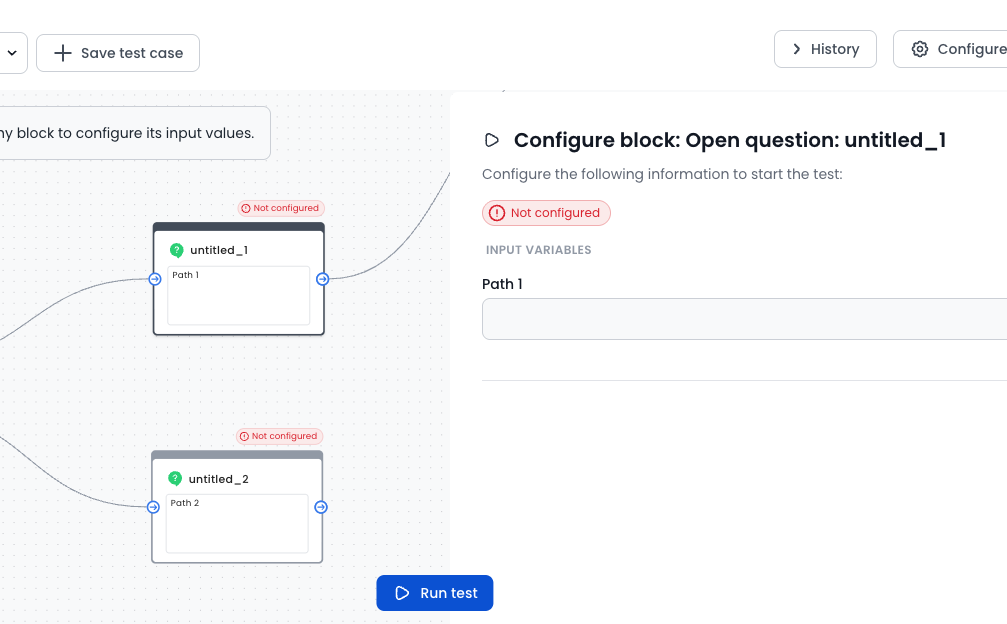
- Click on any block in the flow diagram.
- A sidebar opens where you can enter the expected inputs for that block.
- The input fields adapt to the block type:
- Text inputs: type a value directly (names, emails, document numbers, etc.).
- File inputs: upload a test file (document photo, selfie, PDF, etc.).
- Other inputs: options, dates, booleans, or structured data depending on the block configuration.
- Repeat for each block you want to pre-fill. You can fill all blocks, or only some of them — if a block has no configured value when execution reaches it, the execution pauses and asks you to enter the value manually before continuing.
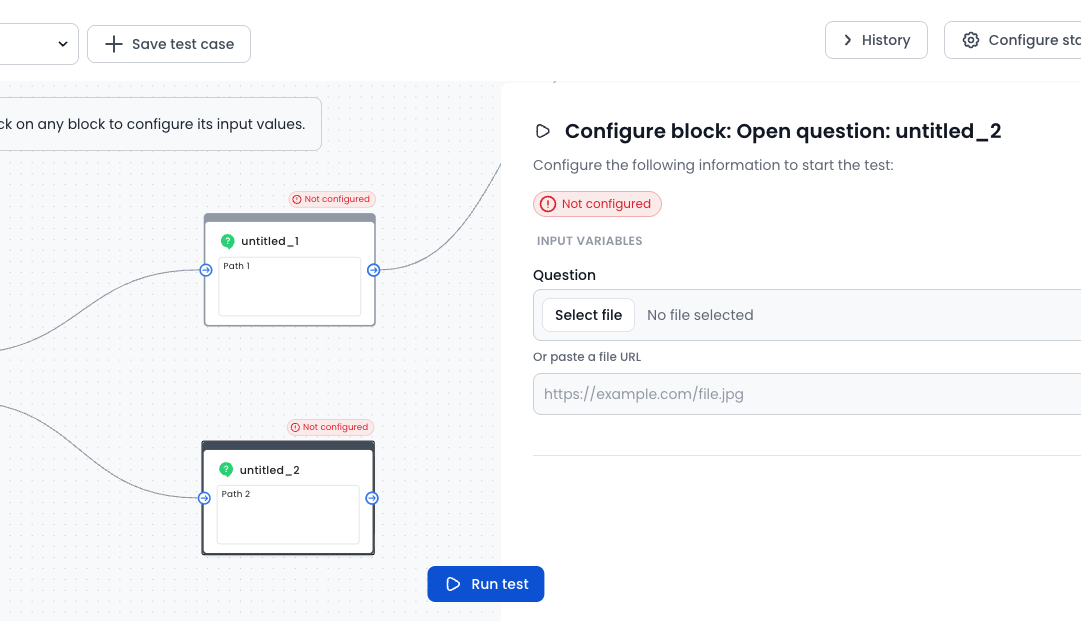
Tip: Use realistic data. If your flow validates documents or faces, upload valid test files so conditionals evaluate the way they would in production.
Configure start variables
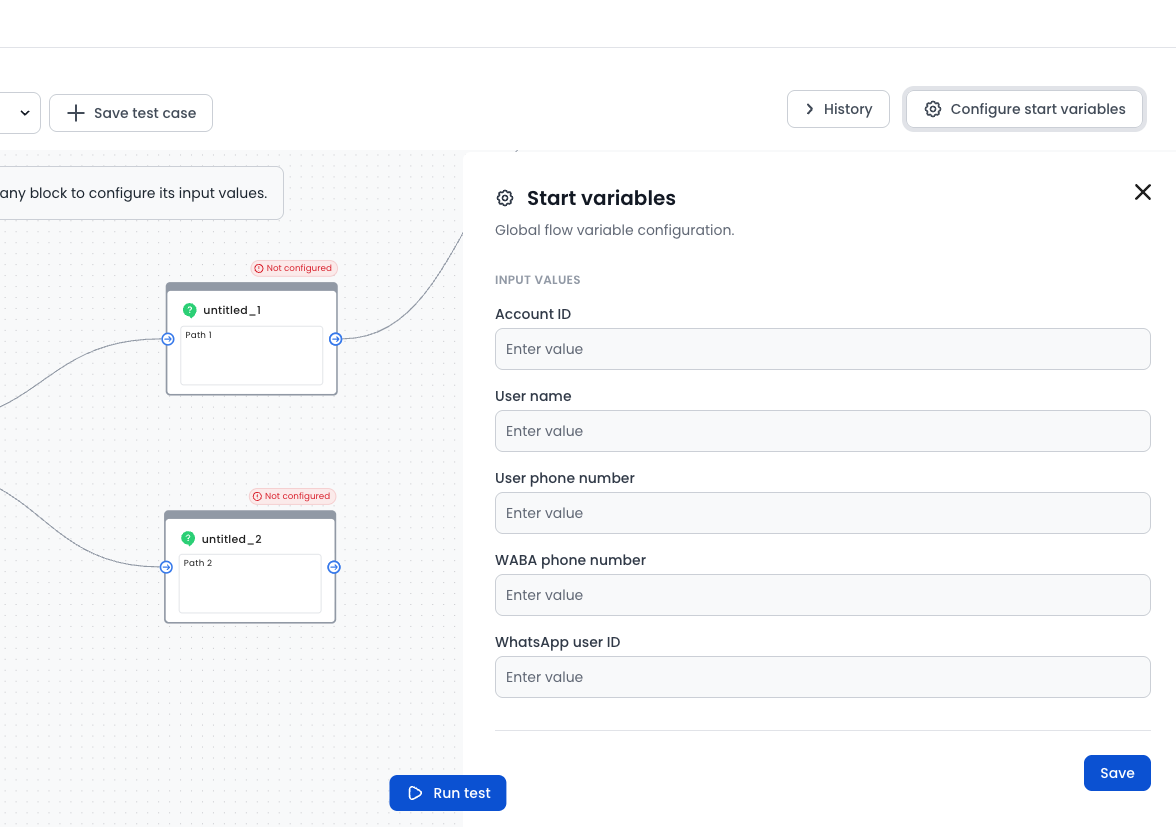
Some flows use start variables — process-level variables available from the beginning of the execution (for example: account ID, external IDs, locale, campaign parameters, or values injected via API).
- In the Logic Test header, click Configure start variables (or the variables/settings icon).
- Add or edit the key-value pairs for this execution.
- These variables are also saved as part of the test case (see below), so you can reuse different starting contexts.
Run, stop, and reset execution
Once your inputs are ready:
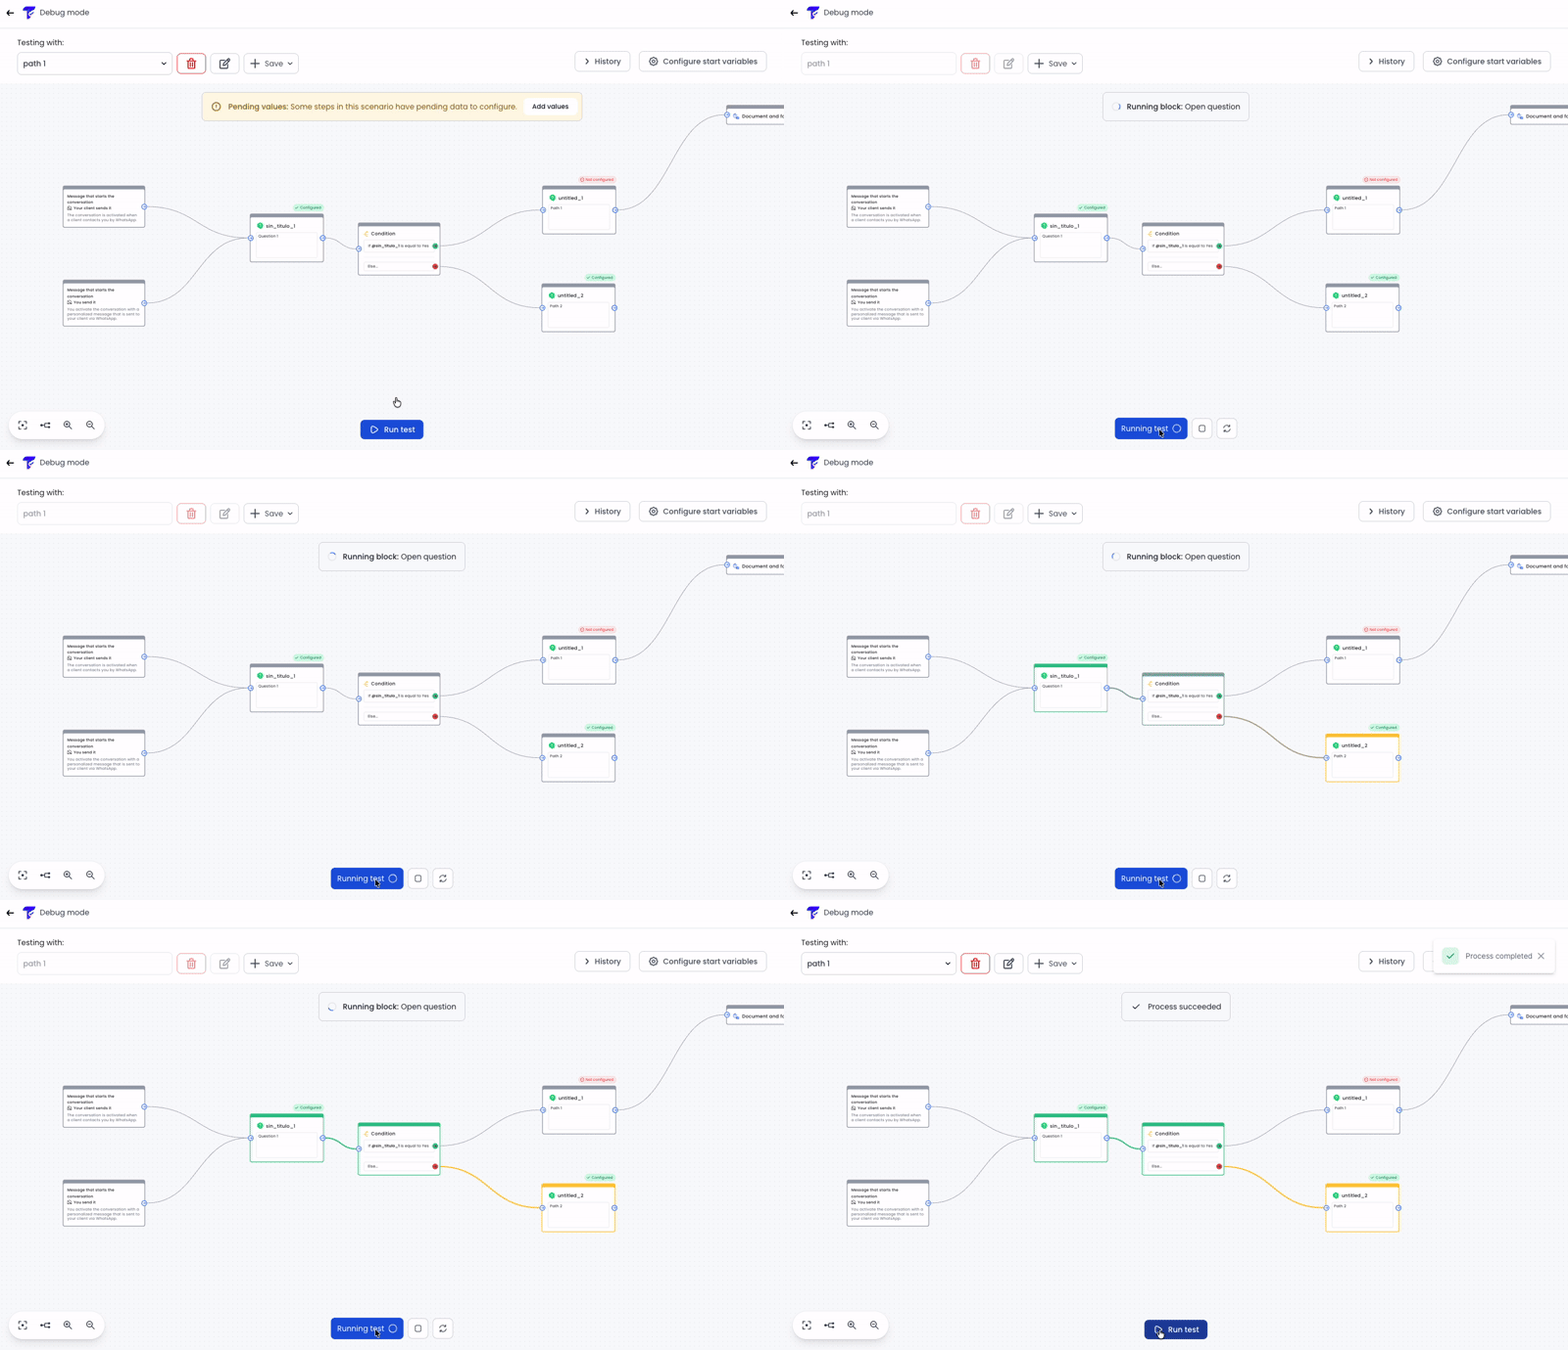
- Click Run test in the floating action bar at the bottom of the screen.
- The engine starts processing the flow from the start block:
- Each block is painted/highlighted as it executes, so you can follow progress in real time.
- When execution reaches a conditional, only the branch that is taken is painted, making it clear which path the logic followed.
- If execution reaches a block with no pre-configured input, it pauses and prompts you to enter the missing value before continuing.
- Use the floating controls at the bottom to Stop the execution at any time, or Reset it to run again from the beginning.
Inspect block outputs
When a block finishes executing:
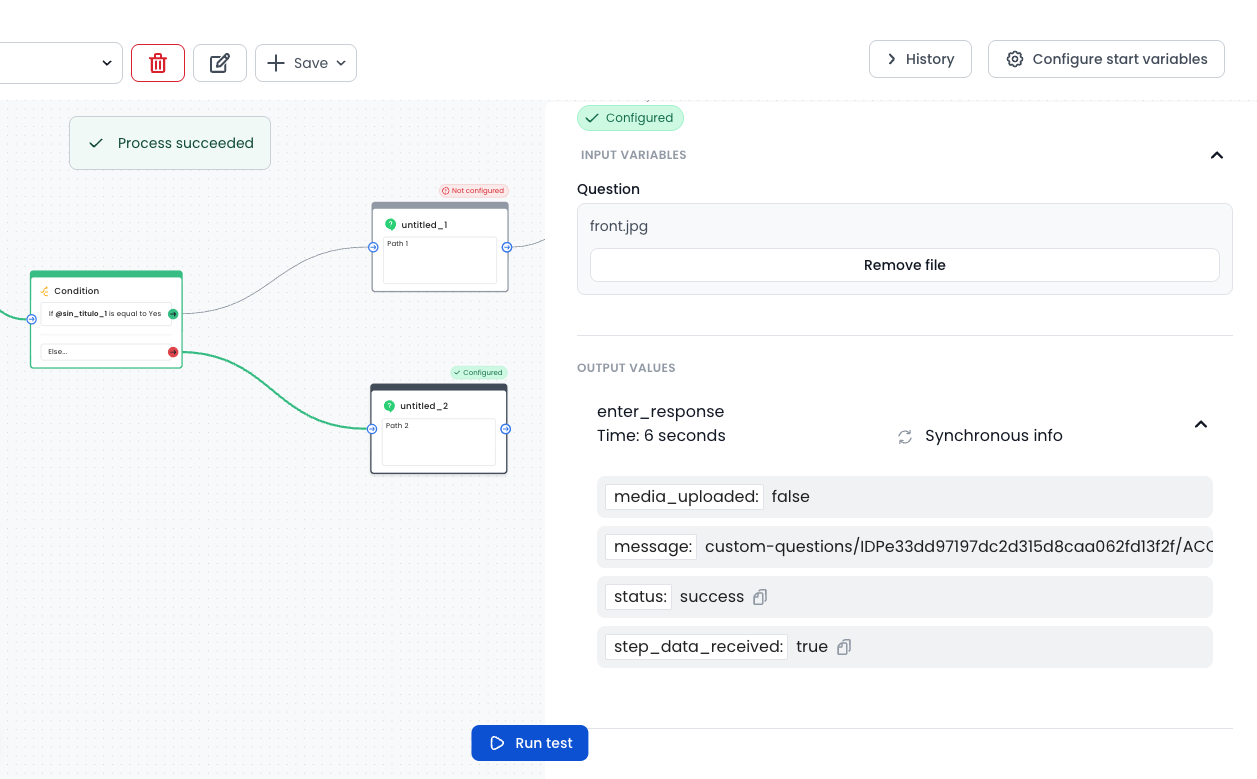
- Click on the executed block.
- In the sidebar you will see both the inputs used and the outputs produced by that block (validation results, transformed data, integration responses, etc.).
- Use this to verify that each step returns what the next step expects. If a conditional went the wrong way, check the outputs of the previous block — the value that drove the decision will be there.
Save and reuse test cases
If you test the same flow repeatedly, you do not need to retype inputs every time. Save them as a test case.
A test case stores:
- The expected inputs of all blocks you configured.
- The start variables configured for that execution.
Create a test case
- Configure block inputs and start variables as described above.
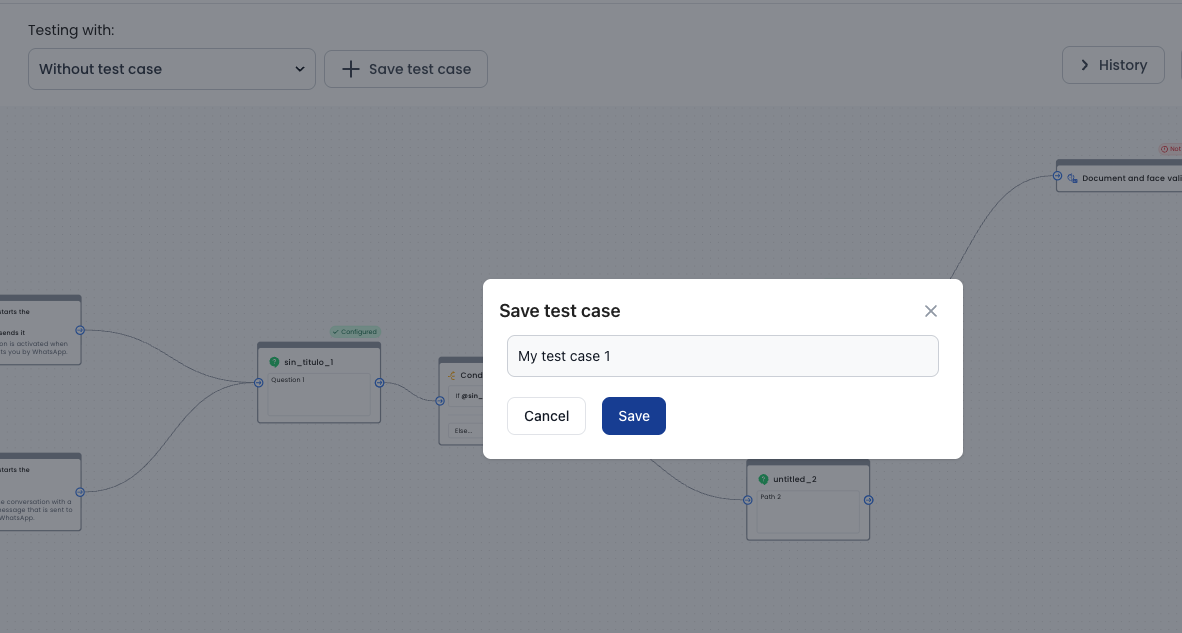
- In the header, click Save (or Save test case).
- Give the test case a descriptive name (for example:
Happy path - valid ID,Conditional rejects minor). - The test case is saved and becomes available in the header selector.
Switch between test cases
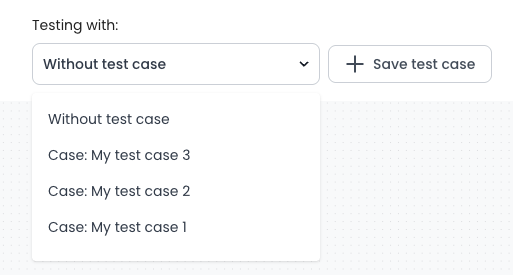
- In the header, open the test case selector dropdown.
- Choose any saved test case. Its inputs and start variables are loaded into the blocks automatically.
- Click Run test in the floating action bar at the bottom to execute with that data set.
Update a test case
- Select the test case you want to modify.
- Click into any block and change its inputs, or update the start variables.
- Click Save again to overwrite/update the selected test case with the new values.
Rename or delete a test case
- To rename: select the test case, use the rename/edit option next to the selector (or in the save menu), enter the new name, and confirm.
- To delete: select the test case and use the delete option. Confirm the deletion. This only removes the saved inputs — it does not modify the flow.

Review execution history
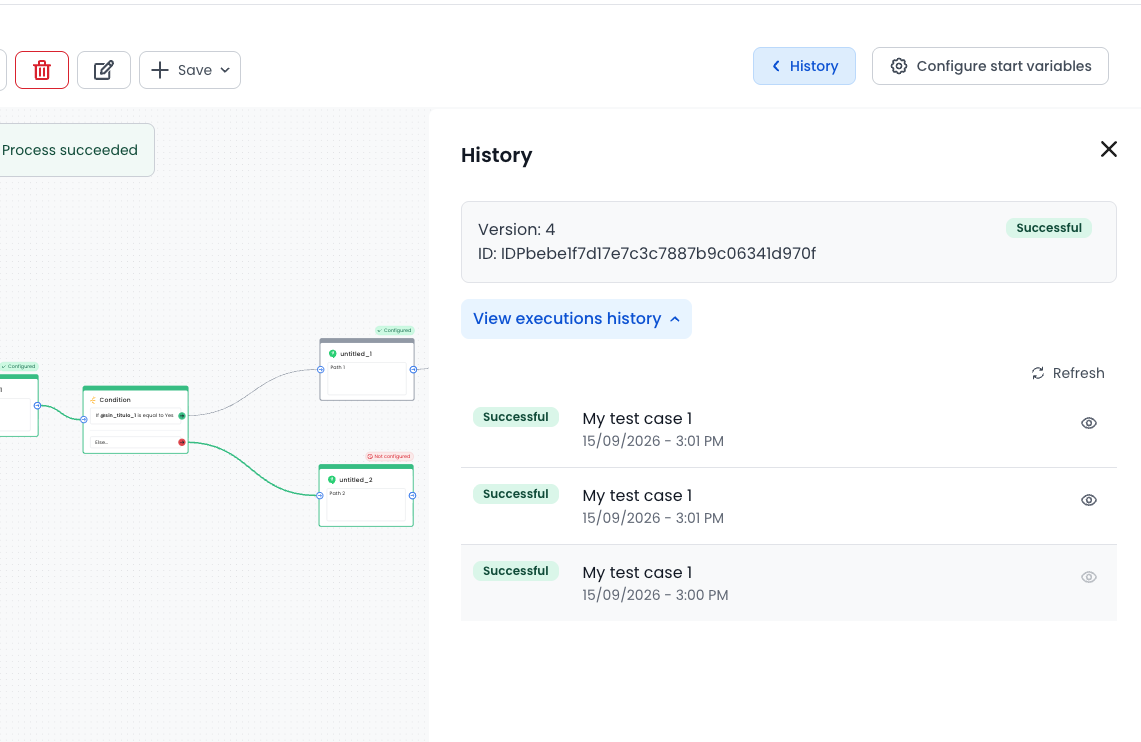
In the Logic Test header, click History to review past test executions.
For each test case, the history lists its executions with their status:
- Success: the execution completed the flow.
- Failure: the execution stopped due to an error in one of the blocks.
- In progress: the execution is still running or paused waiting for a manual input.
Select any execution from the list to see its details, including the inputs used and the outputs produced by each block. This is useful to compare runs of the same test case over time, or to share evidence of a failure with your team.
Recommended workflow
- Design your flow in the flowbuilder and save it.
- Open Logic Test from the header Test button.
- Create one test case per scenario: happy path, each conditional branch, failure/retry case, and edge cases with empty inputs.
- Configure start variables per scenario if your flow depends on them.
- Run each test case, verify the painted path matches your expectation, and inspect outputs block by block.
- Fix the flow in the builder if a path or output is wrong, then re-run the same test cases to confirm the fix.
- Keep test cases saved so teammates can reproduce the same scenarios later.
Troubleshooting
- A block fails immediately: check that its expected inputs match the type the block requires (e.g., a file block needs an actual file, not text).
- The conditional always takes the same path: inspect the outputs of the block before the conditional — the decision value is likely constant across your test cases. Vary the inputs or start variables.
- Execution stops without painting further blocks: check whether it paused asking for a missing input, or use the floating Stop / Reset controls and re-check the last executed block’s outputs for errors or missing data.
- Test case loads empty values: you may have saved it before filling all blocks. Select it, fill the missing inputs, and Save again to update it.
Related guides
- Create a Web flow - Learn how to create web flows using the flowbuilder
- Create a WhatsApp flow - Learn how to create WhatsApp flows using the flowbuilder
- Flow execution view - Review inputs, outputs, and the path of a real production process
- Analyze the performance of a flow - Identify drop-offs and bottlenecks with flow metrics
- Decision variables in flow - Understand how variables drive conditional logic