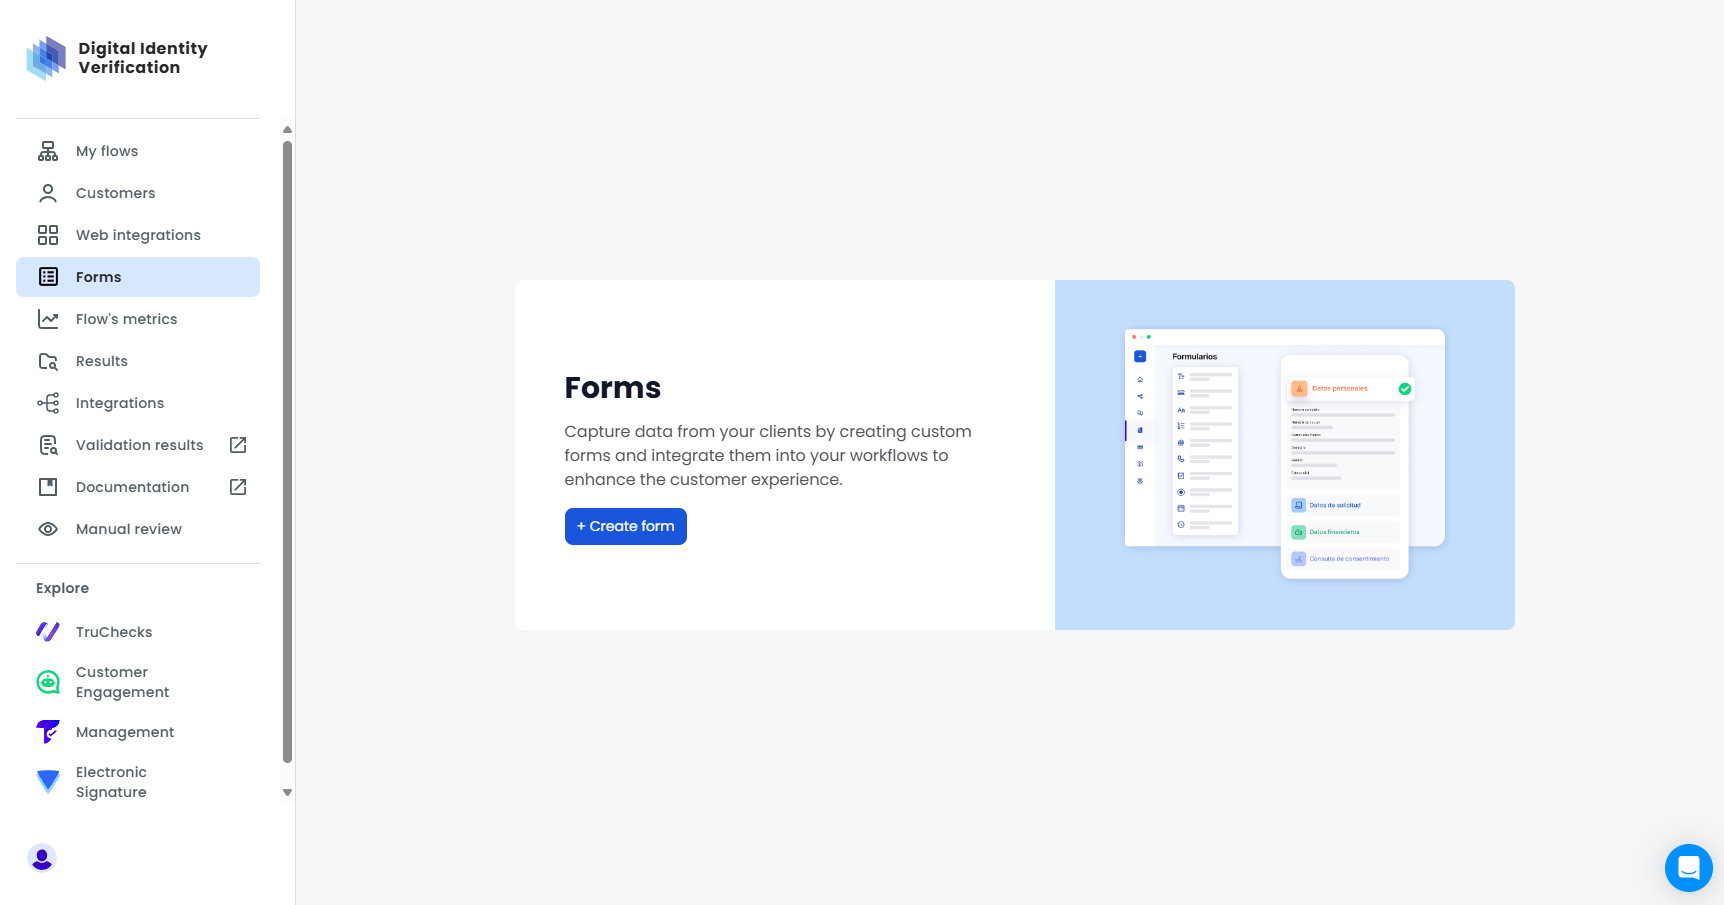
Forms
Forms is a tool that allows you to create customized forms to collect data from your users through a Digital Identity flow.
Create a new form
-
Log in to Truora dashboard, and click Open under the Digital Identity Verification section.
-
Select the forms tab and click on the create form button.
-
In the navigation bar, enter a name for your form.
-
Write a title and description for your first section.
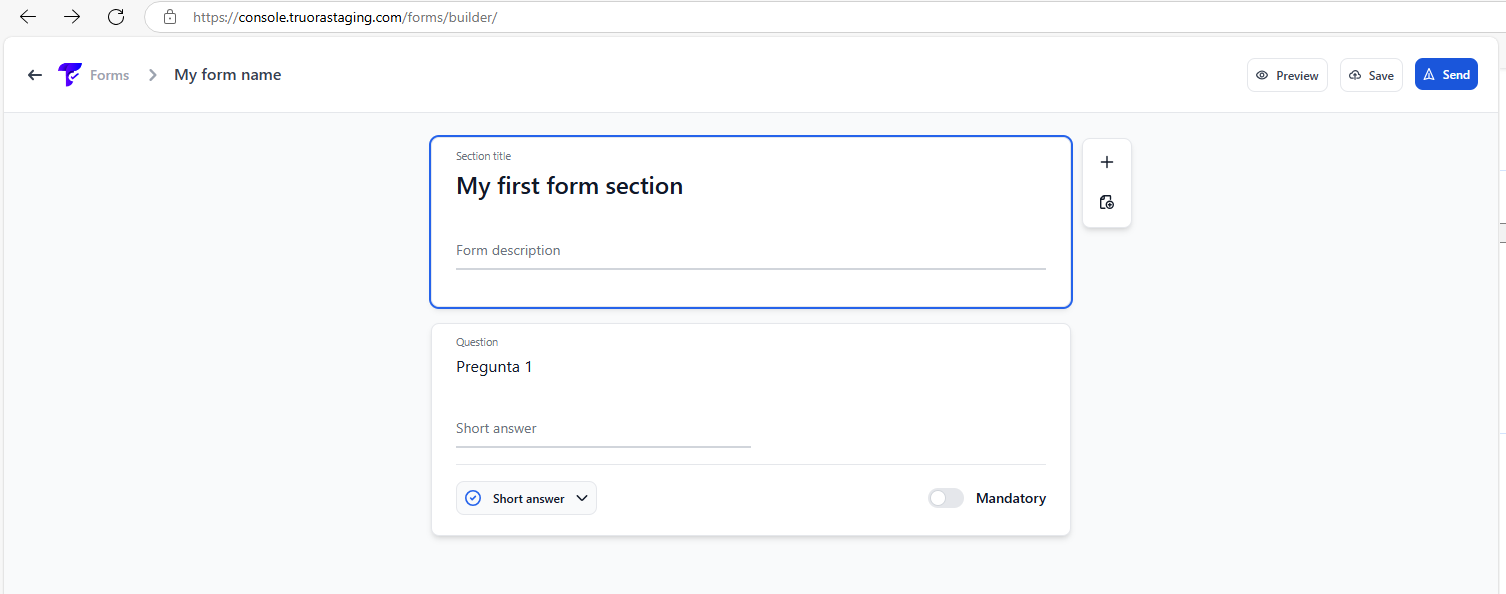
- Click on the save button in the navbar to create the form.

Form Inputs (Preloading Data)
Form Inputs allow you to autofill fields using information collected in previous steps of the Digital Identity flow. Instead of asking users for the same information twice, you can “pass” variables into the form.
Configure Input Variables
To define the data your form should expect, select the Variables tab located in the top navigation bar of the form editor.
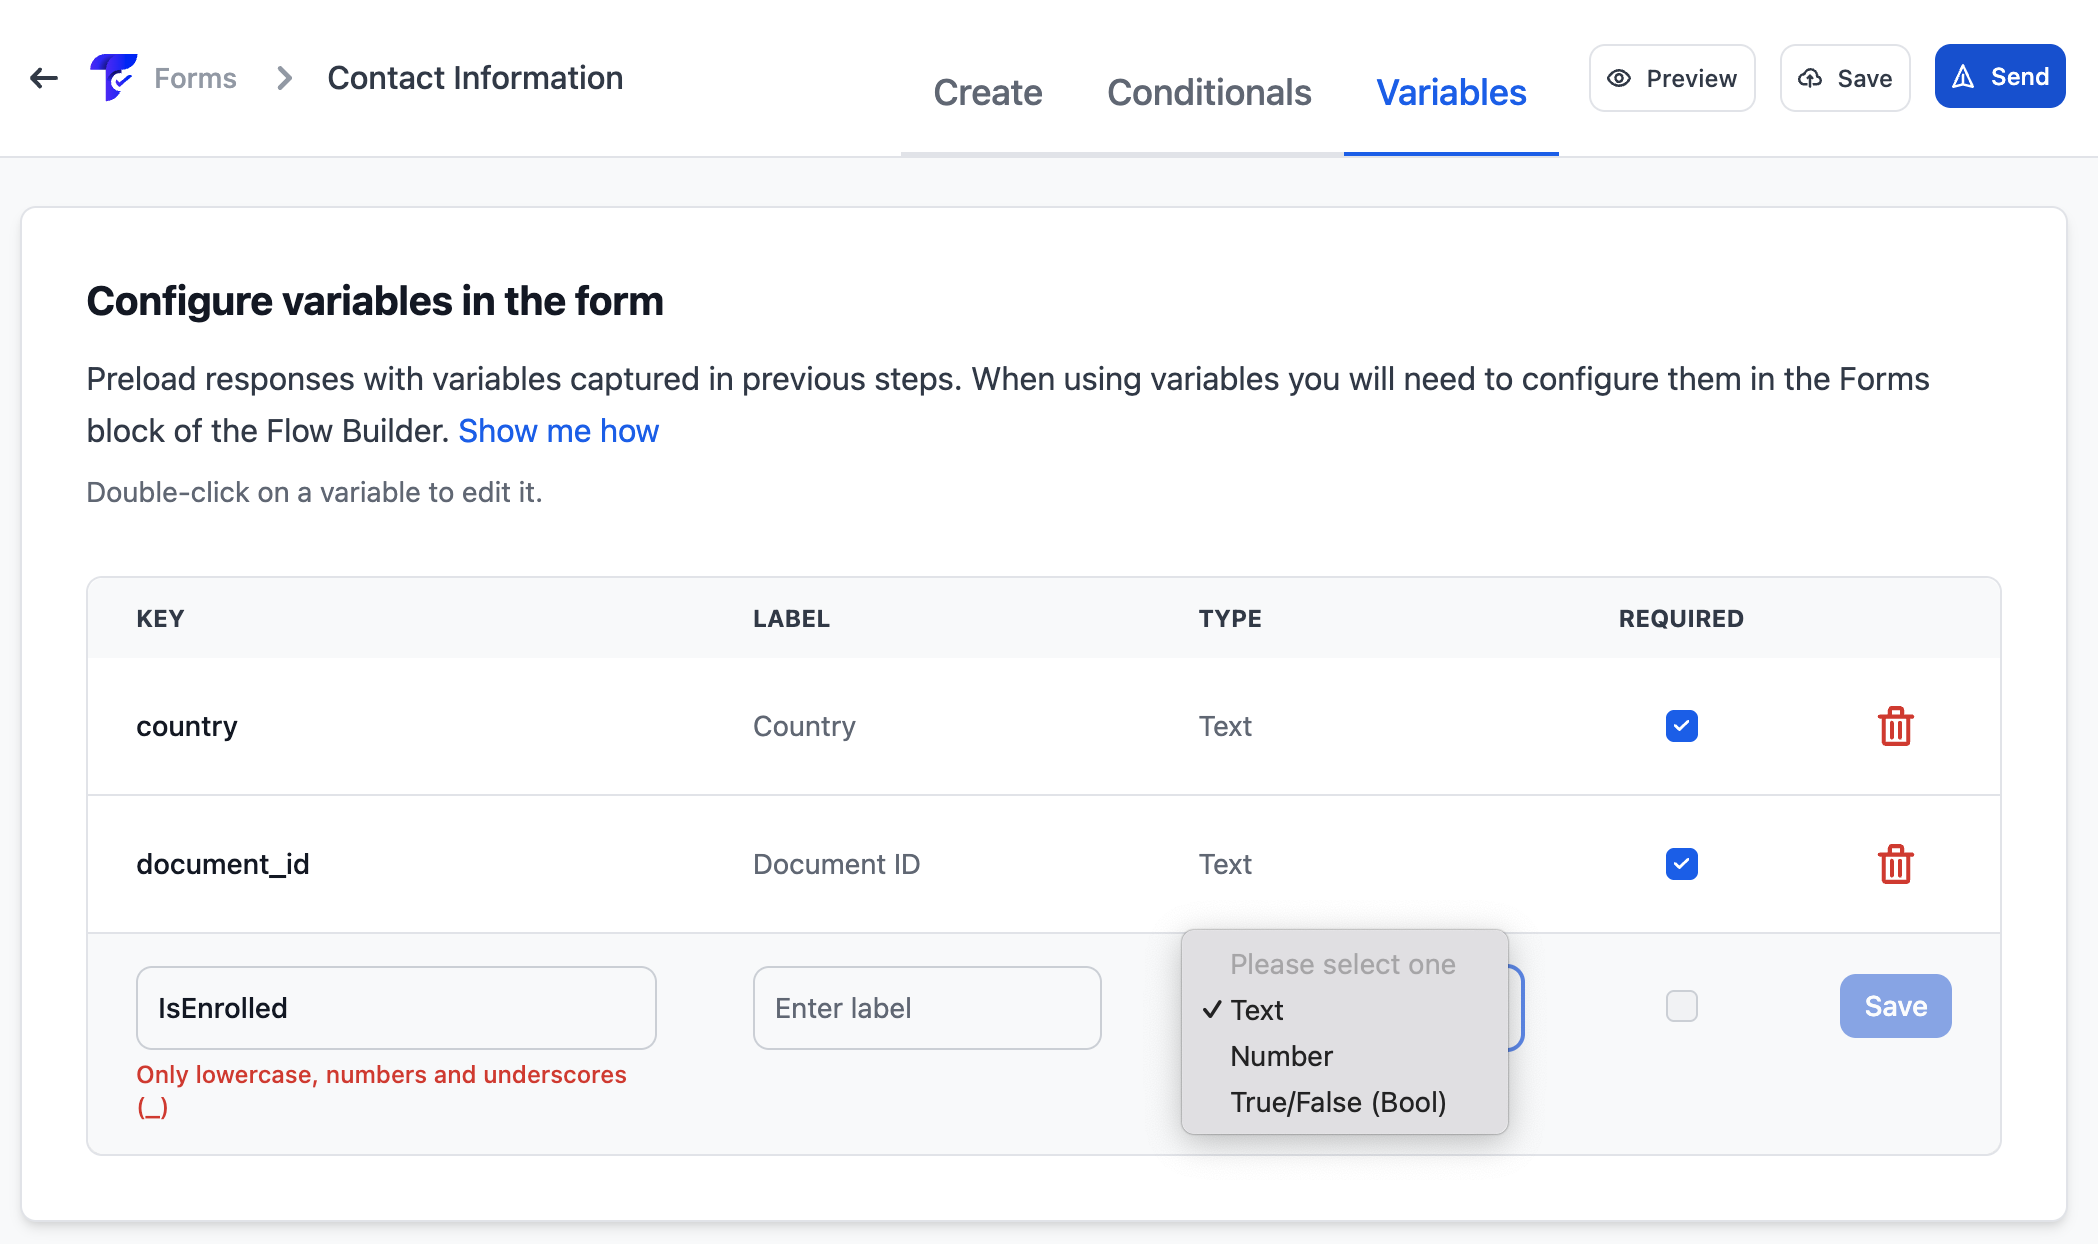
Inside the variables configuration screen:
- Key: Define the technical ID for the data. This must be in snake_case (lowercase, numbers, and underscores only) and has a limit of 34 characters.
- Label: Enter a friendly name for the variable.
- Type: Select between Text, Number, or True/False (Bool).
- Required: If checked, this variable must be provided by a previous step in the flow for the form to function correctly.
Note: You can create a maximum of 5 form input variables per form.
Add a new question
Using the new question button in the question card tools, select a question type and a new question card will be created.
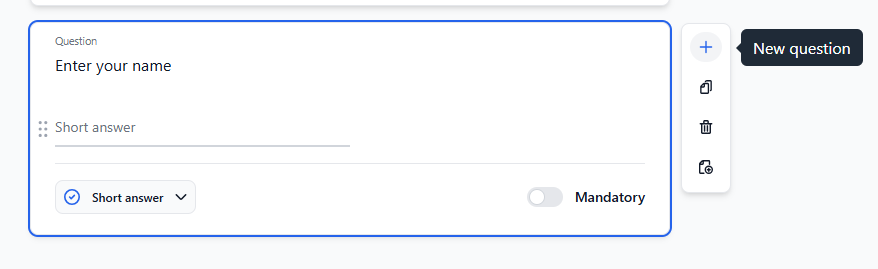
Below each question card, you will find two options to customize its settings. The first allows you to change the input type, where you can choose from different field types, such as text, number, date, etc. The second option is a toggle to specify whether the question is required or not. The table below shows the available input types and a brief description of each one.
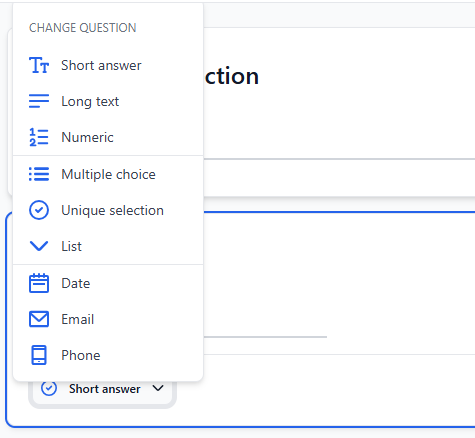
| Question type | Description |
|---|---|
| Short answer | Allows responses up to 250 characters and supports advanced validation patterns (Alphanumeric, Numbers, Letters, URL, or Custom Regex) to ensure data matches your required format. |
| Long text | Allows long texts in the response with a limit of 1000 characters |
| Numeric | Creates a question that accepts only numeric responses from -2147483647 to 2147483647 |
| Multiple choice | Creates a form question with checkboxes |
| Unique selection | Creates a form question with radio inputs |
| List | Creates a form question with a dropdown input |
| Date | Creates a question with a datepicker |
| Creates a question that validates the email format | |
| Phone | Creates a question to fill a phone number |
| Password | Creates a secure input field where characters are masked by default. Includes a “show/hide” eye icon for users to verify their entry while typing. |
Referencing Variables in Questions
You can use these variables to pre-select options in Multiple choice, Unique selection, and List question types.
-
Create or edit a question of a compatible type.
-
In the options field, type the
@symbol. -
Select the desired variable from the dropdown list (e.g.,
@document_id).

Character Limits and Concatenation
Each answer choice in a form has a maximum limit of 30 characters. When using a variable like @variable_name, the system calculates this limit based on the final value displayed to the user at runtime.
If the combination of your static text and the variable value exceeds 30 characters, the answer will be automatically truncated. This may result in cut-off information that makes the option difficult for your users to understand.
Example Scenarios:
| Type | Format in Editor | Runtime Value (Example) | Resulting Answer | Status |
|---|---|---|---|---|
| Simple | @city |
“San Francisco” | “San Francisco” | ✅ OK |
| Concatenated | Office: @city |
“Office: San Francisco” | “Office: San Francisco” | ✅ OK |
| Multiple | @plan in @city |
“Premium in San Francisco” | “Premium in San Francisco” | ✅ OK |
| Over Limit | Delivery to: @address |
“Delivery to: 123 Magnolia Lane” | “Delivery to: 123 Magnolia La” | ⚠️ Truncated |
⚠️ Warning: Always account for the potential length of the data being passed. If your variable could contain long strings (like full addresses), the answer will be truncated at the 30th character, which may hide critical information from the user.
Preconfigured lists
For List, Multiple choice, and Unique selection questions you can use preconfigured lists (countries, cities, regions, etc.) as options. See the Preconfigured lists (Form Builder) guide to configure them.
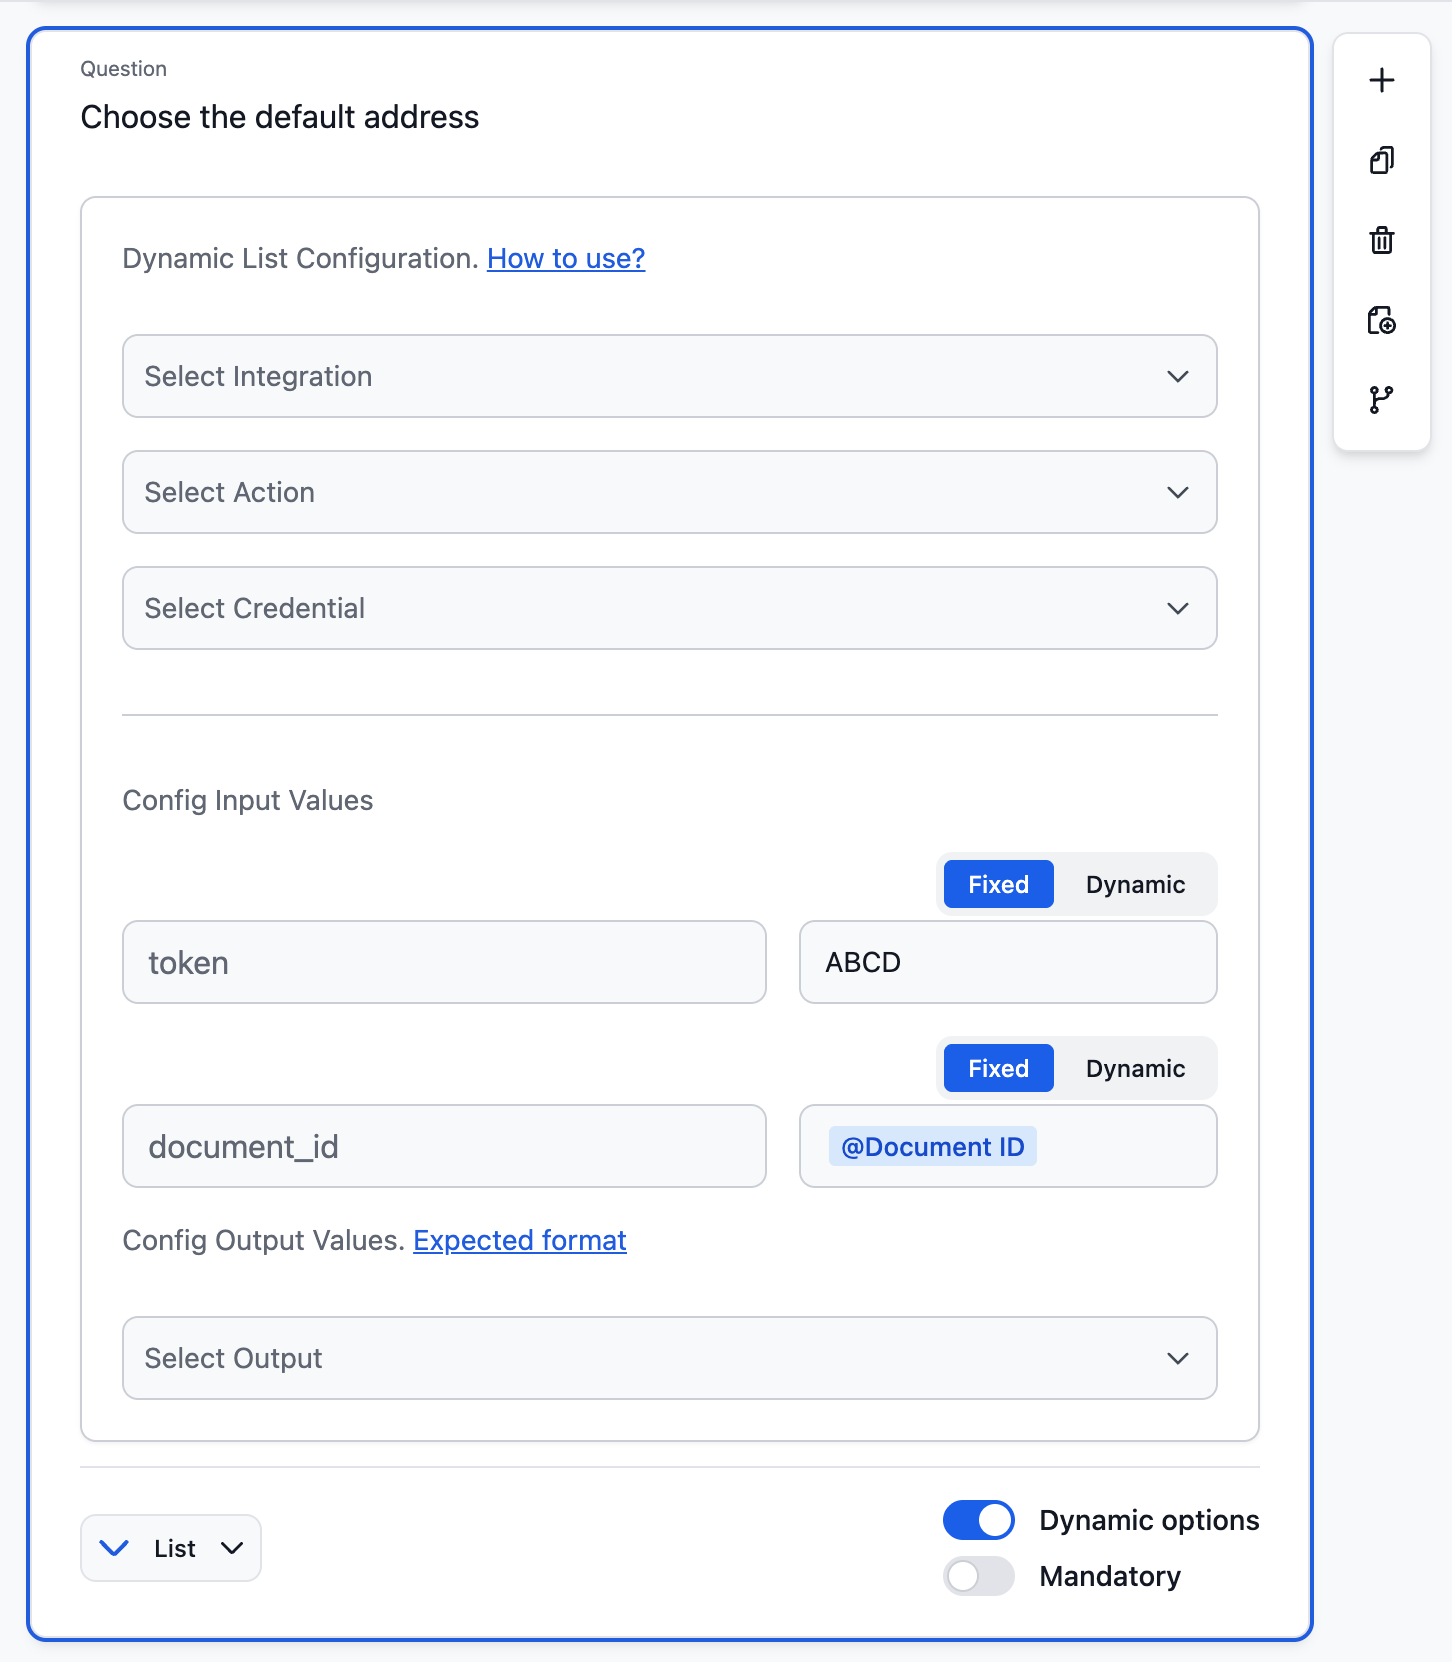
Dynamic lists
For input types that have options like Multiple choice, Unique selection, and List, you can configure dynamic lists. To enable dynamic lists, first activate the Dynamic options switch in the question settings. This will display the integration configuration options. Dynamic lists allow you to populate the options automatically from an external data source through an integration.
To set up a dynamic list, you must first create an integration. Learn how to create and configure integrations in the Custom integrations Guide.
Configuring Input Values with Variables
When an integration requires input parameters (e.g., a token, user ID, or country code), you can now use information collected in previous steps of the Digital Identity flow to filter or authorize the data retrieved.
- Select the integration you want to use
- Choose the specific action from that integration
- Select the credential that will be used to authenticate the requests
- Config Input Values: Under this section, you will see the parameters required by your API action.
- Use Variables: To use a form input variable as a parameter, click on the value field and type the
@symbol. This will open a dropdown list of all pre-defined variables (e.g.,@Document ID).
Pro Tip: Using @variables in dynamic lists allows you to create personalized experiences, such as showing a list of addresses specifically linked to a @document_id retrieved in a previous step.
Important: The integration action must have an output with a JSON array with objects containing id and title properties. Note that the title property is also subject to the 30-character limit and will be truncated if the returned value is longer. For example:
[
  {"id": "1", "title": "Option 1"},
  {"id": "2", "title": "Option 2"},
  {"id": "3", "title": "Option 3"}
]
The dynamic list component only accepts this specific format. Any other format will not be processed by the component.
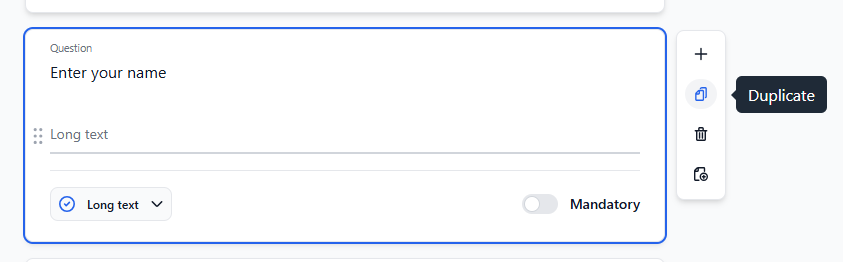
Duplicate a question
If you need to create an exact copy of a question, click the duplicate button and a new question will be generated with the same information.
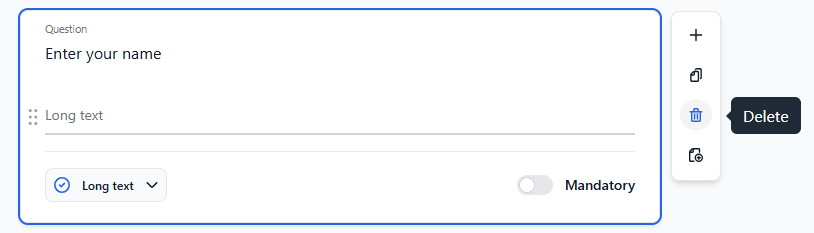
Delete a question
By clicking the delete icon, you can delete the selected question.
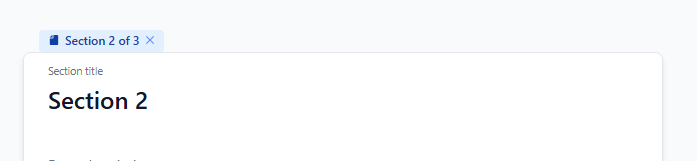
Form sections
Form sections let you organize groups of questions on separate pages, with each section allowing up to 50 questions.
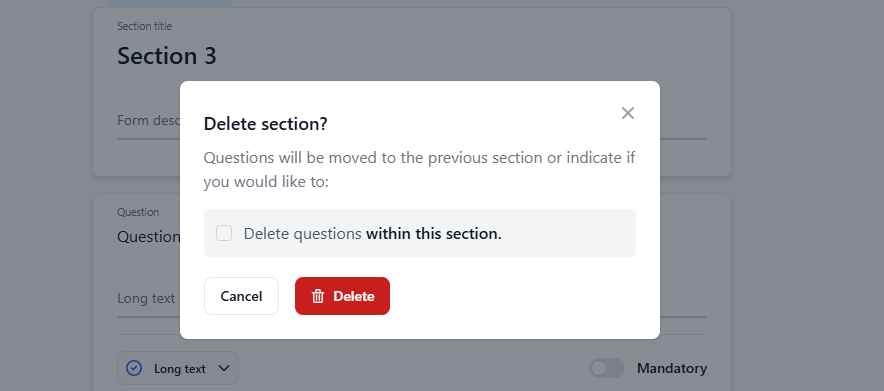
When you create a new section, each section will have an item with the section number and a button to delete the section.
If the section has questions, there will appear a modal where you can choose to also delete the questions or move the questions to the previous section.
Preview a form
The navbar has a preview button that allows you to see how a user will fill out the form responses.
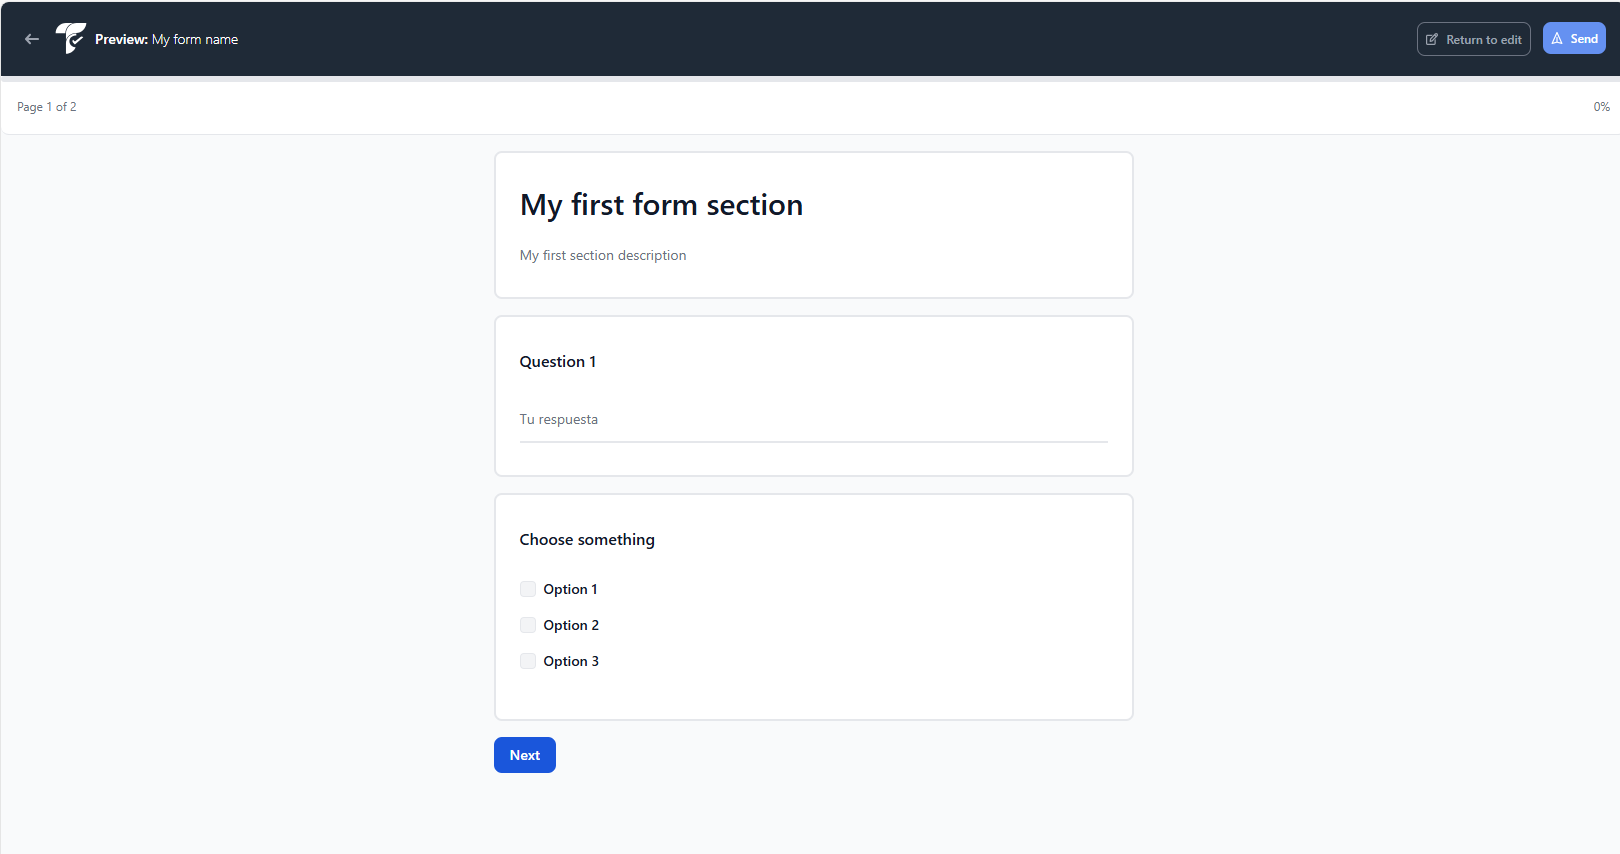
This view shows how the form sections are separated in different pages and how a user will see the form.
Forms in WhatsApp Flows
Also available for Truora’s WhatsApp Flows, learn how to Create and use Forms in WhatsApp Flows.