Azure as identity provider - SSO Setup
Note: Please be aware that for this process, Truora must provide information that you will use in certain steps, and later, you will need to supply information to complete the process. Before starting, please contact your sales representative or reach out to the support line.
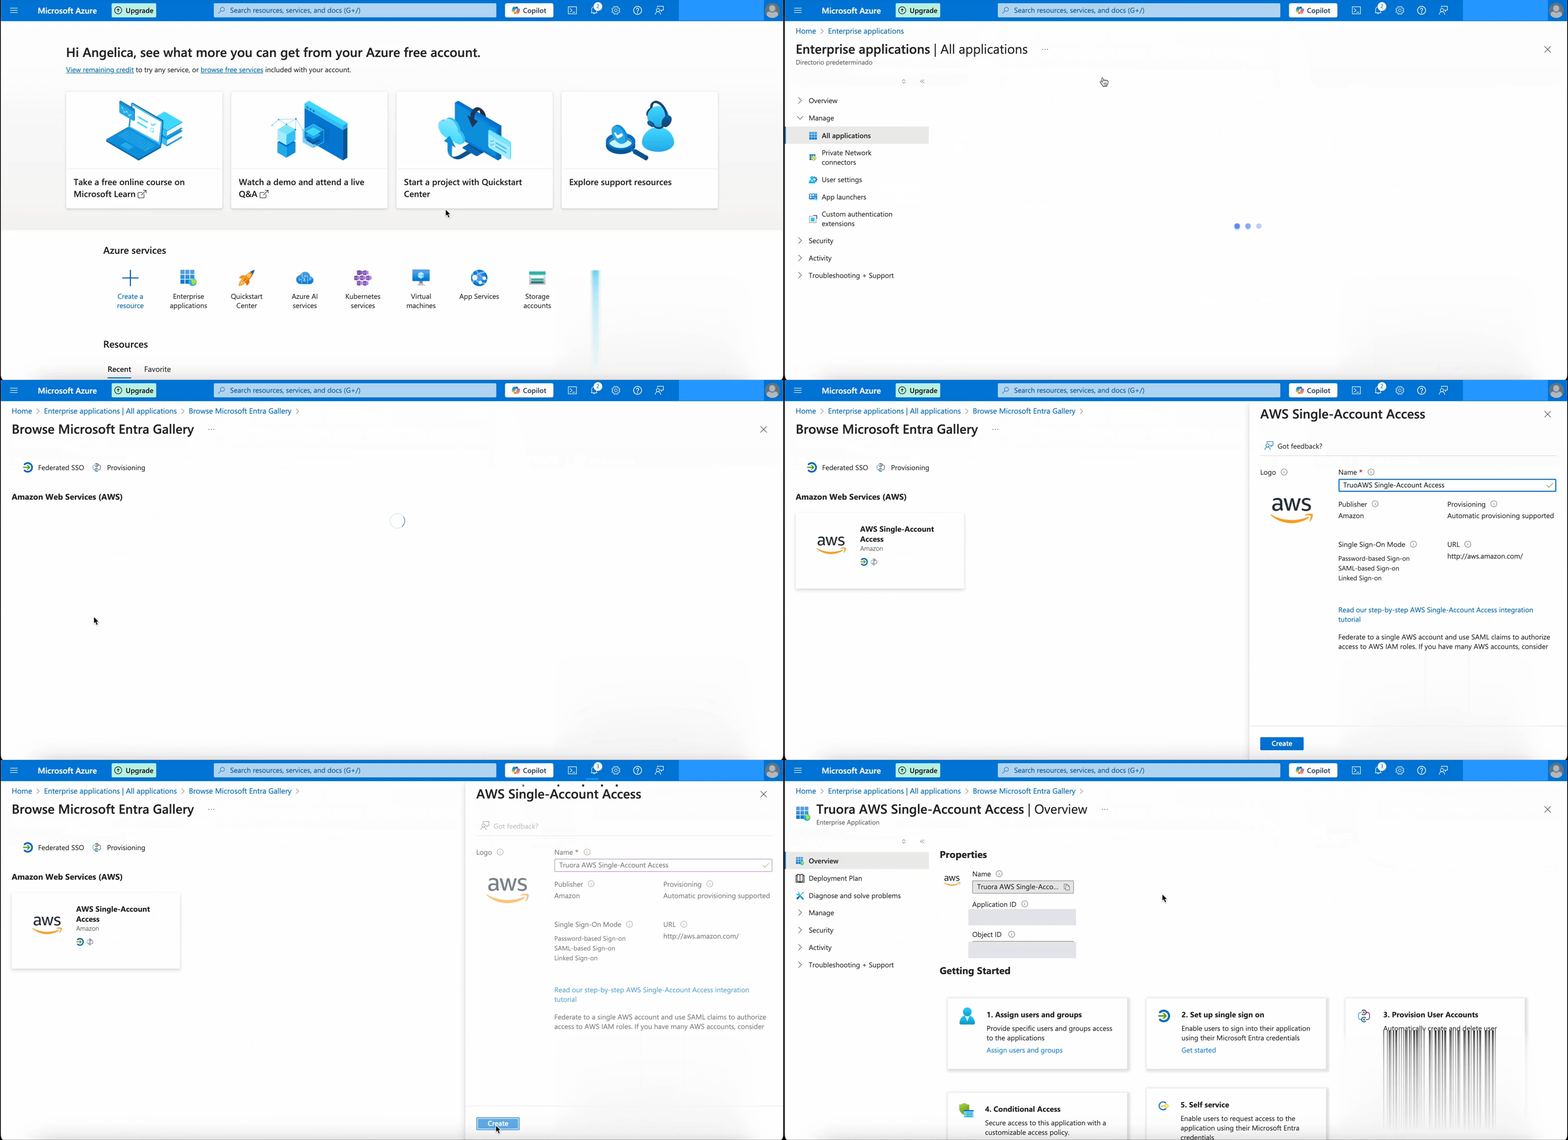
Step 1: Add an AWS Single Account Access Application in Azure
- Log in to the Azure portal.
- Search for Enterprise Applications.
- Create a new application.
- In the cloud platform section, select AWS.
- Then, choose AWS Single Account Access.
- Assign a name to the application.
- Click Create.

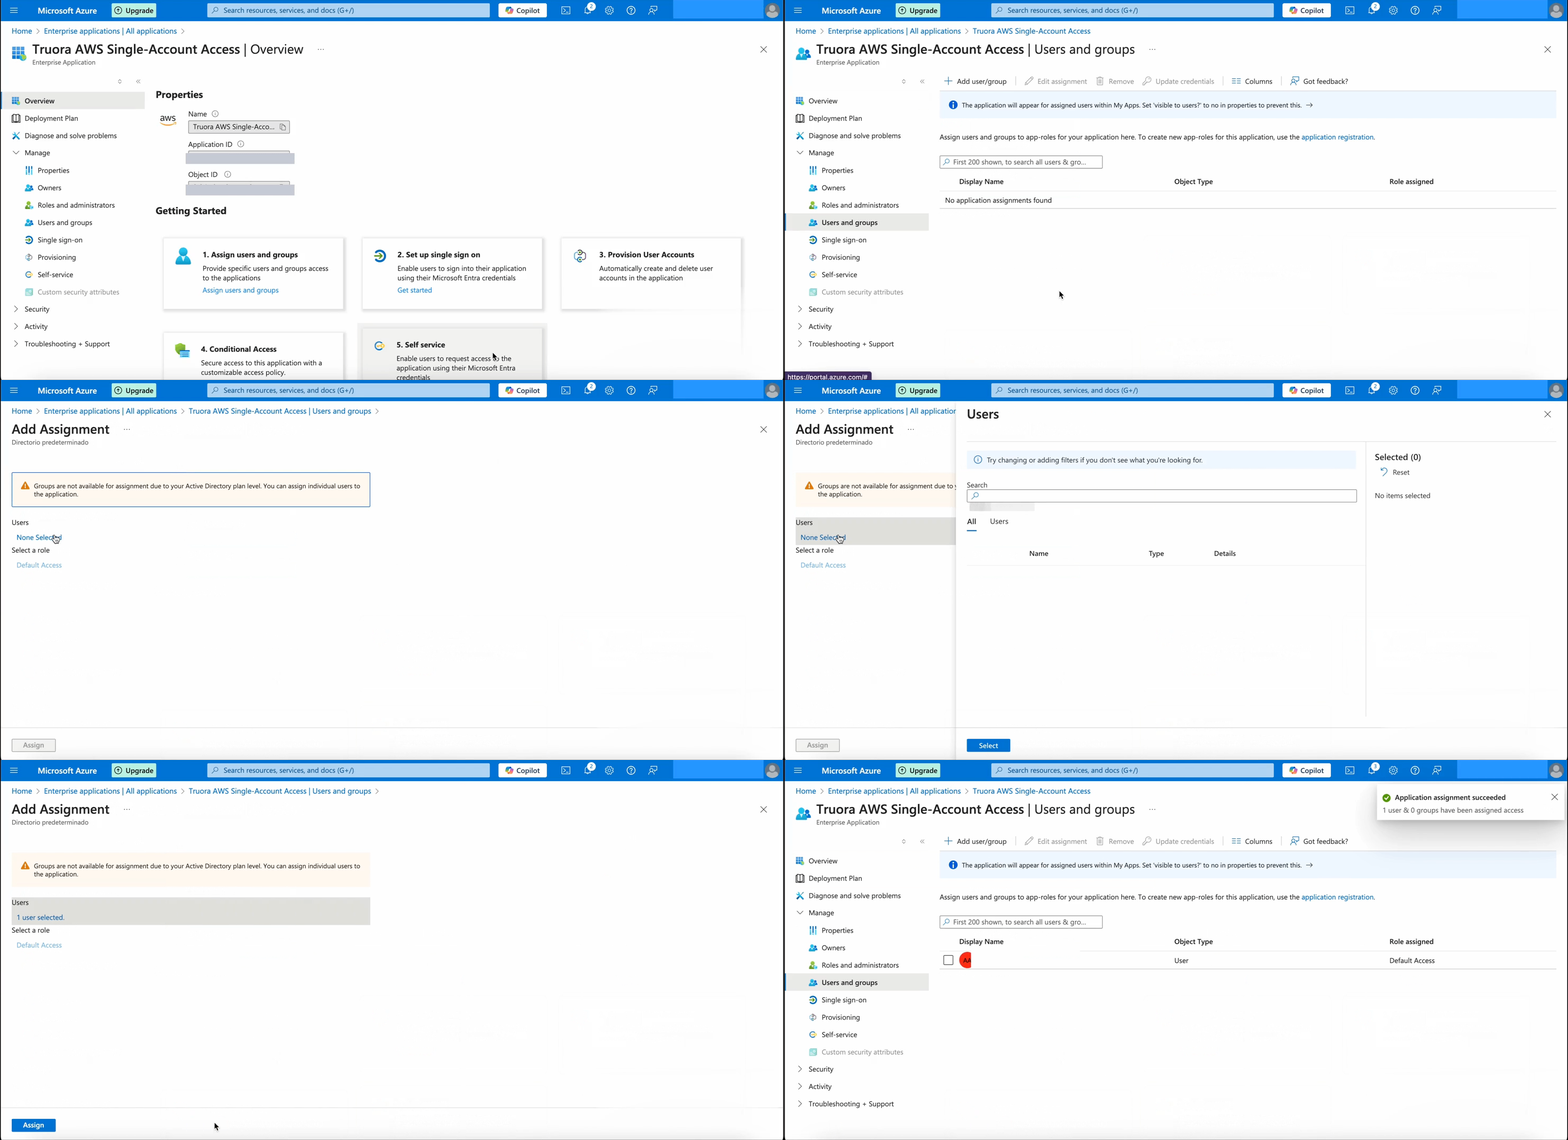
Step 2: Assign users and groups
Provide specific users and groups access to the application.
- In the registered app, navigate to Users and Groups.
- Click on Add user/group.
- Select the users or groups you want to assign to the application.
- Confirm your selection and click Assign to grant access.

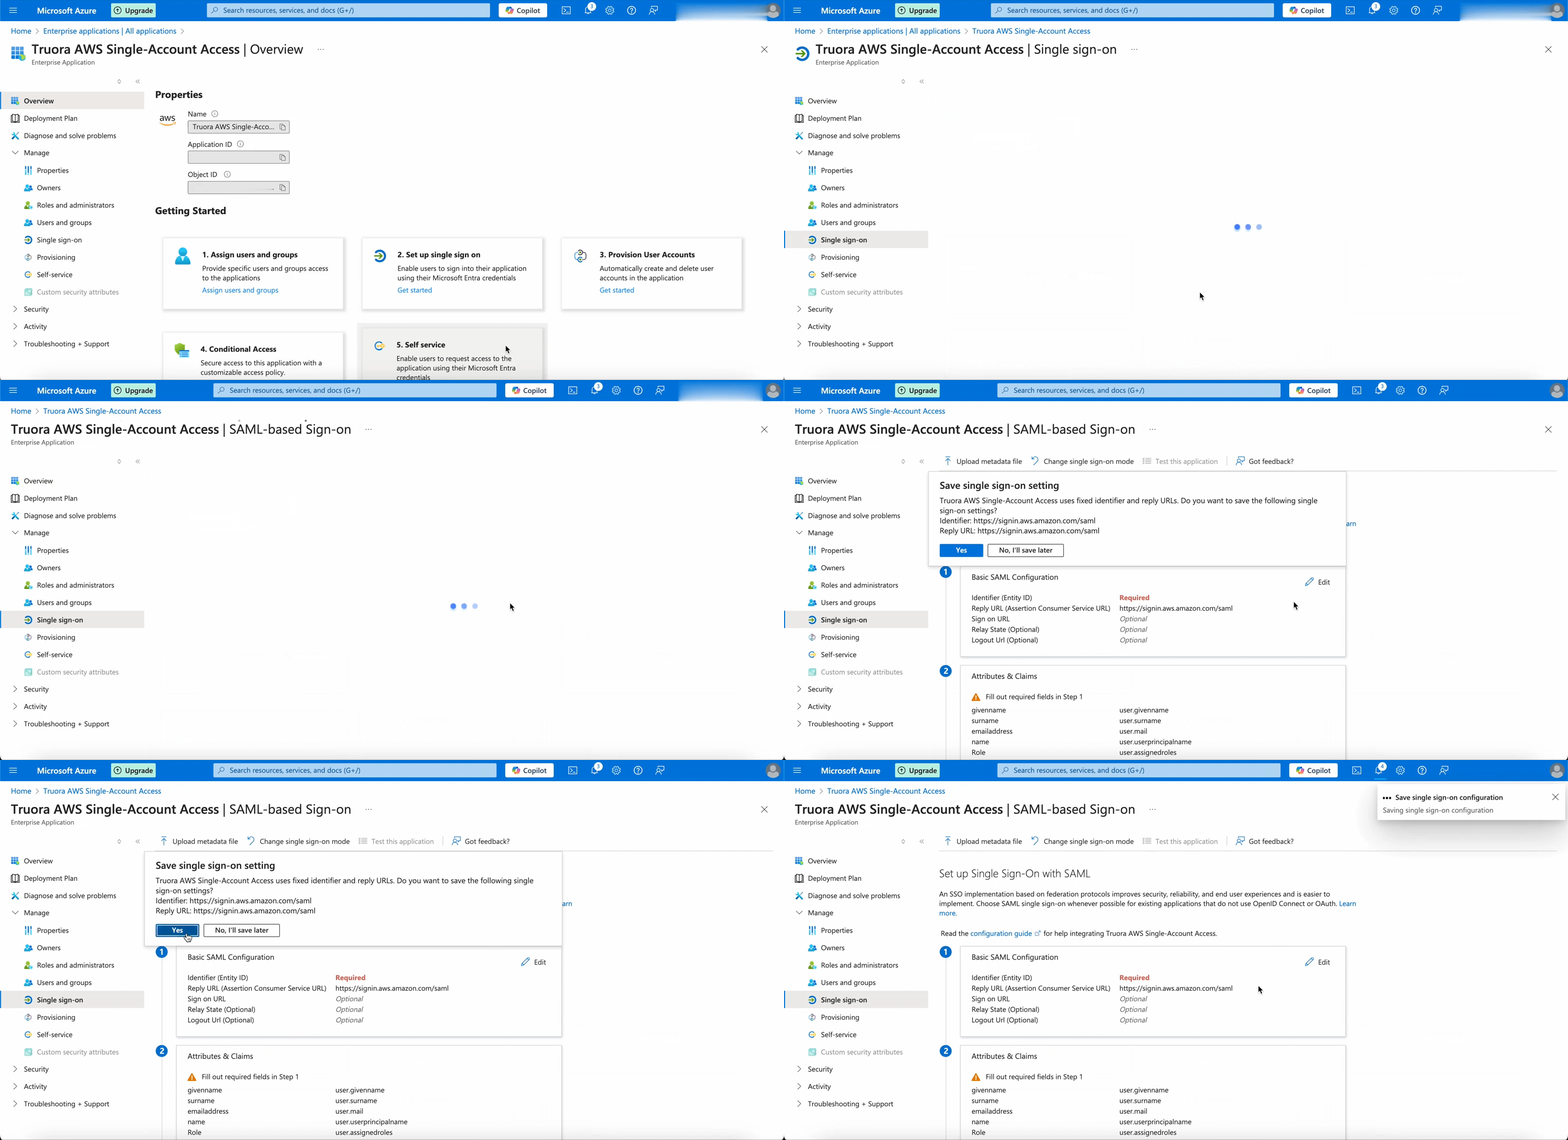
Step 3: Set up single sign on
Enable users to sign into the application using their Microsoft Entra credentials.
- In the registered app, go to Management.
- Select Single Sign-On.
- Choose the SAML method.

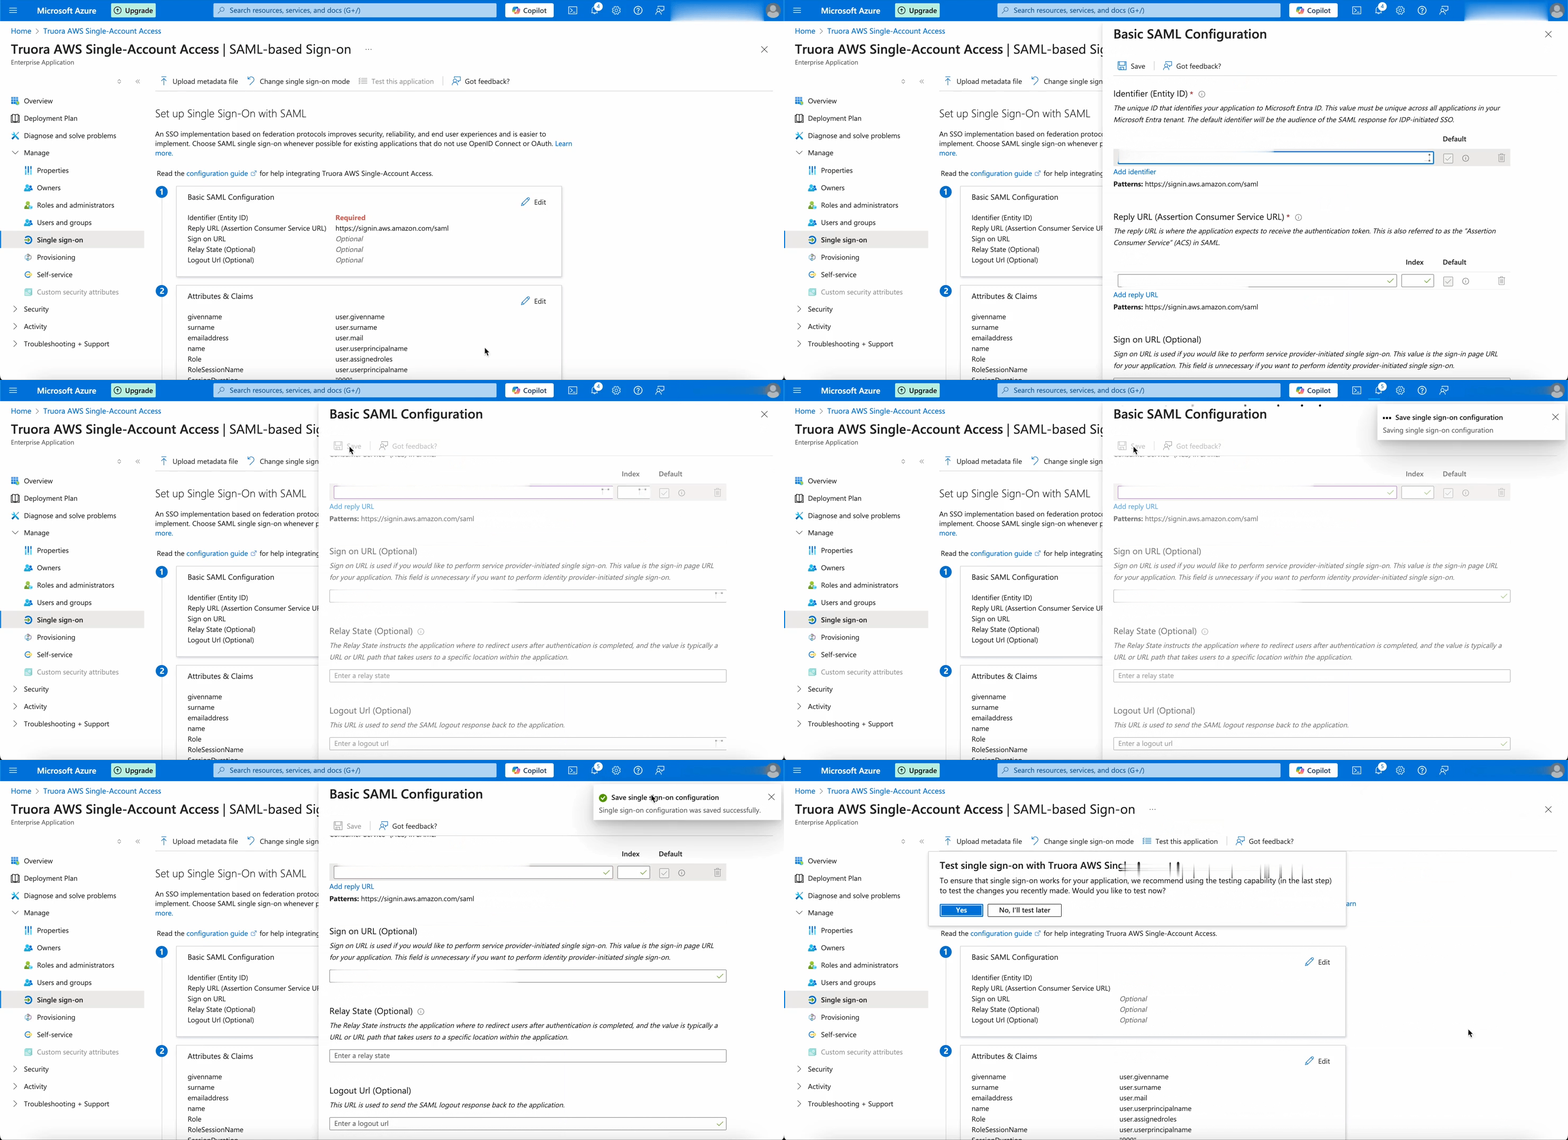
- Configure the basic SAML settings by entering the Identifier and Reply URL provided by Truora. Examples:
- Identifier: urn:amazon:cognito:sp:«region»:«identifier»
- Reply URL: https://«your-cognito-domain».auth.«region».amazoncognito.com
- Click Save.

Step 4: Share SAML Certificates
Copy the App Federation Metadata URL and download the Federation Metadata XML. Ensure both are shared securely with Truora to facilitate the integration process.
