Google as identity provider - SSO Setup
Note: Please be aware that for this process, Truora must provide information that you will use in certain steps, and later, you will need to supply information to complete the process. Before starting, please contact your sales representative or reach out to the support line.
Step 1: Create a Project in Google Cloud
- Log in to Google Cloud Console.
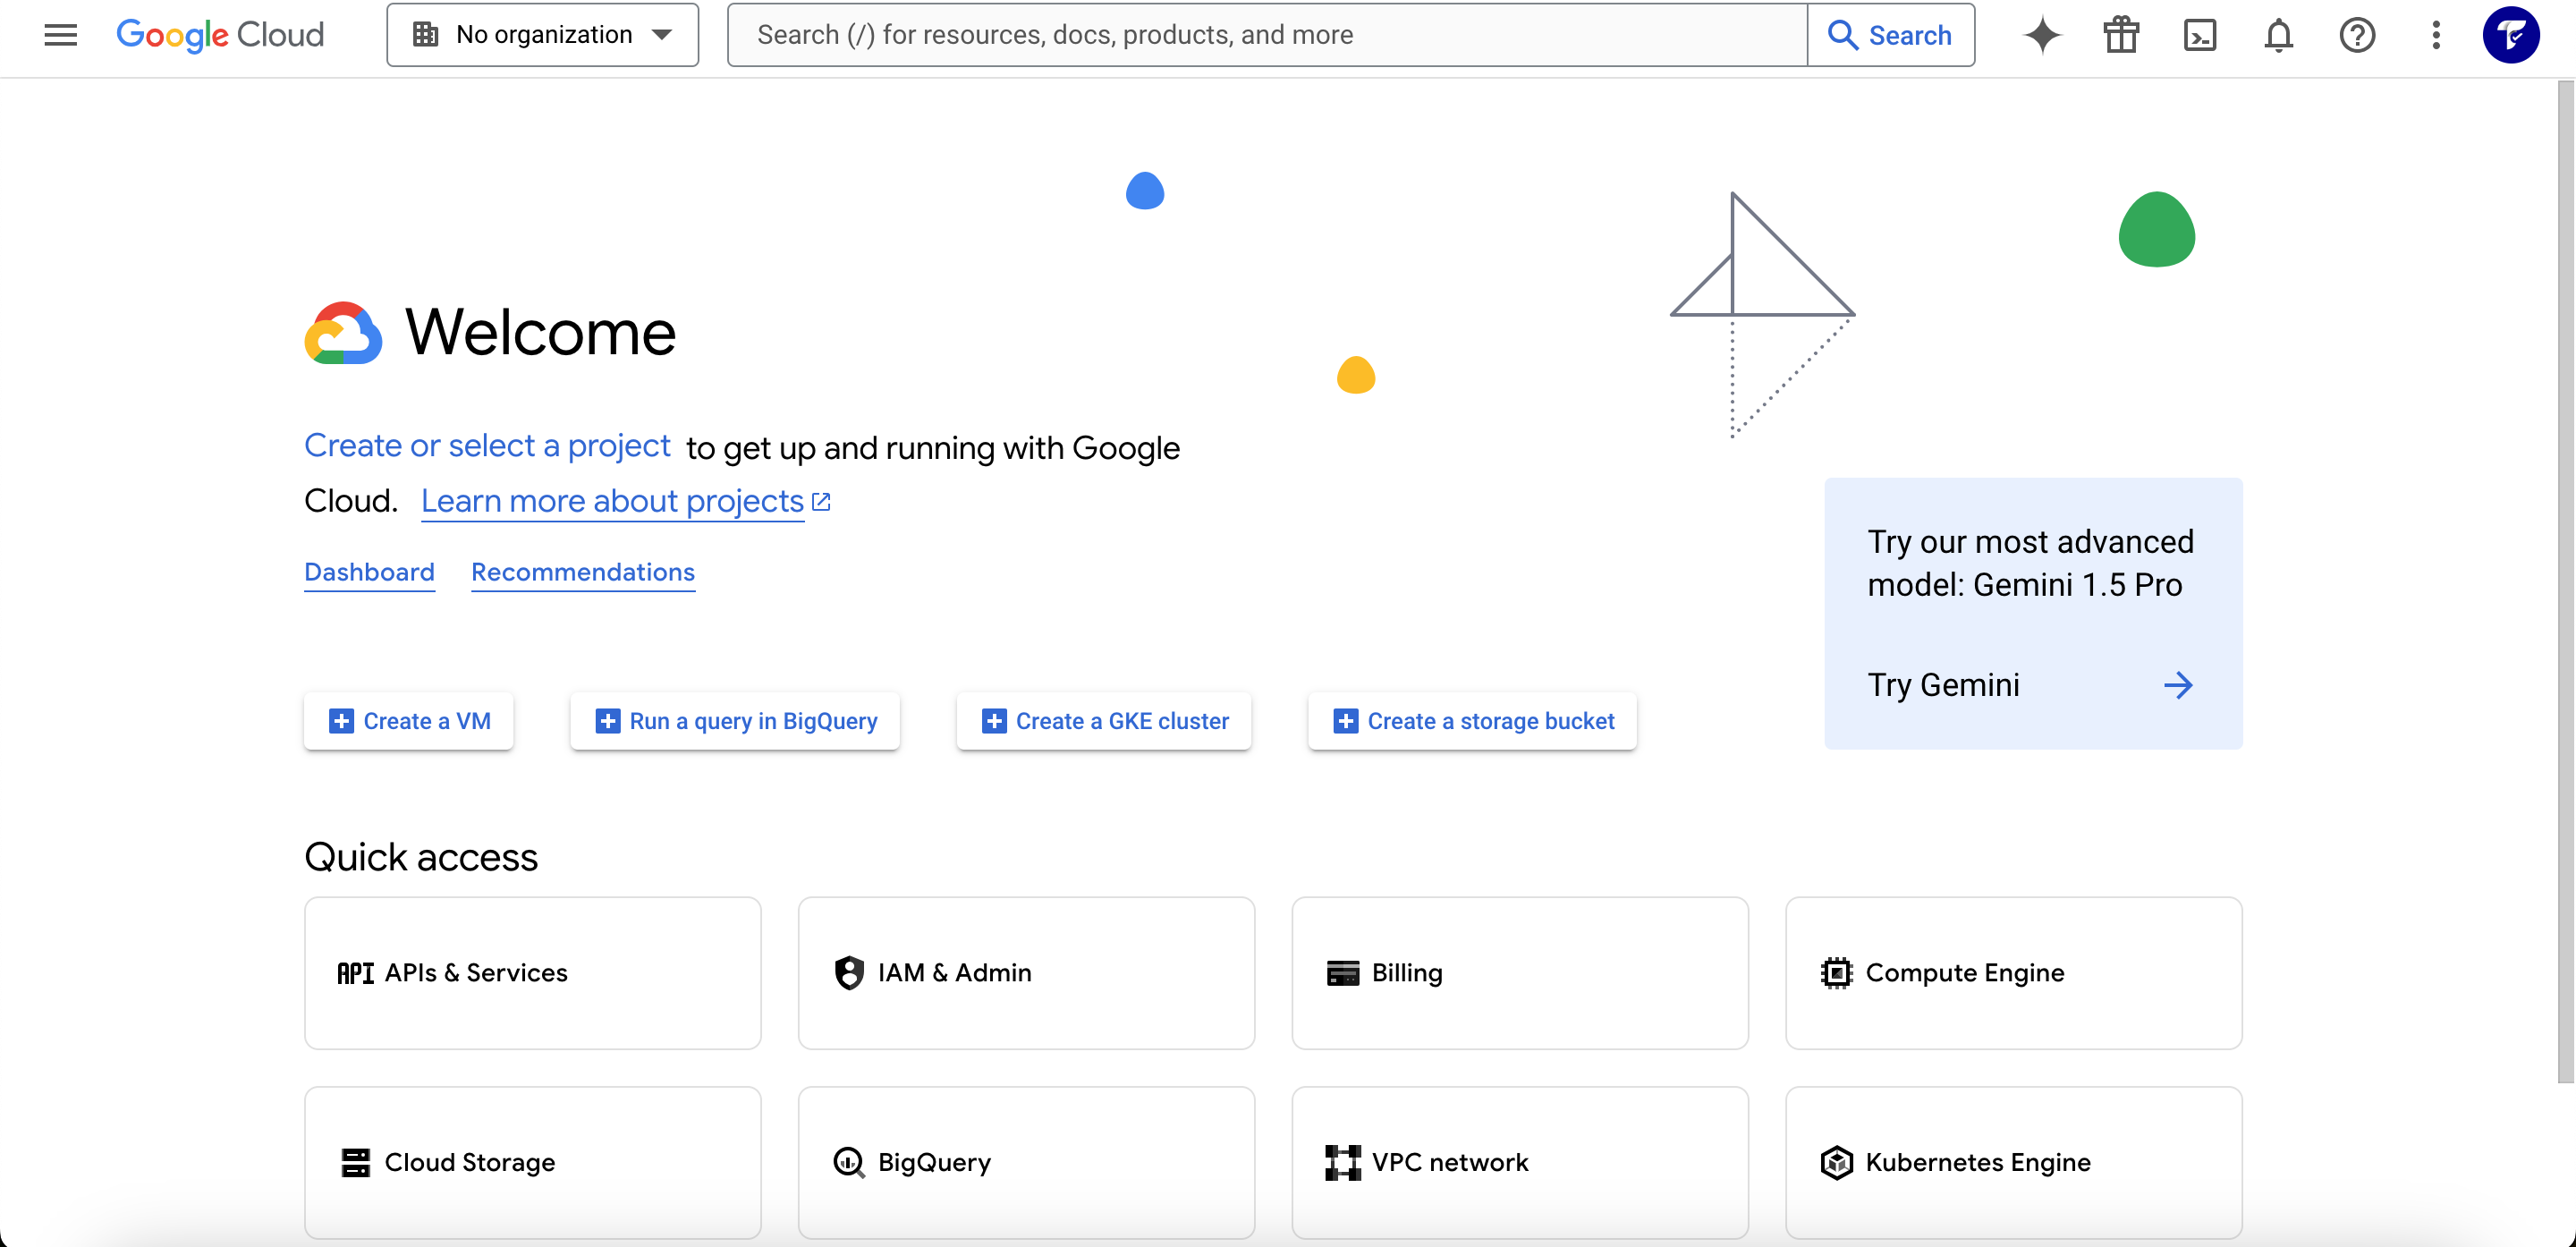
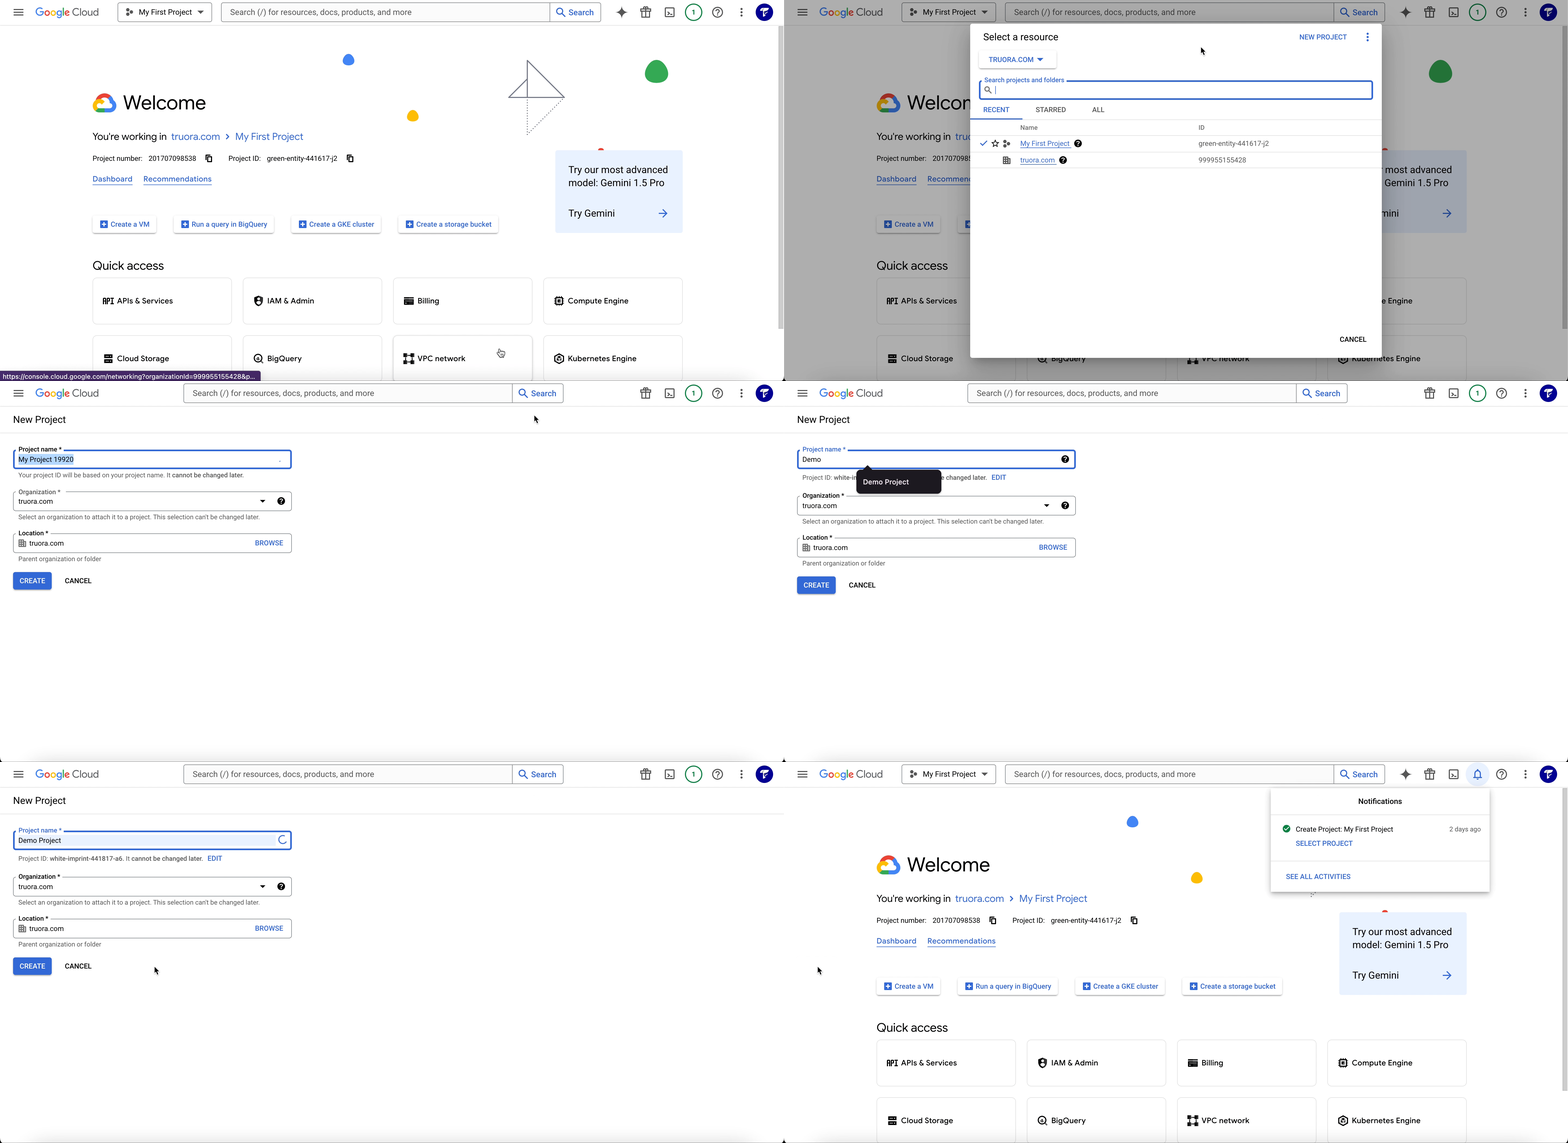
- Click on Select a project, then New Project.
- Assign a name to the project and click Create.
Step 2: Enable Google Identity Services API
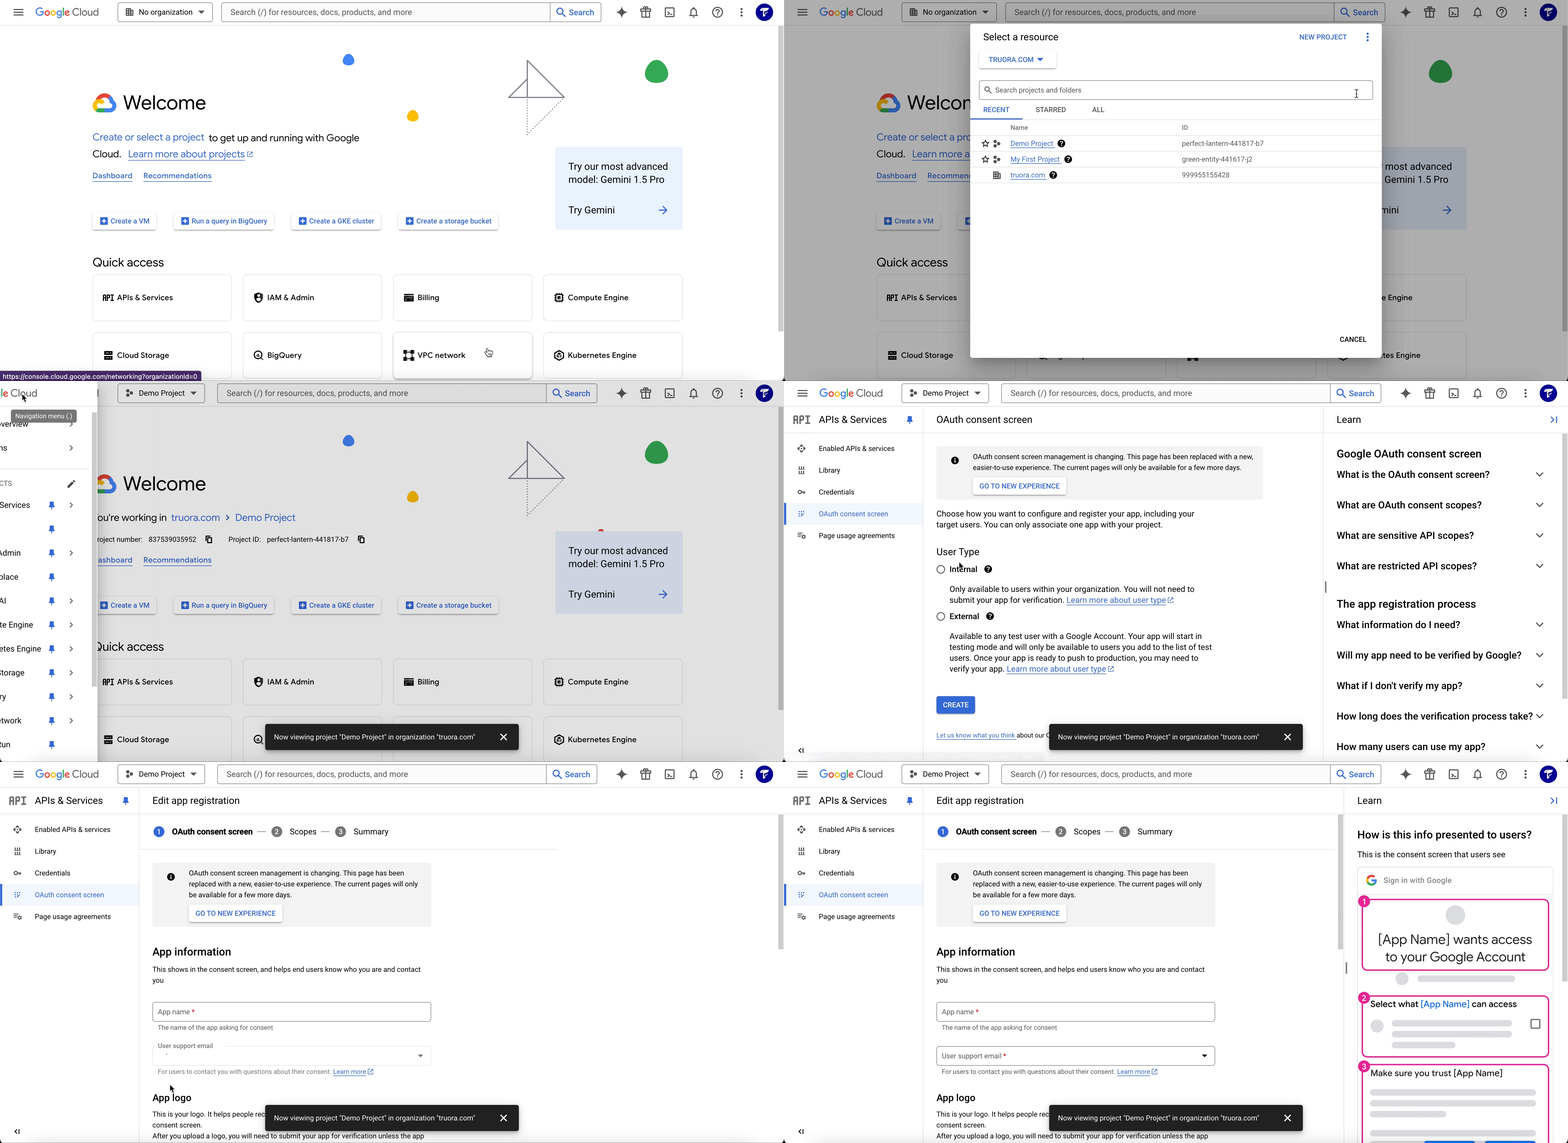
- Navigate to APIs & Services > OAuth consent screen.
- Select External or Internal, depending on who will be using the app:
- Internal is only available to users within your organization.
- External is required if you’re allowing users outside your organization.
- Click Enable to activate it.
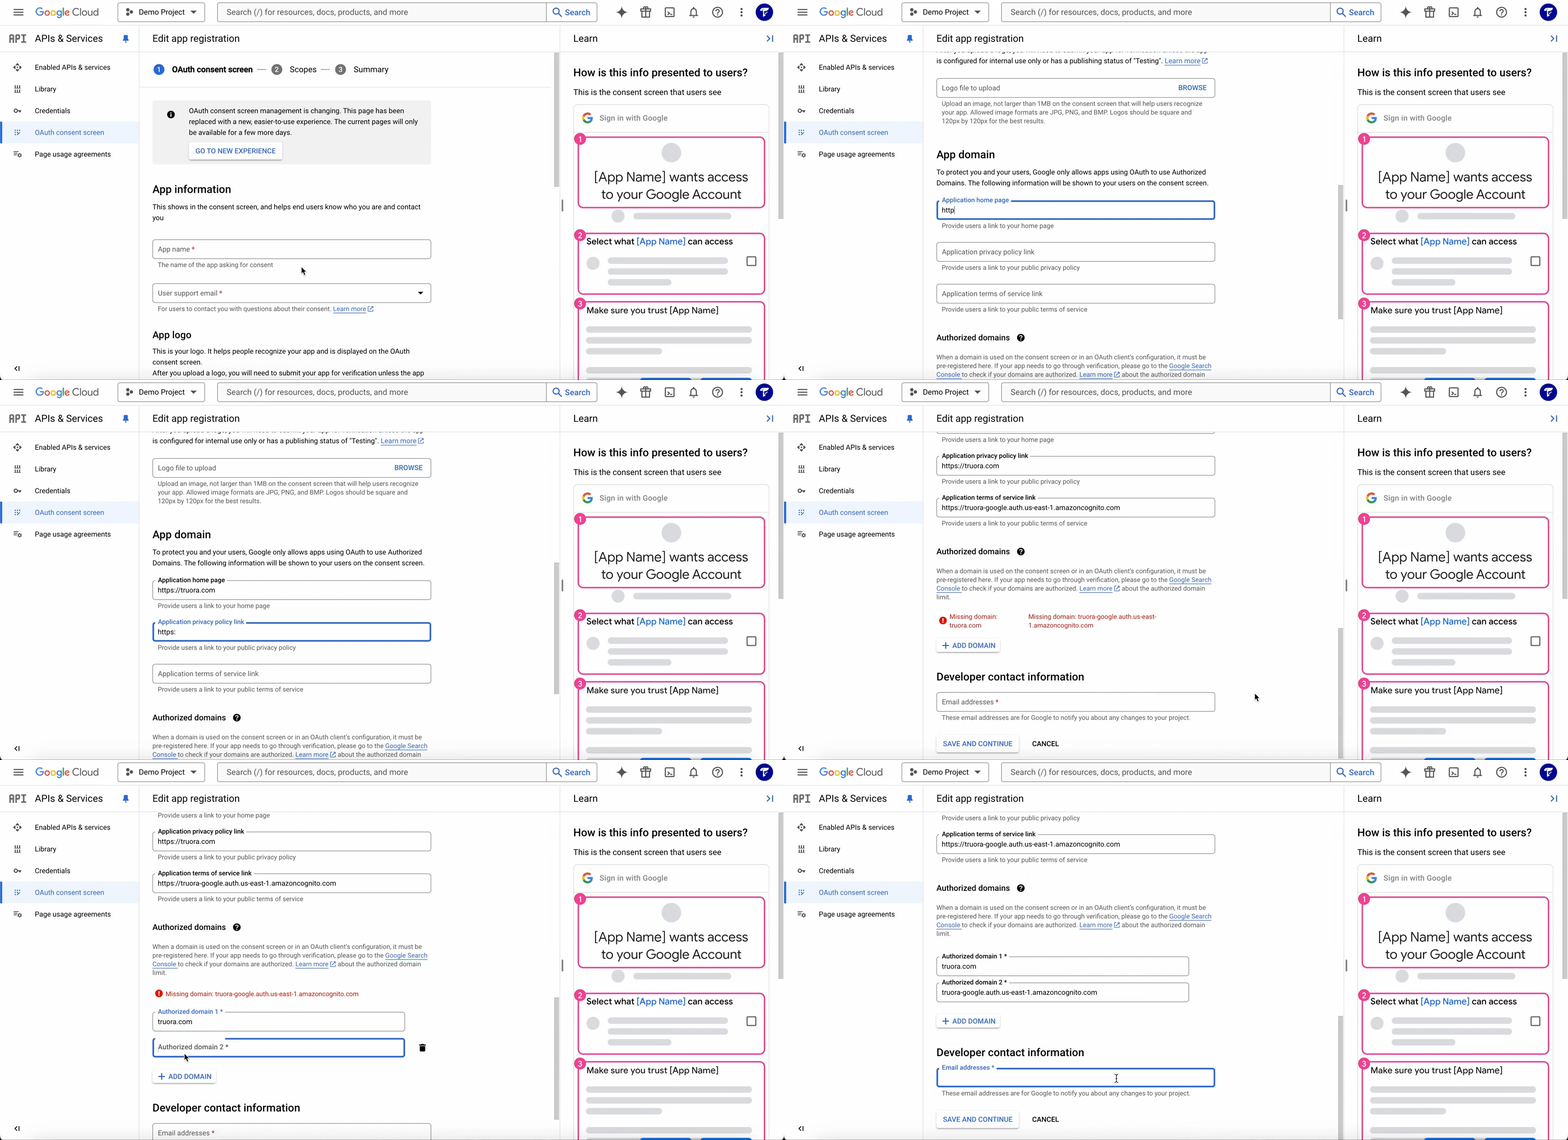
- Fill in the App information (app name, user support email, etc.), remember to use the link that Truora provides to set up the authorized domains and add the scopes required.
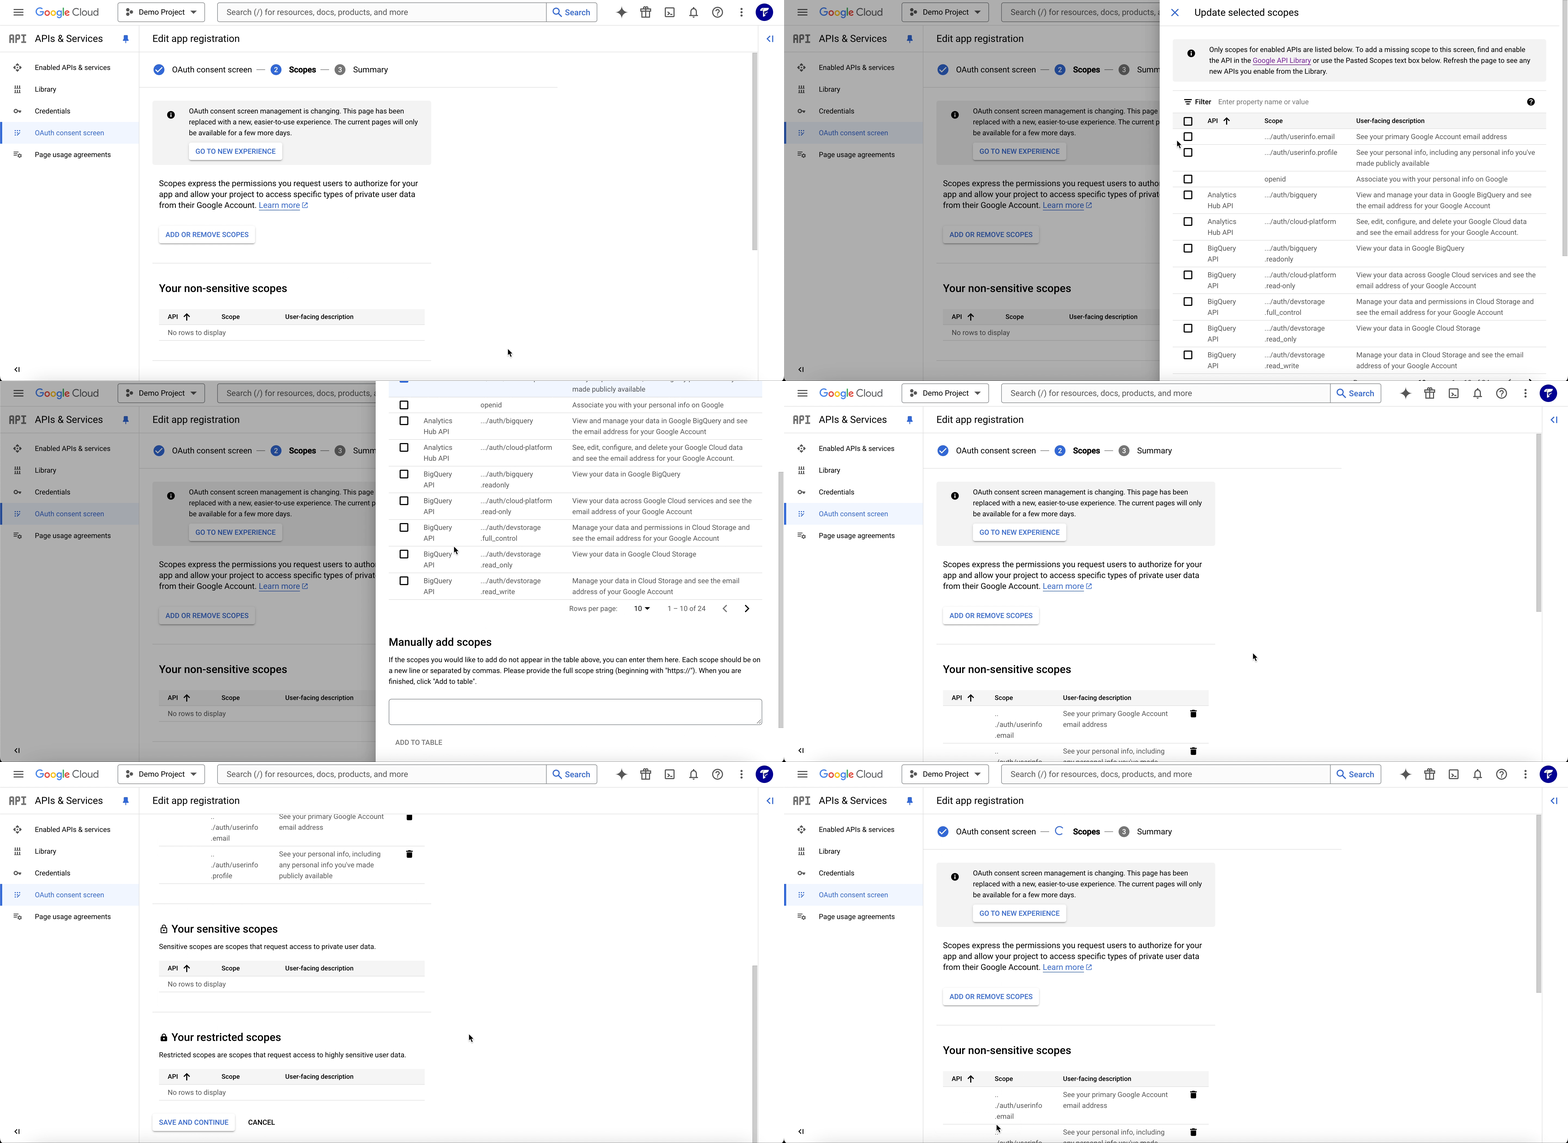
Step 3: Set Up Scopes
In the Scopes section, click on Add or Remove Scopes in the non-sensitive section.
- To access the user’s email and basic profile information, ensure the following scopes are added:
- email:
https://www.googleapis.com/auth/userinfo.email(retrieves the user’s email). - profile:
https://www.googleapis.com/auth/userinfo.profile(retrieves the user’s name, profile picture, and other public information).
- email:
- Click Update to save the scopes.
Step 4: Create OAuth 2.0 Credentials
- Go to APIs & Services > Credentials.
- Click Create Credentials and select OAuth 2.0 Client IDs.
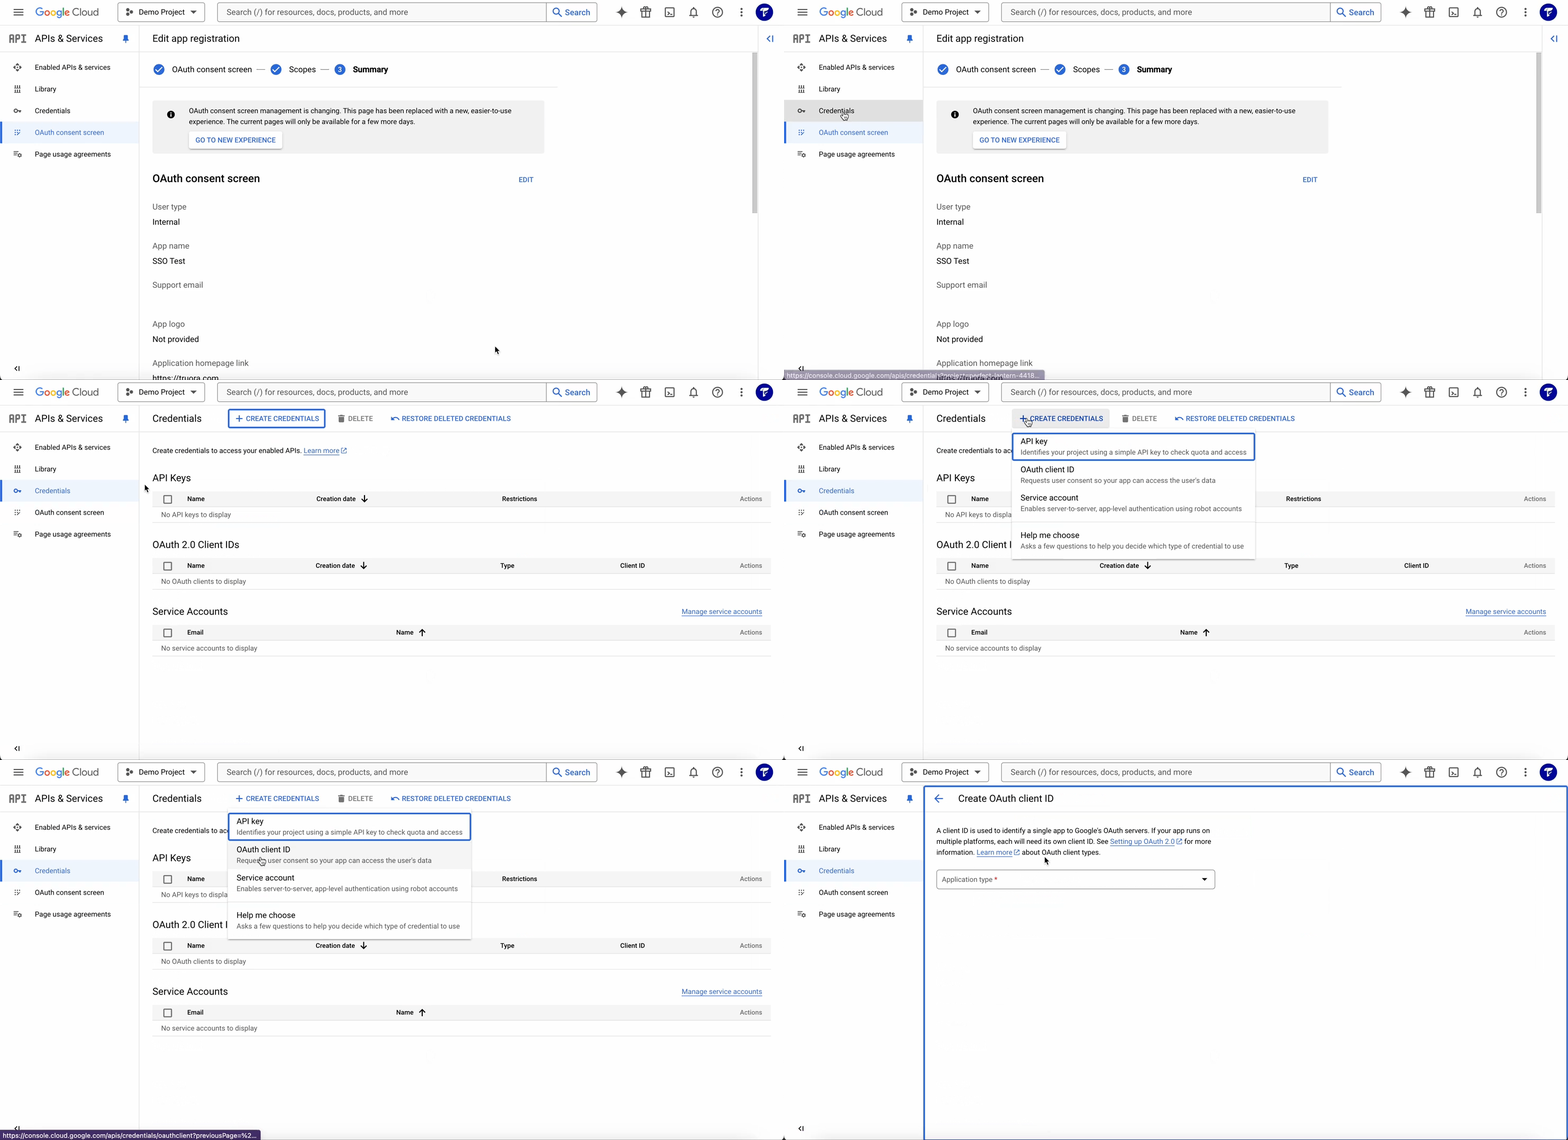
- Choose Web application as the application type.
- Name the credential.
- Under Authorized redirect URIs, add the redirect URL provided by Truora. Example:
https://account.truora.com- https://«your-cognito-domain».auth.«region».amazoncognito.com/oauth2/idpresponse
- Save the configuration and copy the generated Client ID and Client Secret.

Step 5: Share Credentials
Securely share the Client ID and Client Secret with Truora.
