In this guide, you’ll learn how to set up a Custom Integration in your WhatsApp flows to send user-uploaded images to an endpoint you define.
Disclaimer: Configuring API requests requires a solid understanding of APIs and authentication methods. We recommend involving a developer or a tech-savvy individual to assist or handle this process.
Before you begin
To follow this guide, you should be familiar with setting up Custom Integrations and using them in flows. If you’re not yet familiar, we strongly recommend reading the following guides first:
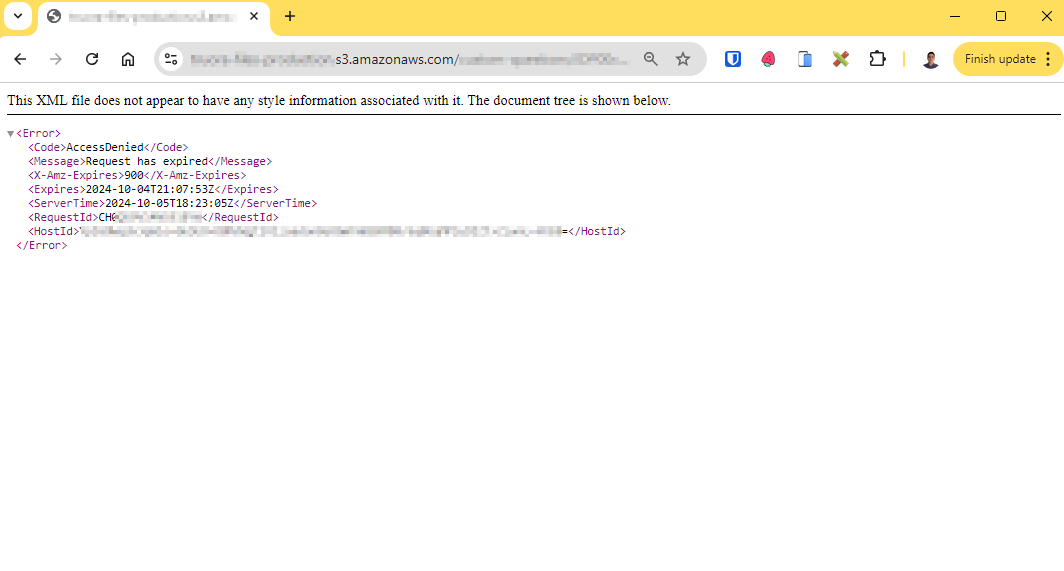
Important: The image URLs you receive in your WhatsApp flow are typically hosted on AWS S3 and are time-sensitive. These URLs usually expire after a predefined period of 15 minutes. Ensure you process or retrieve the images within this time-frame.
Creating the integration
In the left sidebar of Customer Engagement product, click on Integrations.
Click the New Integration button.
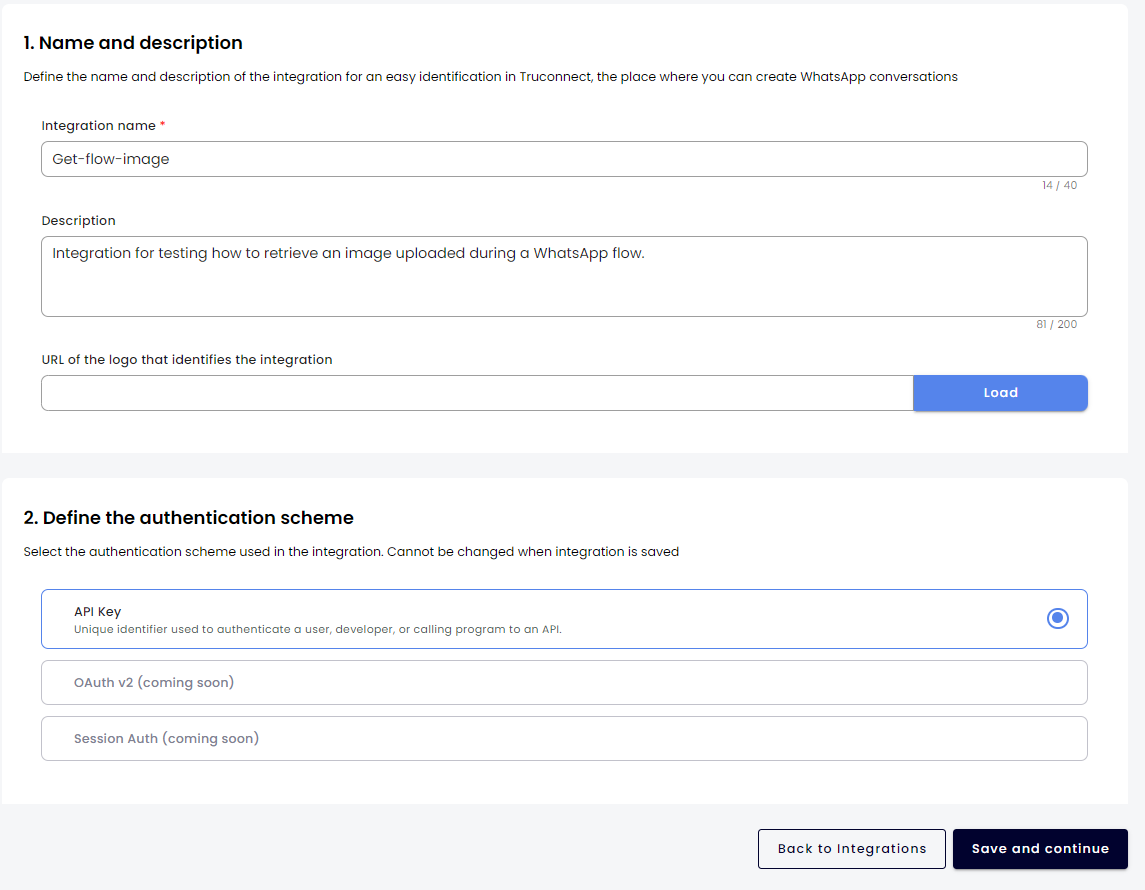
Fill in the Integration name (required) and optionally add a Description and a URL of the logo that identifies the integration.
Select the authentication scheme for the action you’ll create. Currently, only API key authentication is supported.
Click Save and continue to proceed with the authentication section.
Configuring authentication
Set up authentication to be used by the actions:
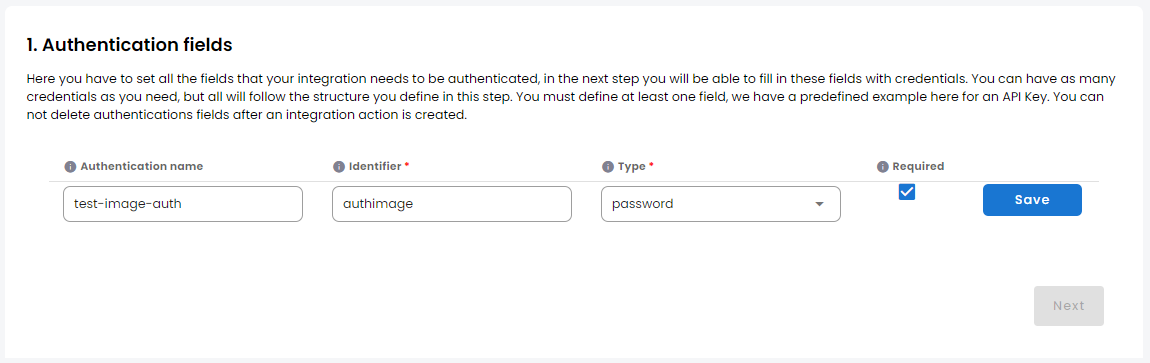
Adding Authentication fields: Define the fields required by your APIs for authentication:
Fill in the following fields:
Authentication name: (Optional). A custom name to easily recognize the authentication later.
Identifier: (Required). The Identifier will be used to reference an authentication field inside API requests. It should only contain lowercase letters, digits, and underscores (’_’). It must not start with a digit or underscore, nor end with an underscore.
Type: Choose text or password (passwords are end-to-end encrypted in our systems.).
Required: Mark this option to make the authentication field Required when creating a credential.
Review all the fields and click on the Save button.
Note: At this stage, you are not setting any actual API key; you are merely defining the fields that will contain those keys. Please do not enter any credentials at this point.
Click Next to proceed with the Configure a test request step.
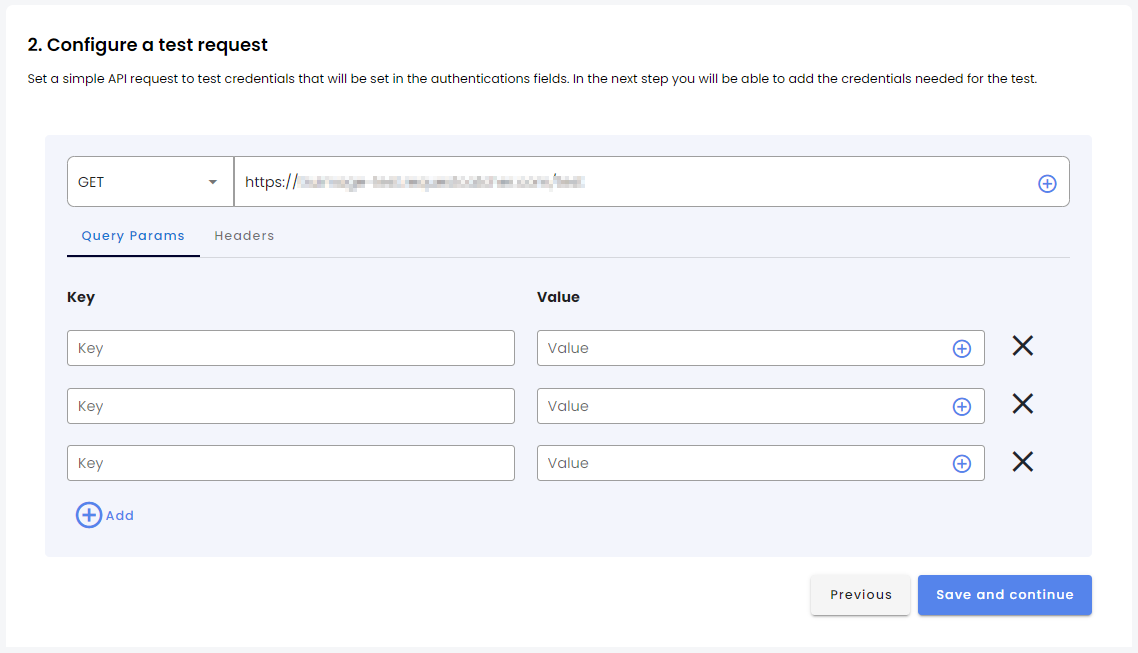
Configure a test request: Set up a simple request to test the credentials defined in the authentication fields. We recommend using a request that only retrieves information to avoid accidentally making changes to your system data during testing.
Fill in the test request:
Type of request: Select from: GET, POST, PUT, DELETE, OPTIONS, CONNECT, TRACE or PATCH. We recommend using a method that only retrieves information (e.g., GET) to avoid unintended modifications to your system data.
Endpoint: Enter your endpoint URL.
Query Params: If required, set the key-value pairs for the query parameters of your test request.
Headers: If required, enter the key-value pairs for the headers of your test request.
Click on Save and continue to proceed to set the Credentials.
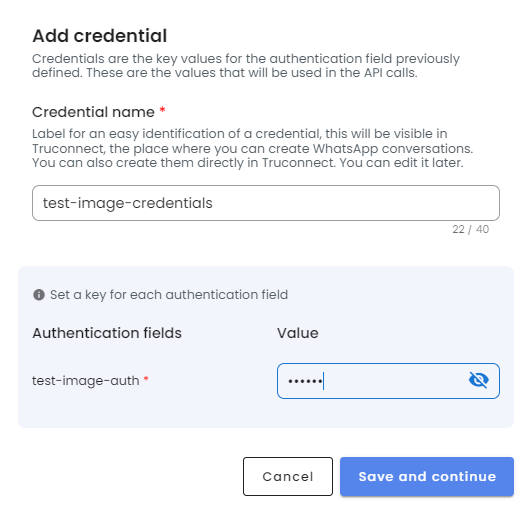
Setting Credentials and Testing: Click the Add credentials button to set the credential that will contain value for your authentication field. A modal will appear where you can set your new credential’s name and enter actual value for the authentication field.
The Credential name you set here will help you easily recognize it later when using it in Truora’s Flow builder.
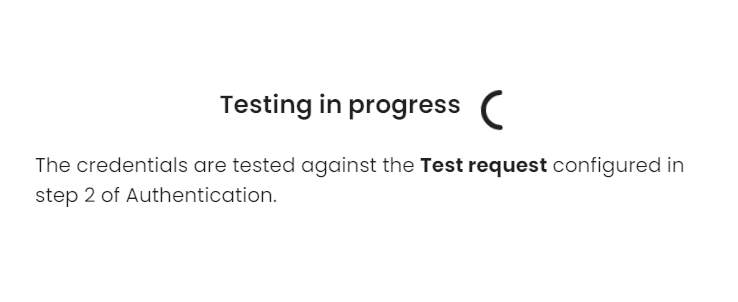
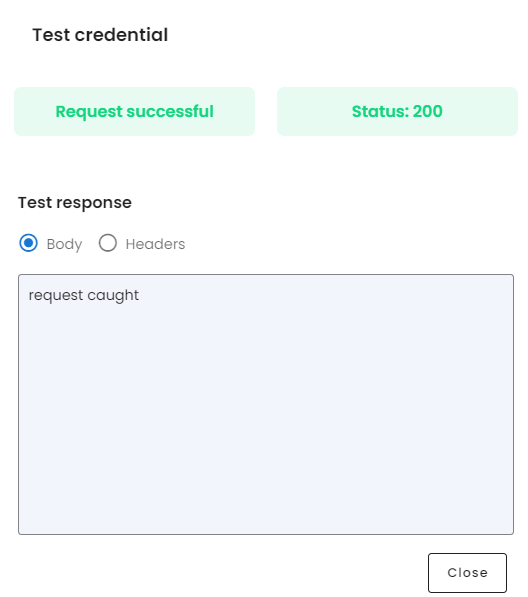
Click Save and continue. The system will test your credentials against the test request you configured in step 2. Ensure that the status code and the response body are correct:
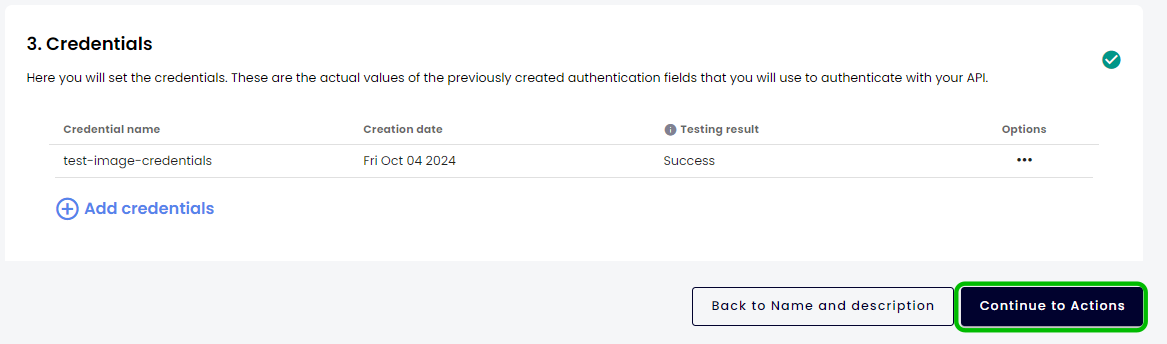
If everything is correctly set and tested, click Continue to Actions.
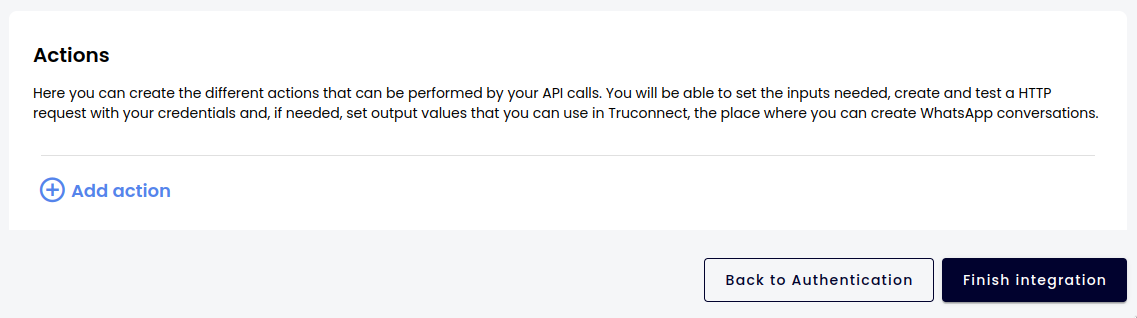
Creating the action for your integration
Now we’ll create an action named post_image_url to receive the user’s image and make a POST request to an endpoint with the image URL in the request’s Body.
Click the Add action button. A new view will appear with a sequence of steps:
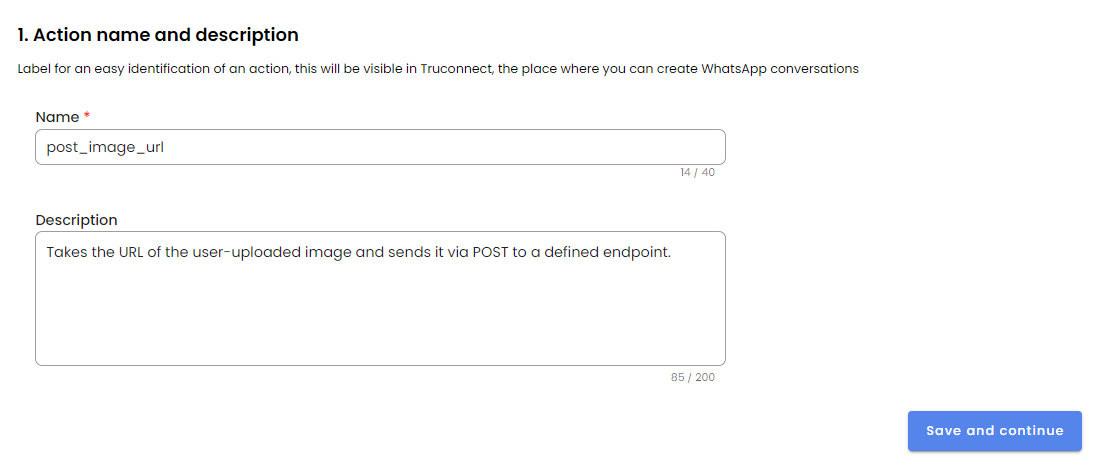
Create post_image_url action
Action name and description:
Name: (Required). Set a name to easily recognize the action when using Truora’s Flow builder. For our example, the action will be named post_image_url.
Description: (Optional). A description for easier recognition later.
Click Save and continue to proceed to define inputs.
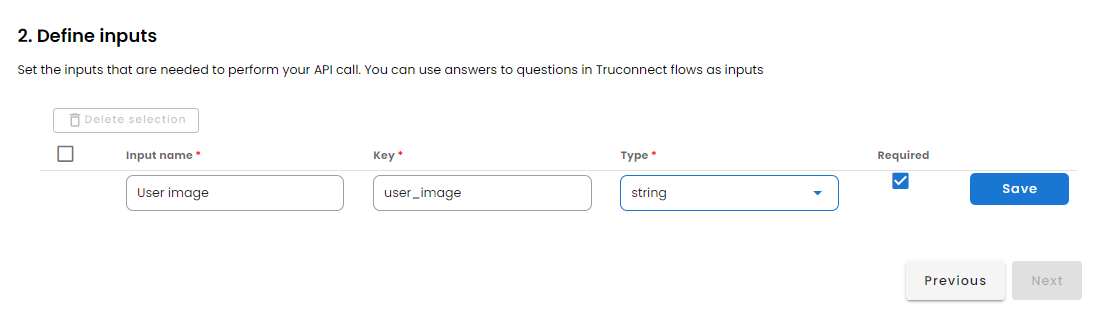
Define inputs: Define the required inputs for the request. For this example, the input will be the User Image provided by the user in the WhatsApp flow. We’ll mark it as Required.
Fill in the following fields:
Input name: (Required). Enter a custom name to easily recognize it in your WhatsApp flow.
Key: (Required). This is the actual key used to perform your request. Be sure to write this correctly. It should only contain lowercase letters, digits, and underscores (’_’), and must not start with a digit or underscore, nor end with an underscore.
Type: (Required). Select the type of your input. For our use case we’ll select string.
Required: Mark this to make the input field required when using the action.
Review all the fields and click on the Save button.
Click Next to proceed to Configure your API Request.
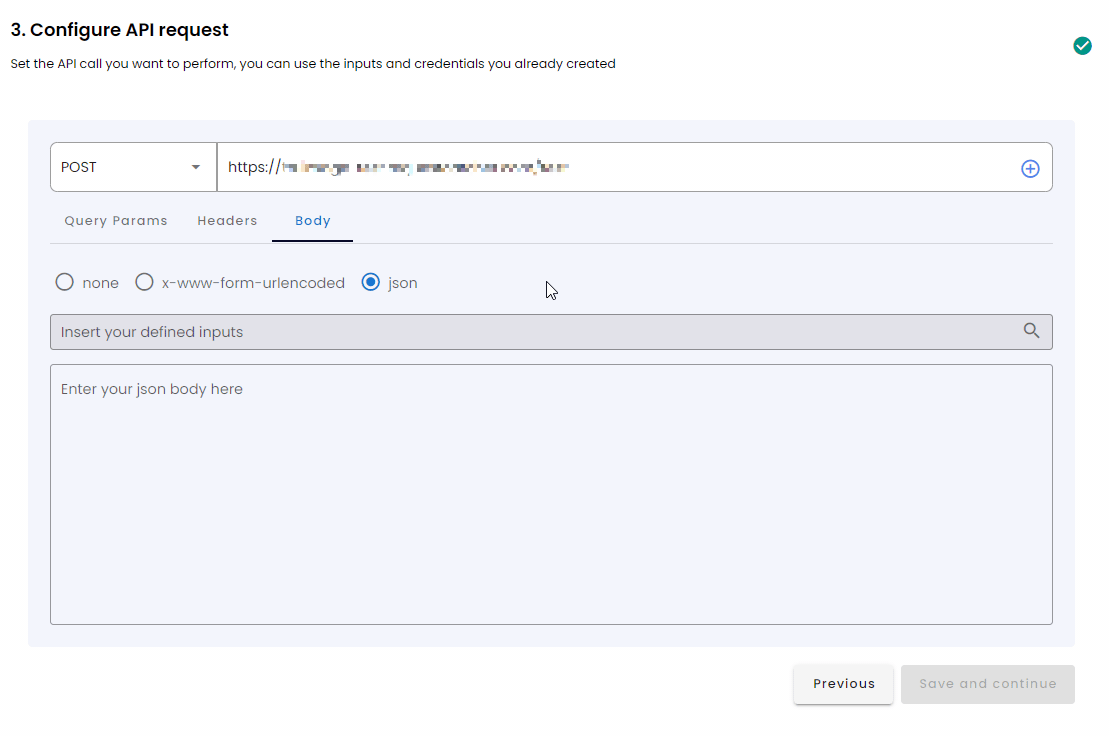
Configure API Request: Fill in the required fields for the API request.
Set request:
Type of request: We’ll select POST for this specific use case.
Endpoint: Enter the endpoint URL.
Query Params: If required, set the key-value pairs for the query parameters of your request (none are used in this example).
Body: For this specific use case, select Body json type and find the previously created input to configure the body to include the user image. For example:
Headers: Enter the required key-value pairs for the headers of your request (none are used in this example).
Once you’ve configured your API request, click Save and continue to proceed to Test your API Request.
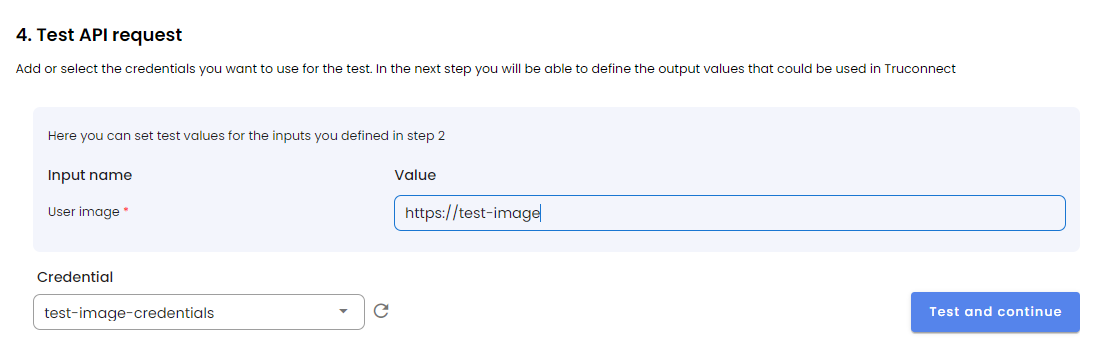
Test API request: Here you can test the created request by setting a test value for the input defined earlier and selecting the credential. We recommend using a credential pointing to a test account or user.
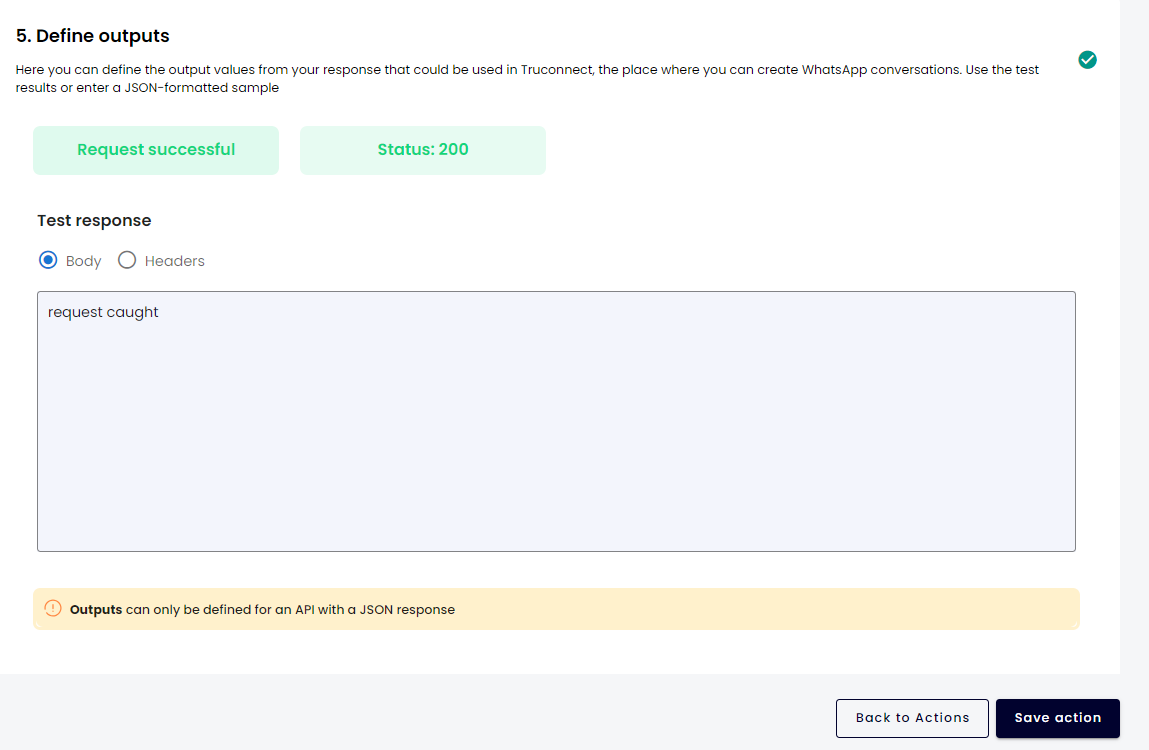
Click Test and continue and review the response:
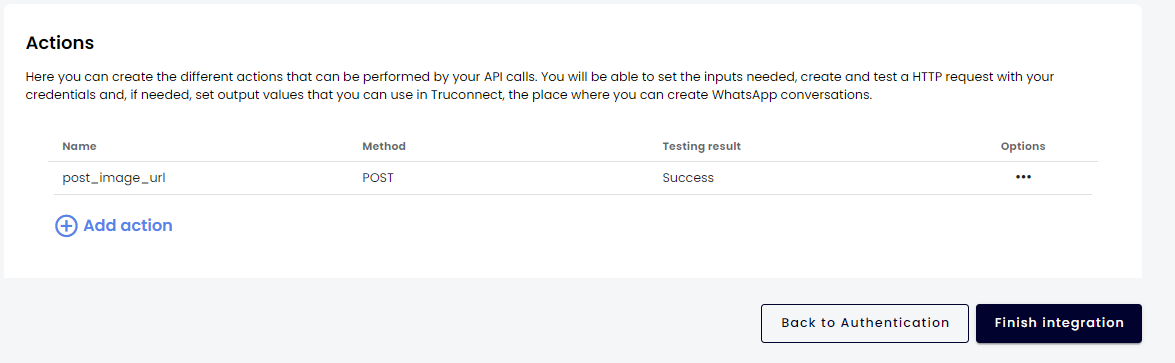
Click on Save action to be redirected to the initial actions section:
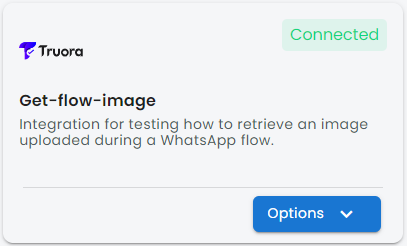
Click on Finish integration to complete the process. Your new integration should now appear in the general integrations view:
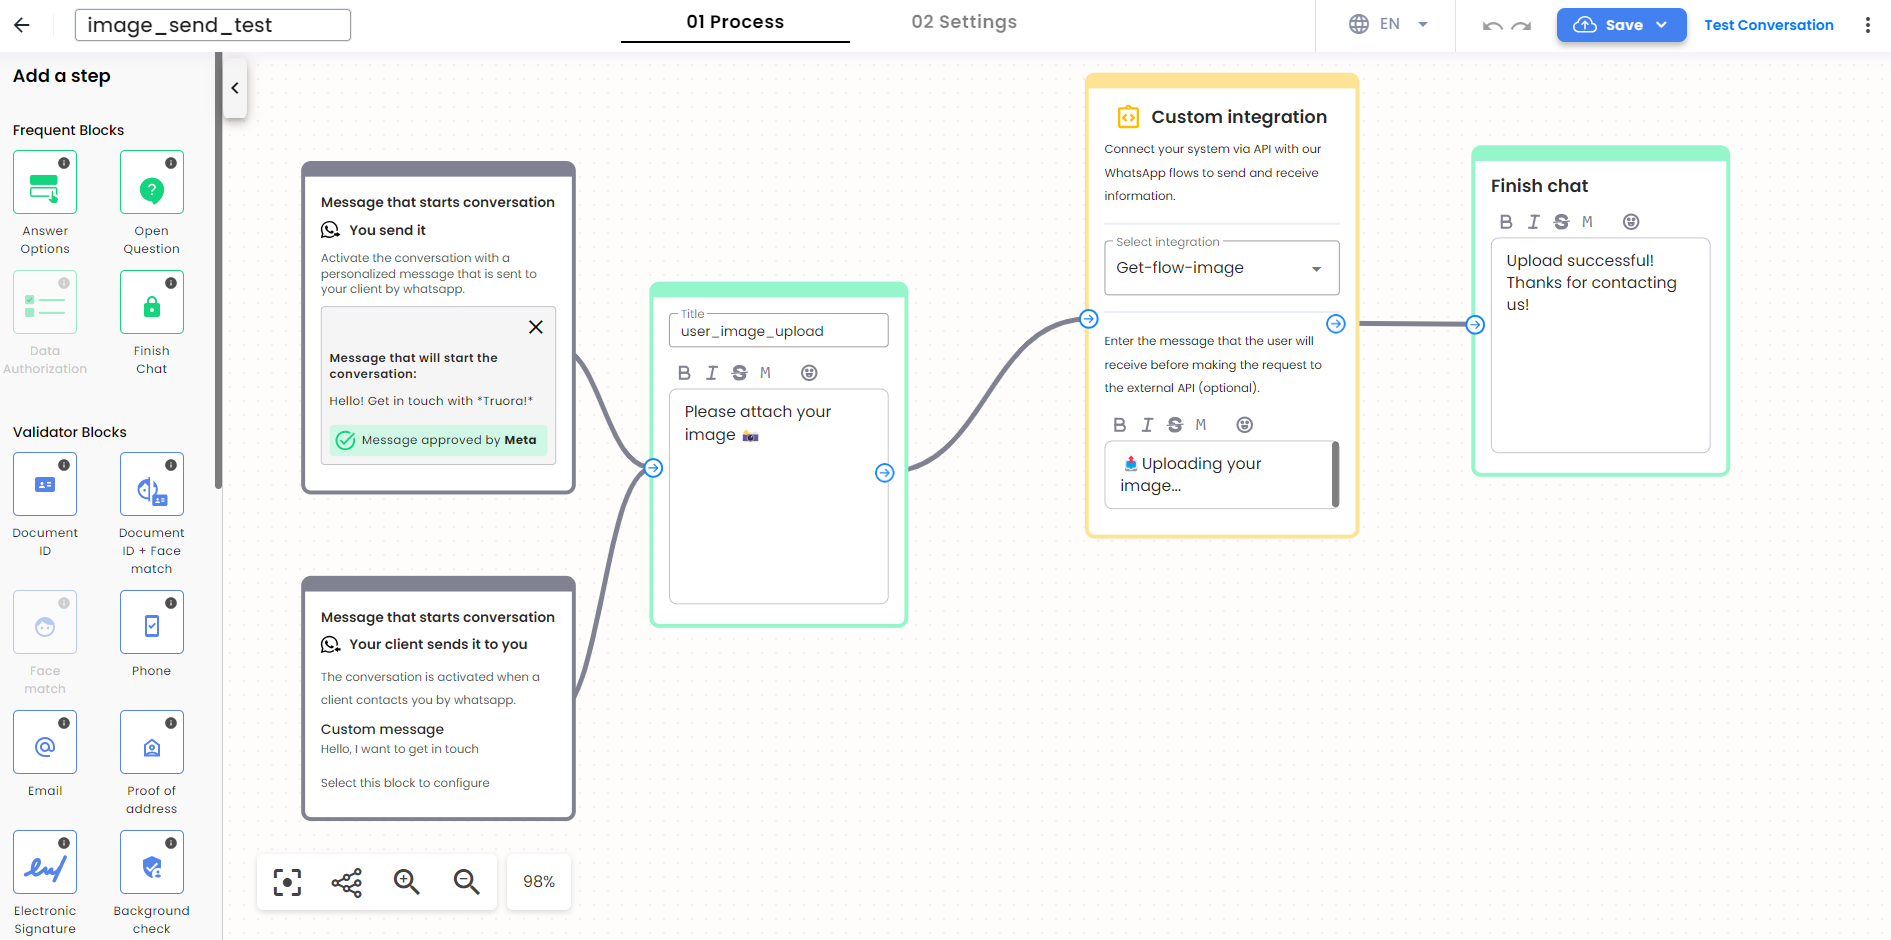
Configure the Integration in your Flow
For this example, configure a simple flow like the one shown below:
In the Open question box Properties:
Title: Enter a recognizable title. A variable with this title will store the user’s answer, which, in this case, is the uploaded image’s URL.
Message: The message requesting the image to the user.
Expected response type: Select Image as the expected response type.
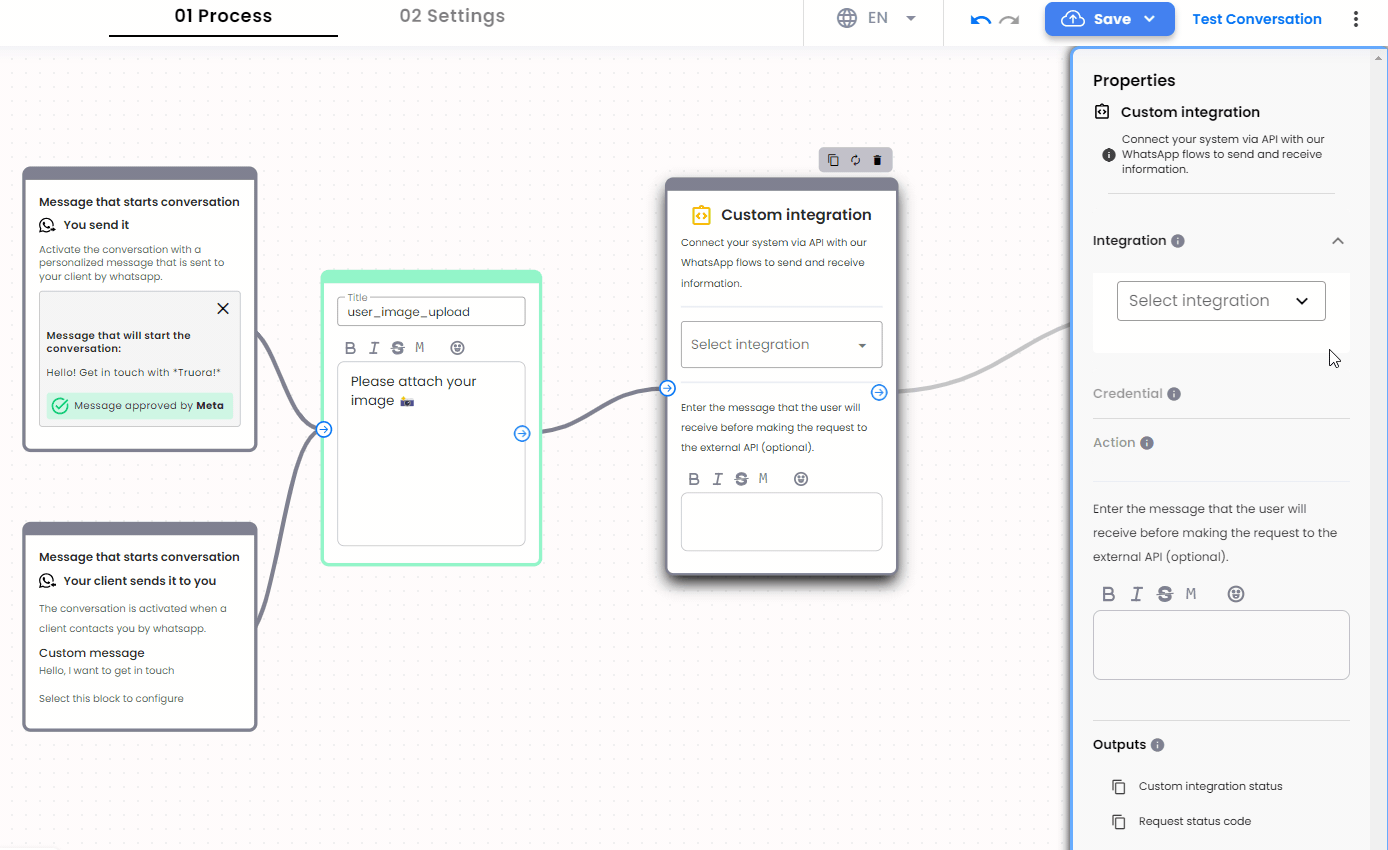
In the Custom integration box Properties:
Integration: Select your created integration.
Credential: Select the credential created in your integration.
Action: Select the Action created in your integration.
Inputs: Click Add Inputs and select the Variable associated with the Open Question Box.
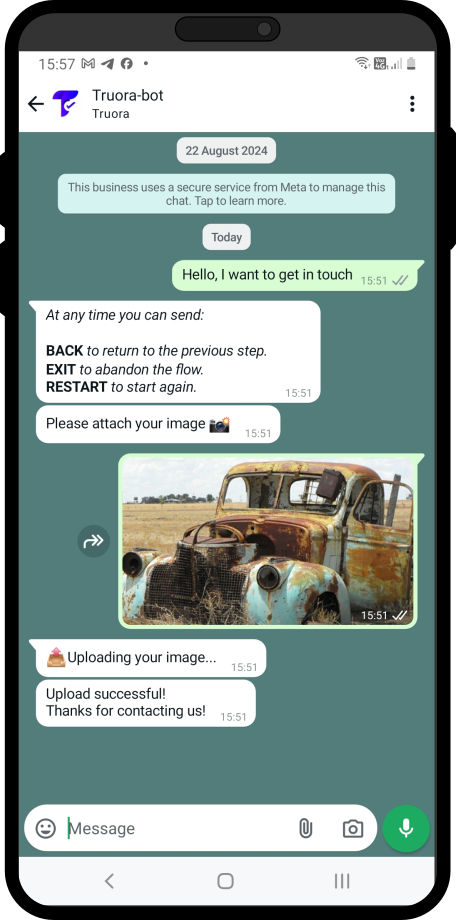
Testing the Completed flow
To test the flow:
Save and publish the flow.
Click on Test Conversation.
Select Your user sends it and click Continue.
Review the Chatbot phone and Message that triggers the conversation, then click Continue.
Test your conversation:
Click on Open conversation to directly open and test the WhatsApp conversation with the Chatbot.
Or click Copy link and use it to test the conversation on any device.
Example Interaction with the Chatbot:
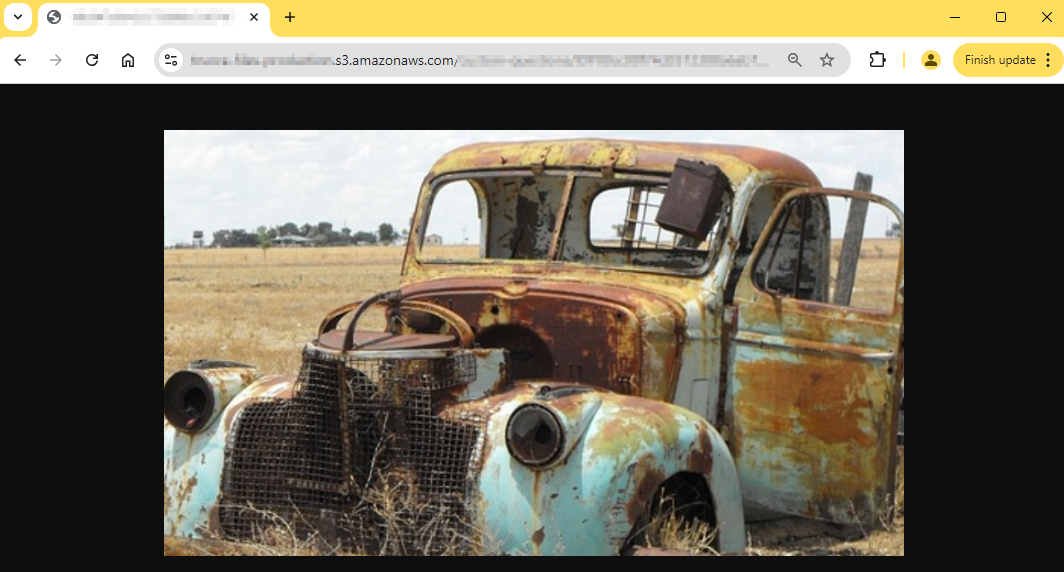
Example Caught Request after Interaction:
Once the user uploads the image during the WhatsApp flow, the endpoint receives a POST request that should look like the one configured during the Custom Integration: