Conversations and Agents Management
The Conversations section in the Truora platform is the control center where your agents can directly interact with customers, managing messages and resolving inquiries in real-time.
Connecting with Agents
Activate Agent Conversations
- Go to the Conversations section.
- Click on “Click here to activate Truora agent conversations.”

Flow Builder Configuration
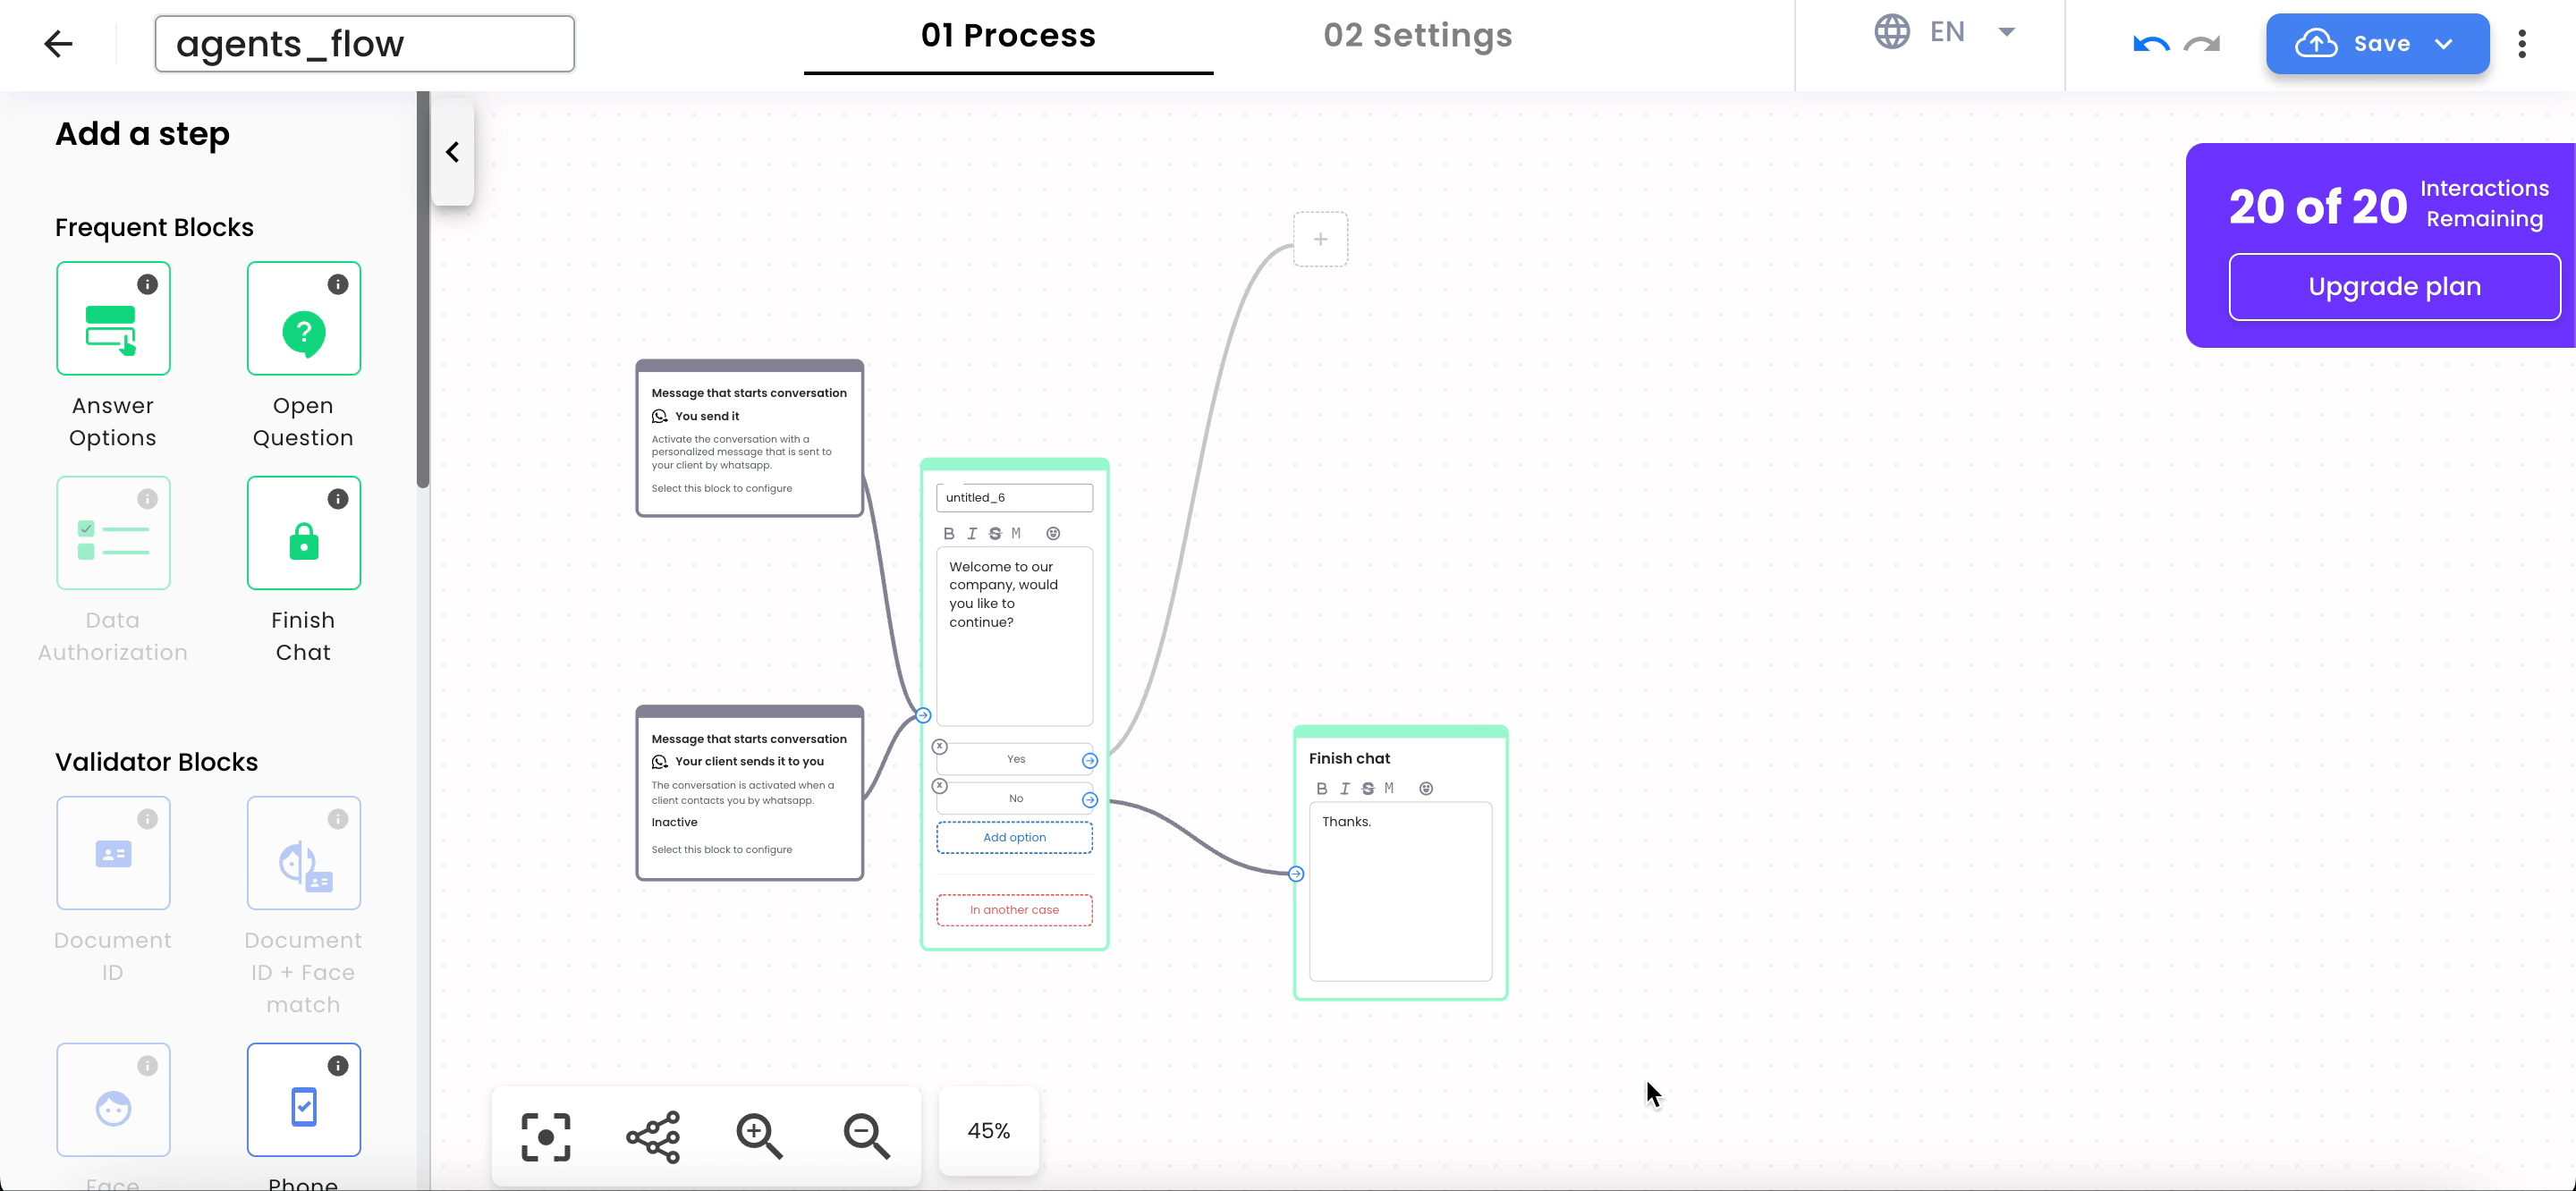
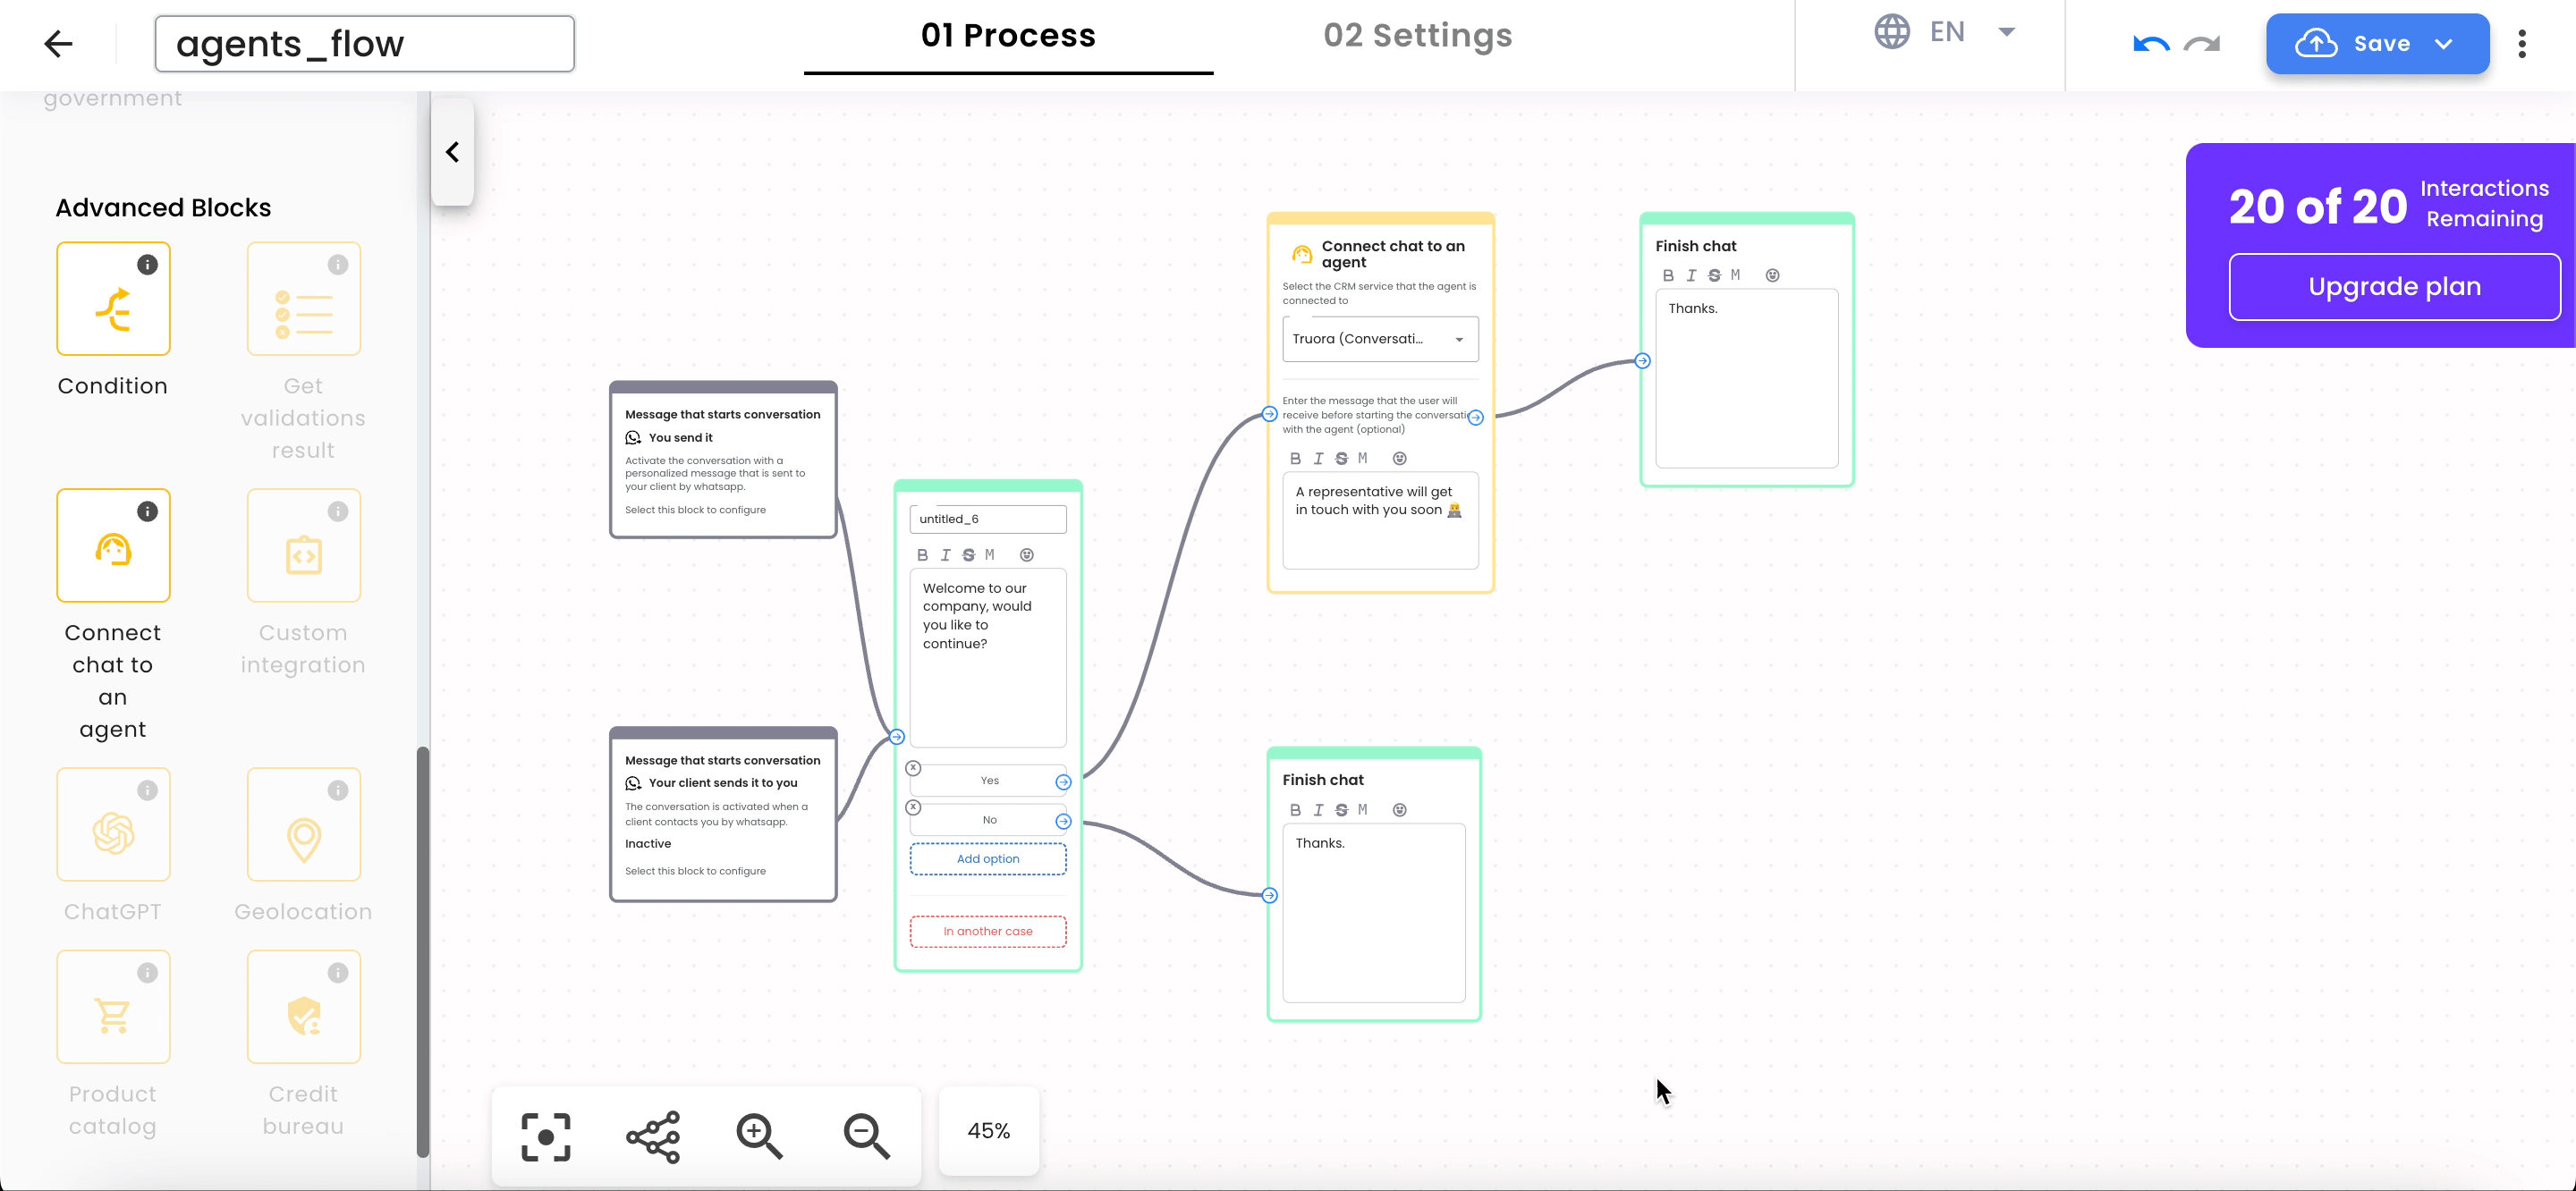
- In the Flow Builder, select the Advanced Blocks option.
- Find the “Connect a chat to an agent” block and add it to your flow as needed.
- In the block, you will find a section that prompts you to select the CMR service through which the agent will connect.
Please select the one that says “Truora (conversations)”.
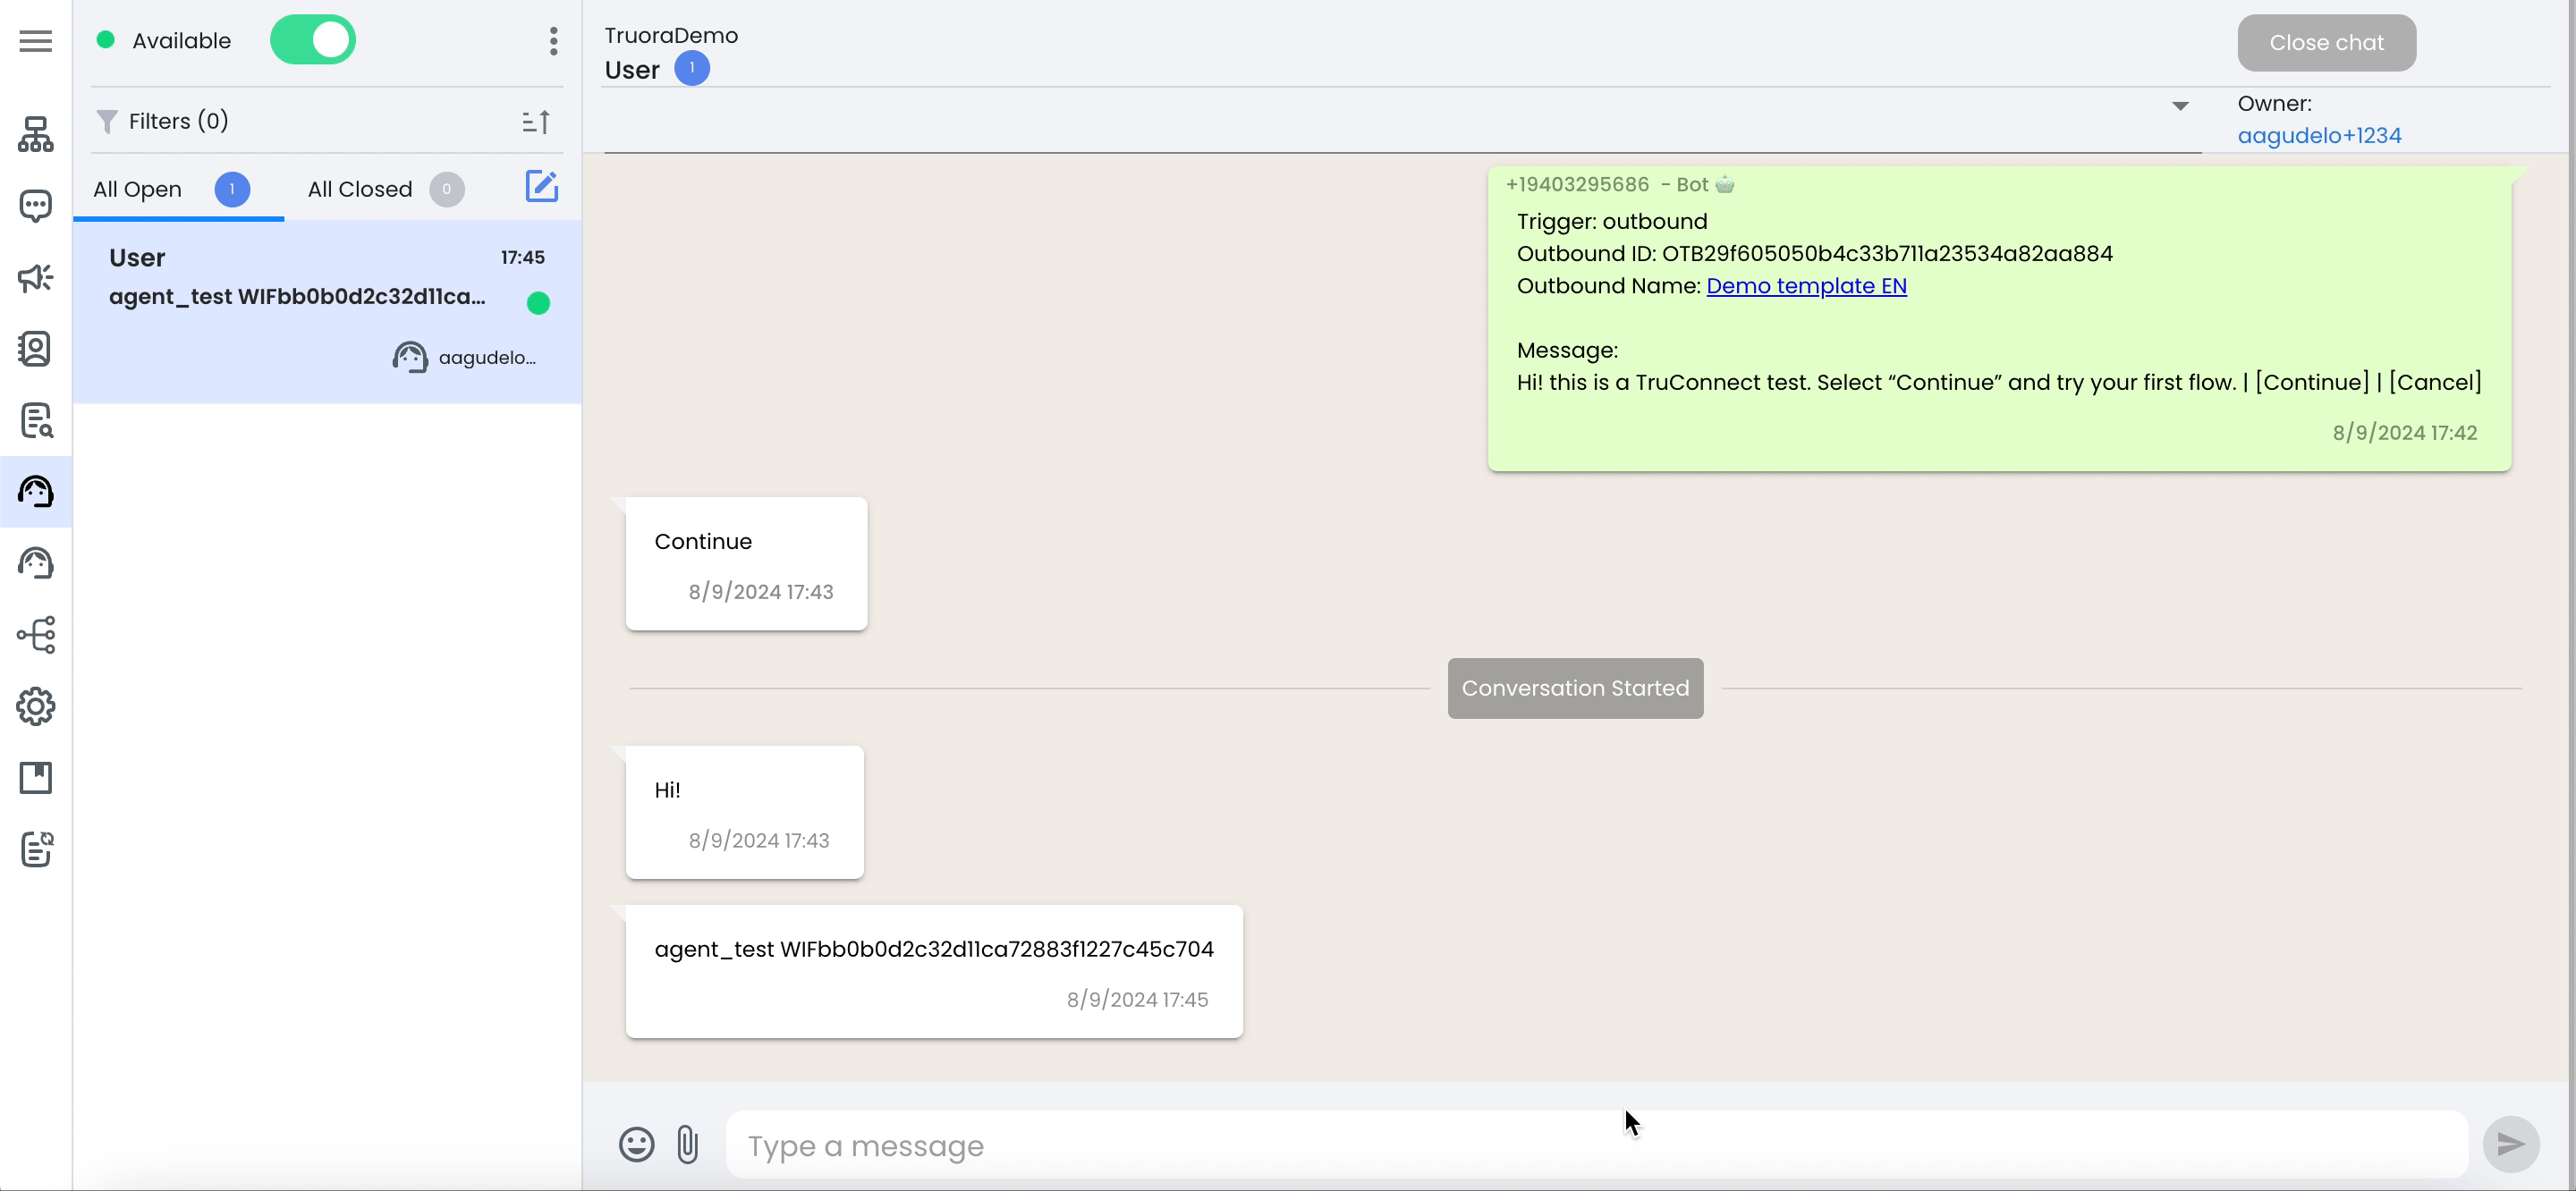
Managing Conversations in the Agent Suite
Once a customer selects the route that connects with an agent, a conversation will open in the agent’s suite. Here, the agent can:
-
Have a more human interaction and resolve specific issues.
-
View all previous responses, as the flow’s information is stored in the chat.
-
Closing Conversations:
- Remember to close conversations once they are finished by using the option in the top right corner.
- Conversations will automatically close 24 hours after they start, as per Meta’s policy,
or earlier depending on the expiration time defined in the flow.
Agent Groups
Chat Distribution
The platform allows incoming chats to be distributed among different agent groups, facilitating message management according to the company’s areas.
Agent Configuration
- Ensure your agents have access to the Truora platform.
- From the main screen, select “Members” and click the blue “+ Add” button.
- Enter your agents’ information and select “agent_role” in the “role” field.
If you don’t see this option, please contact your sales representative or our support line.
Creating Agent Groups
- Go to Customer Engagement and select Settings in the left menu.
- Click on Conversations and then on the blue “+ New Group” button.
- Assign a name to the group and add the corresponding agents.
- To edit or delete groups, use the buttons to the right of the created group.

Assigning Conversations
- In the Flow Builder, in the agent block, select the group to which the incoming conversation will be assigned.
- Click on the agent block to open the menu and select “Assign the conversation to a responsible or group.”
- Agent Rotation Types:
- Available users in the group: Agents with the “available” status will receive messages.
- All users in the group: Conversations will be assigned in rotation among the agents in that group, regardless of availability.
- Specific user: Assign chats to a single agent.
- No owner: Conversations will need to be manually assigned.
Agent Schedules
Notification Settings
In Conversations, next to the available button, there’s a three-dot menu with notification options.
- Desktop notifications: Displays a message when a new message arrives. This option can be turned on or off.
- Play sound: Plays a sound when a new message arrives. This option is also configurable.
Time-Based Conditions
- In conditional blocks, set conditions based on the day and time the user reaches that point in the flow.
- If the conditions are met, the flow continues as defined; otherwise, it is redirected to another box.