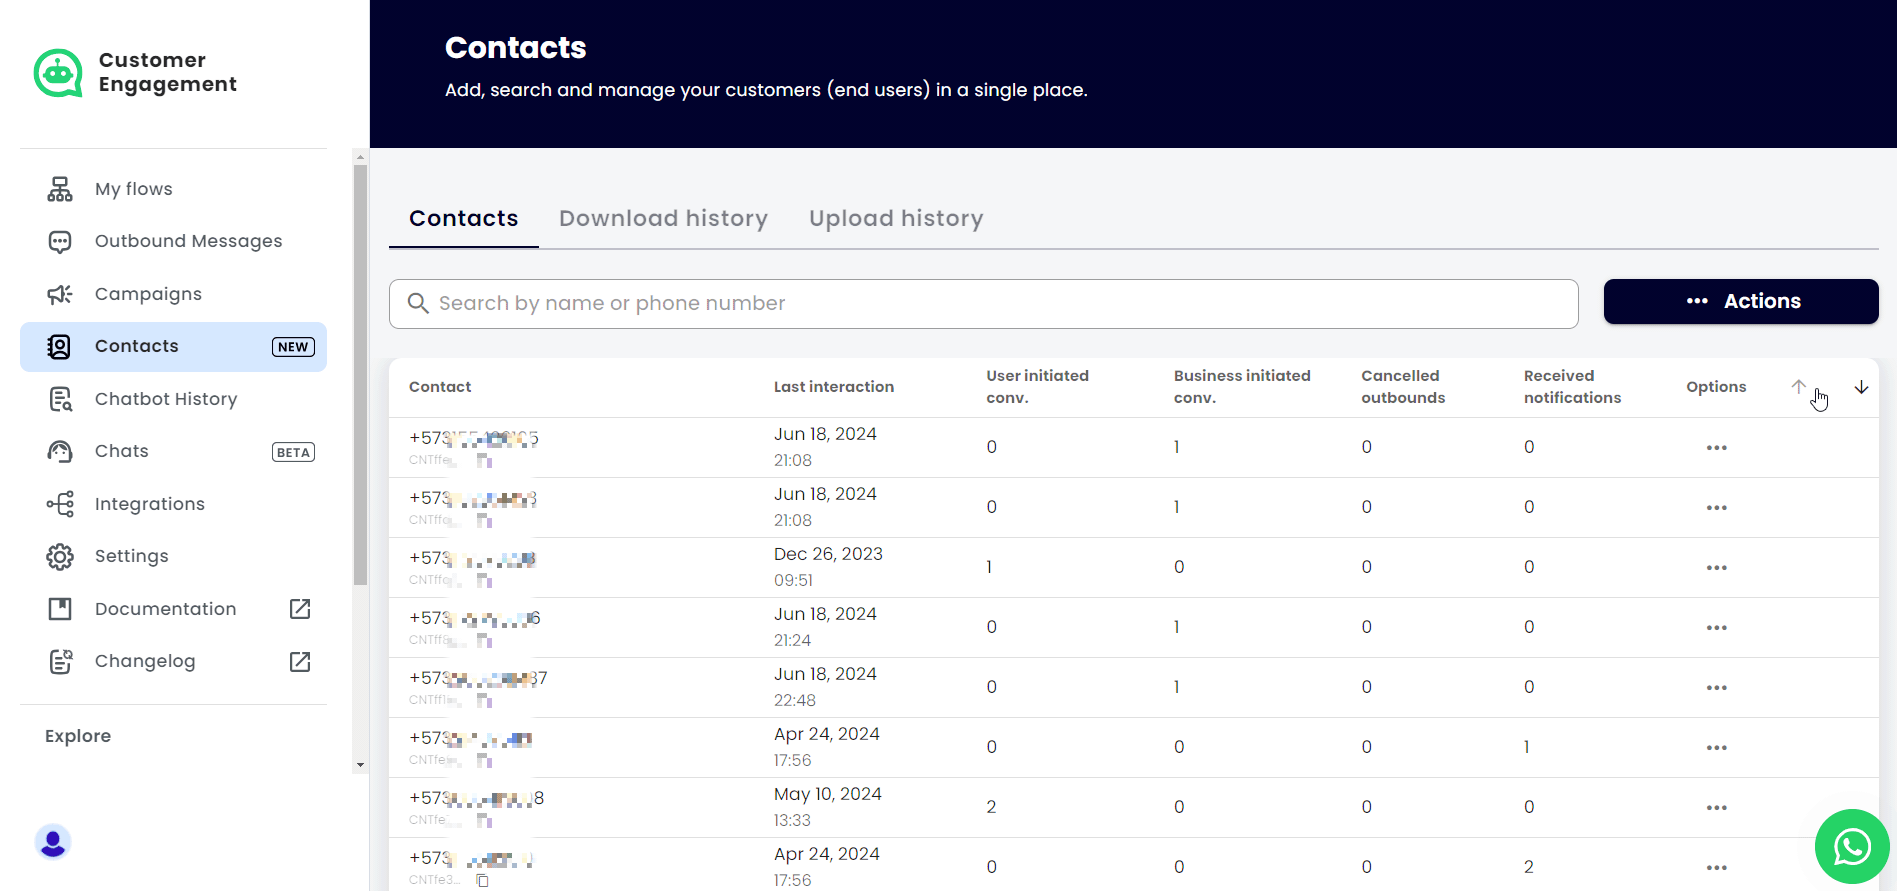
Contacts Management
The Contacts section in the Truora platform allows you to manage all customer interactions through WhatsApp. Here, you can view, edit, import, and download contacts, as well as track key statistics and manage their information. This guide will walk you through how to effectively use the Contacts section to organize and maintain your customer data.
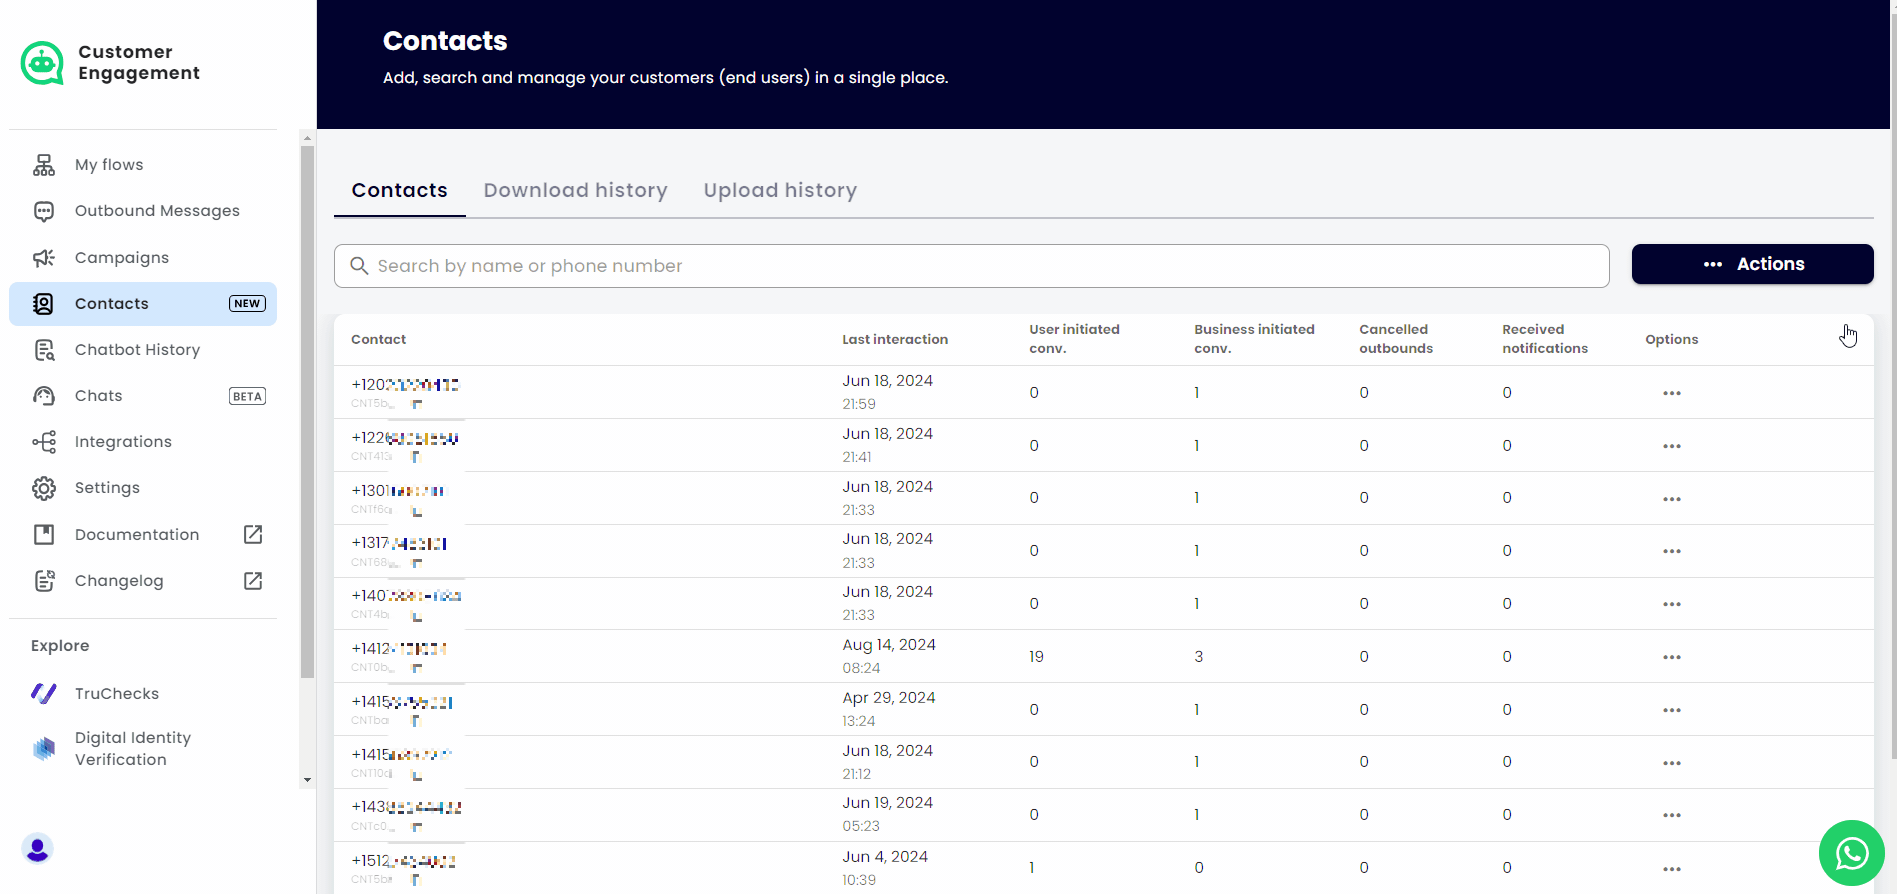
View Contacts details
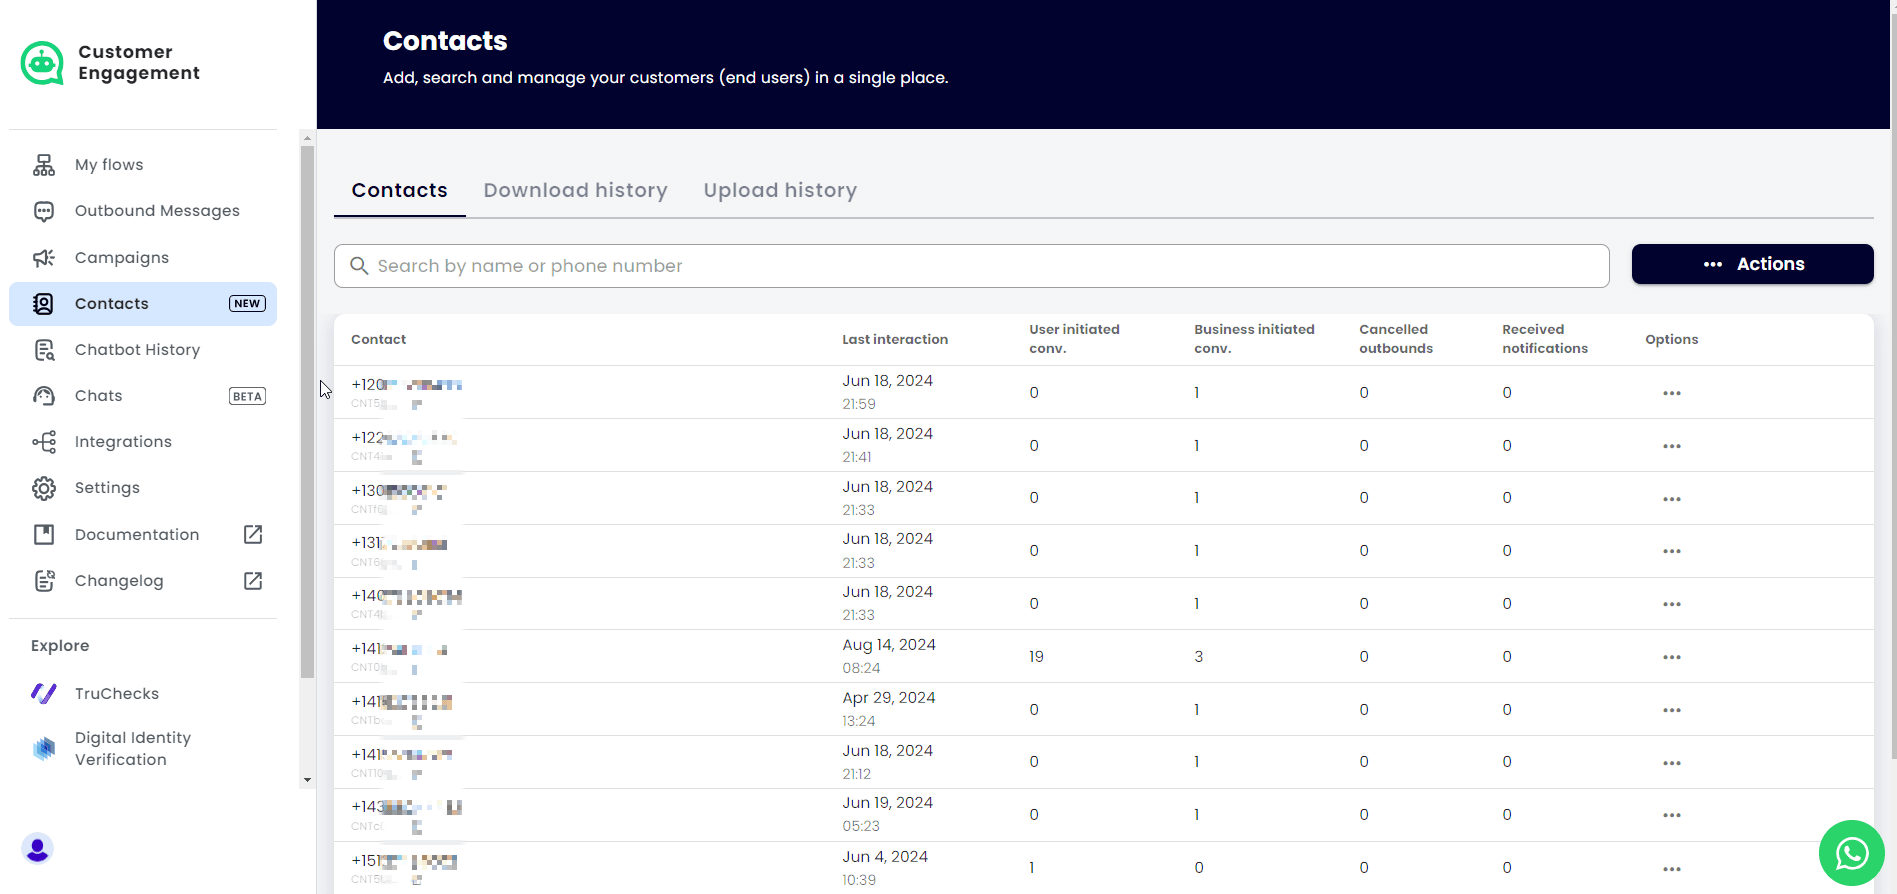
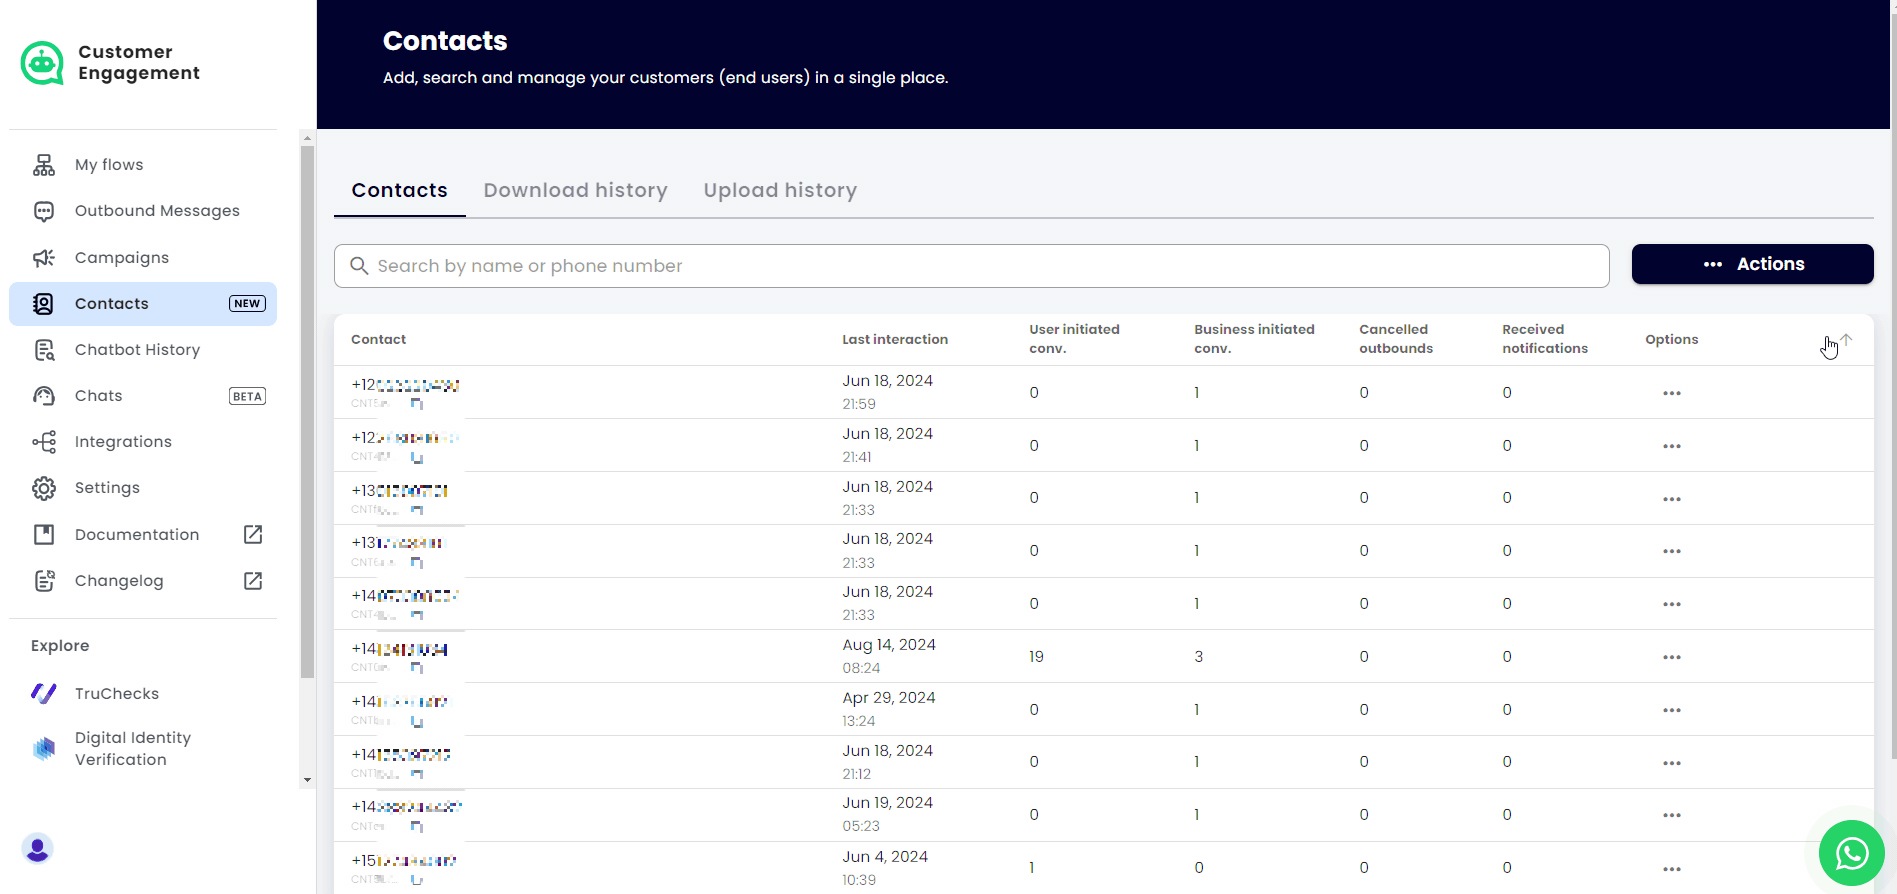
Contacts are displayed in the platform, whether they arrive via inbound messages, are manually created, or imported in bulk. The platform automatically creates and updates contacts as they interact with WhatsApp bots, maintaining interaction counts from the moment the contact is created.
To view contact details, navigate to the Contacts section.
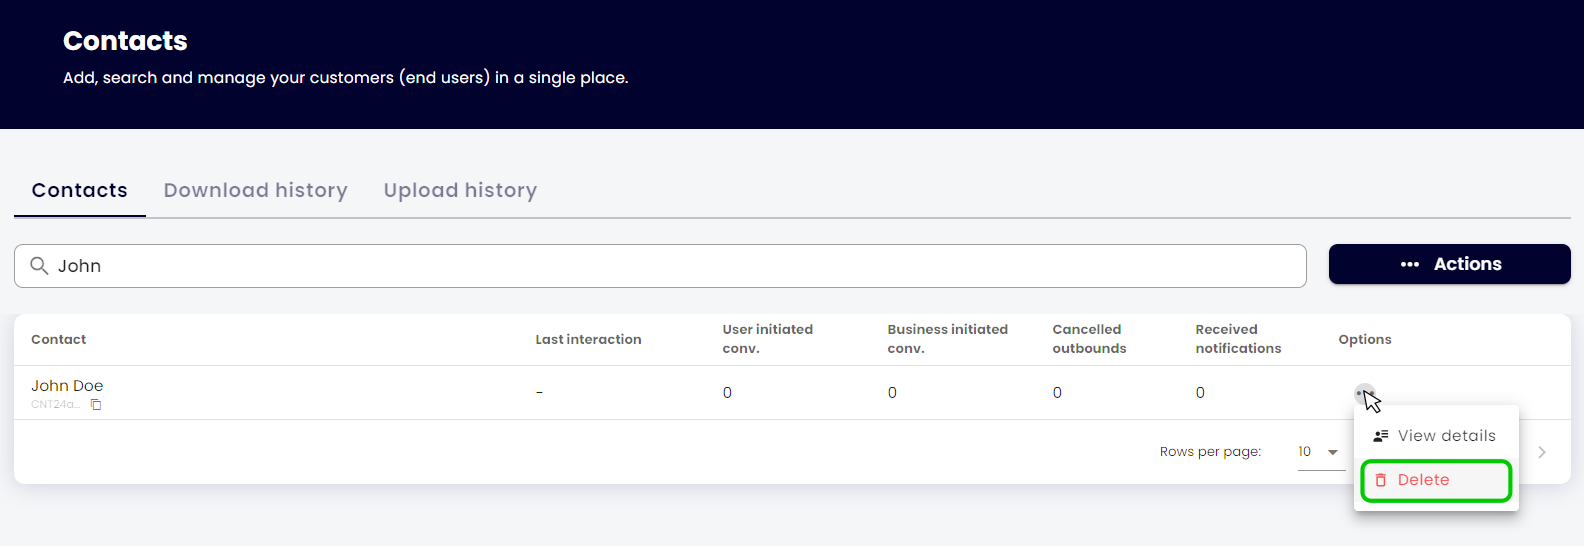
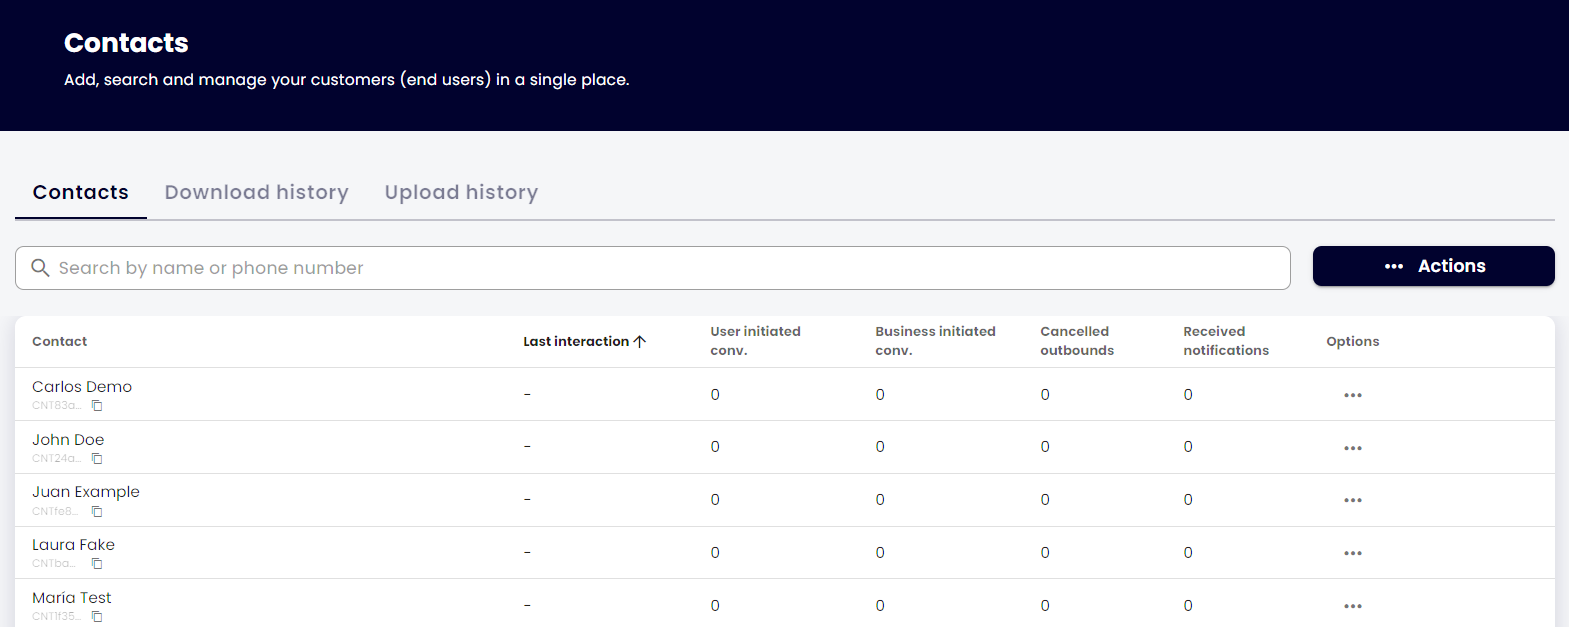
The contacts information is displayed in a table with the following columns:
- Contact: The contact name or phone number (always editable).*
- Last interaction: The date and time of the last interaction with this contact.**
- User initiated conv.: The number of times this contact initiated the conversation ( Inbound message).**
- Business initiated conv.: The number of times your company initiated the conversation with this contact ( Outbound message).**
- Cancelled outbounds: The number of cancelled interactions when your company initiated the conversation.**
- Received notifications: The number of single notification messages received by the contact.**
- Options: Here, you can View details of the contact or Delete the contact.
Notes:
* Contacts that arrive through inbound messages will typically have their phone number listed as their name if it’s their first interaction or if the name has never been edited.
** You can sort the information in descending or ascending order by clicking on the column header.
Create, Edit and Delete single Contacts
Create Contact
-
In the Contacts section, click on Actions > +Create contact.
-
Fill in the following information:
- Phone number (Required): Select the country (country code) and enter the phone number.
- Name (Required)
- Email (Optional)
- Add custom property: If you have previously created custom properties, click here to add and fill in the desired property.*
* Note: You will learn more about contact properties further in this guide.
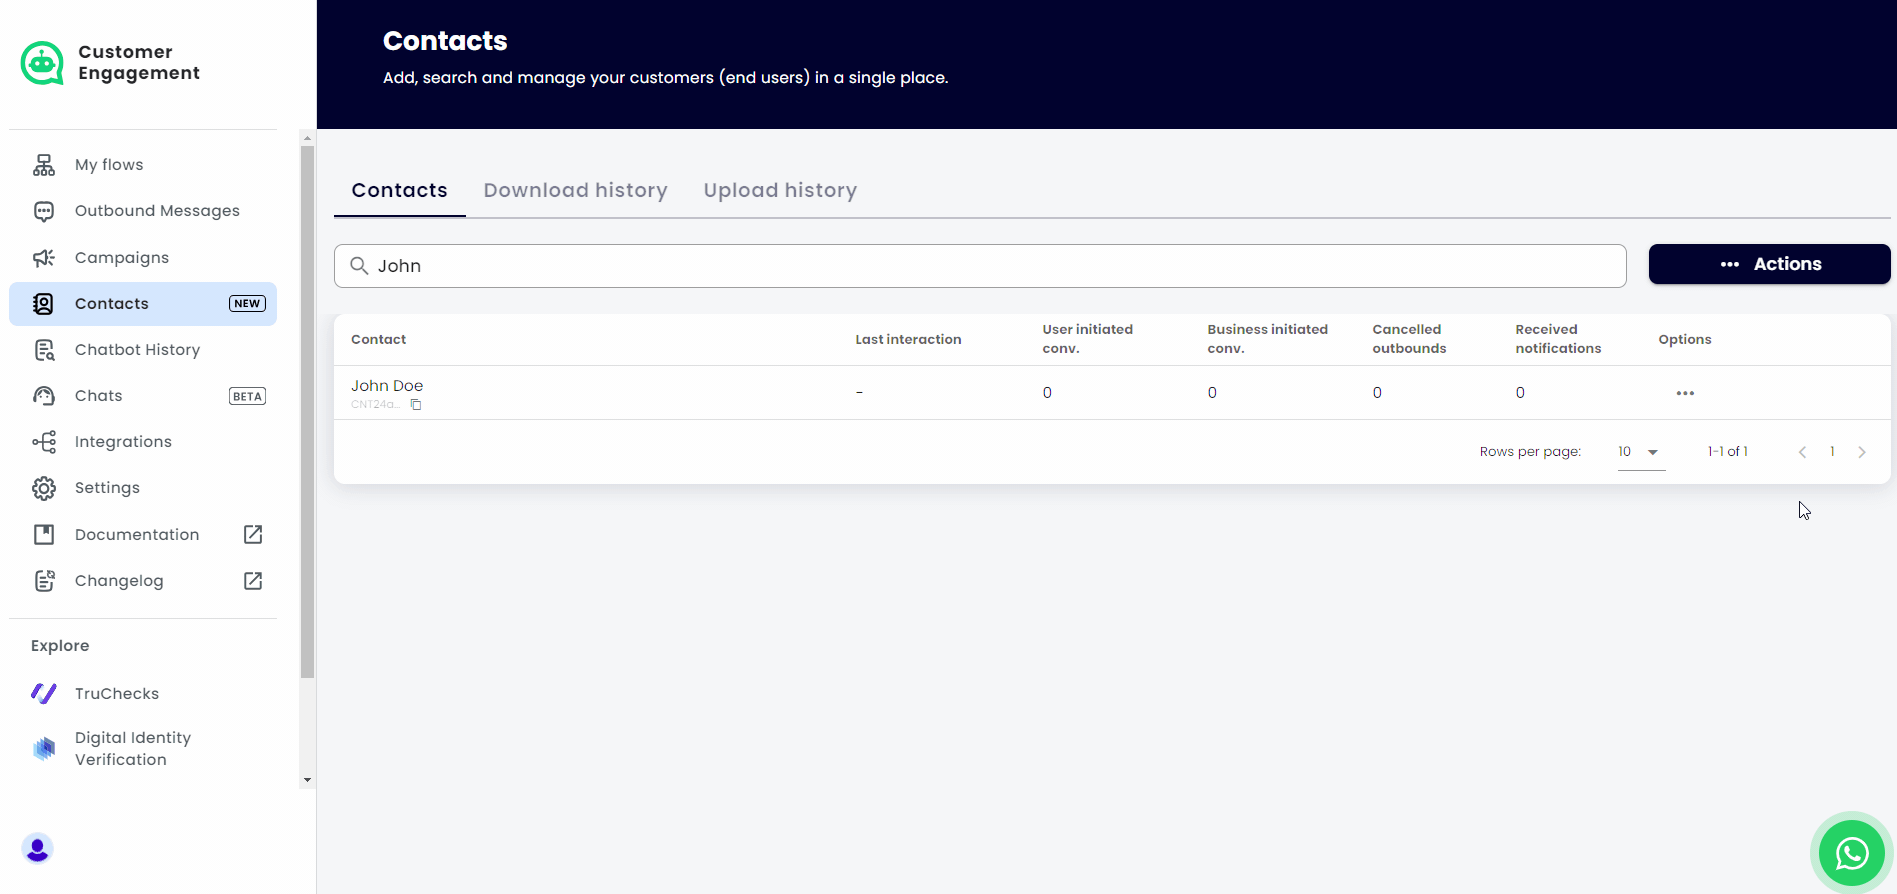
Edit a Contact
- In the Contacts section, click on the contact or click the three dots Options > View details.
- Click Edit to modify the Name, Email and any custom property that you have previously created.*
* Note: You will learn more about contact properties further in this guide.
Delete a Contact
In the Contacts section, click on the three dots Options > Delete
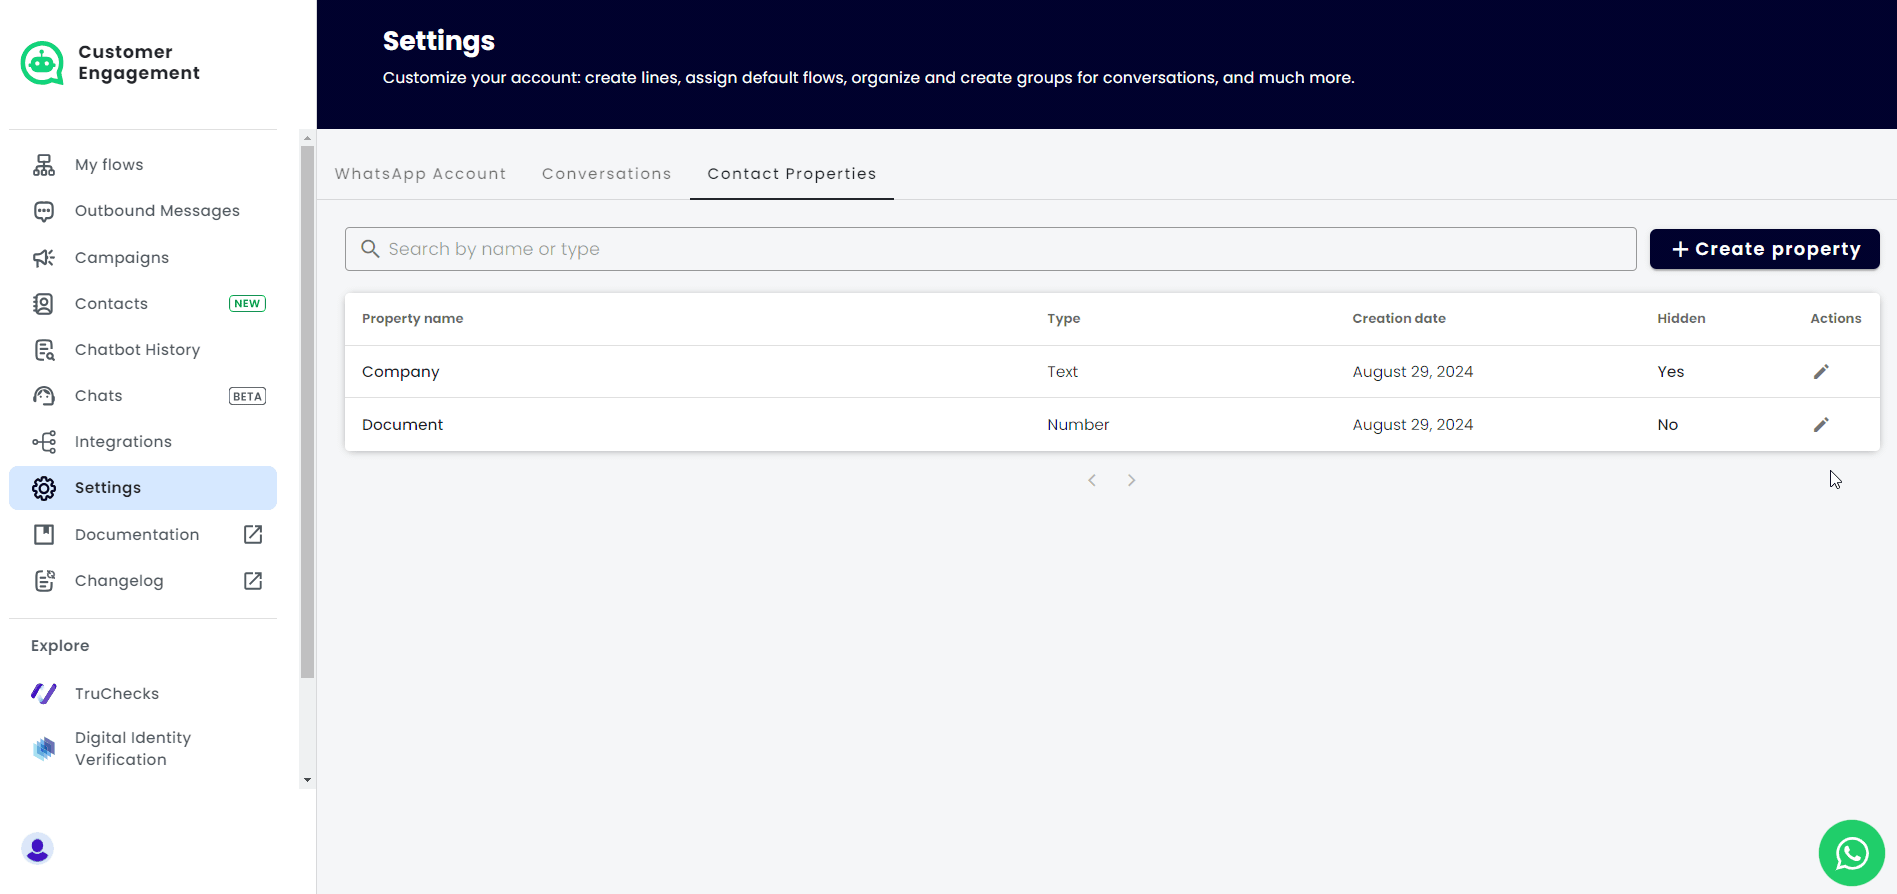
Contact Properties
Contact Properties are custom fields that allow you to track specific details relevant to your business needs, such as customer details or purchase status. You can create and manage these properties to better organize and leverage your contact information.
Create and Edit Properties
Create Property
- Go to Settings > Contact Properties.
- Click on +Create Property and fill the required fields:
- Name: Name of your custom property.
- Type: The type of data expected. Choose from Text, Number, True/False, Date, Email, Value list.
- Hidden: Check this box to hide the property. Hidden properties won’t appear when viewing a contact’s details.
- Click Create Property. Your new property should now be listed in the Contact Properties tile.
Edit Property
- In Settings > Contact Properties, click Edit next to the property you want to modify.
- Update Name or Hidden status as needed.
- Click Save. Your property should be updated in the Contact Properties list.
Import Contacts
You can import your contacts in bulk using an Excel (.xlsx) file that contains the required properties for the contacts to be imported.
Key Details
- Duplicate Contacts: If a contact already exists with the same number, it will not be overwritten; the system will simply move to the next row in the file. The results report will provide immediate feedback on these cases.
- Required Format: The import requires both a phone number (with country code) and a name.
- Custom Properties: These are optional. If used, ensure that each property has a value in every row. The report will highlight rows missing values for these properties.
Excel File Requirements
- Column 1: Phone number (include country code) (required).
- Column 2: Name (required).
- Additional columns: Email and Custom properties (optional).
Import Contacts process
- In the Contacts section, click on Actions > Import contacts.
- In the modal window, you can download a template with the required columns if you don’t have your Excel file ready yet.
- Click on Select file and choose your prepared file.
- Assign columns to the contact properties if needed.
- Click on Import to start the process.
- While the import is In progress you can click Options to Stop loading contacts if needed.
- When the process is Finished you can click Options to Download results of the process, which will generate the Contact Import Report Excel (.xlsx) file.
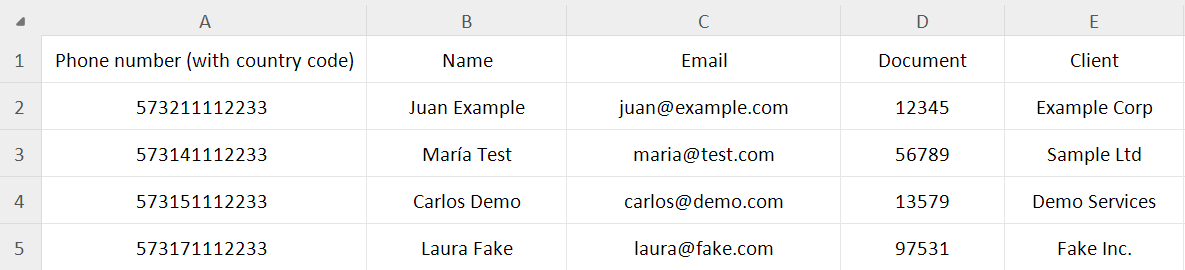
For this guide, we uploaded the following file:
You can now view the imported contacts in your list. This may take a few minutes, so please be patient:
Download Contacts
The Download contacts feature generates a report with contact history in CSV format. You can choose to download all contacts or limit the download to contacts created within a specified date range, up to the last two months.
- In the Contacts section, click on Actions > Download contacts.
- Date range (optional): Select a date range to filter contacts by their first interaction or creation date.
- Language: Choose from English, Spanish, or Portuguese.
Here is an example of a downloaded contact history (click to enlarge):

A few key points from this example report:
- The same statistics from the Contact details view are included in this file.
- Many contacts have their Phone number as their Name. This might indicate that these contacts were not manually created and have not been edited yet.
- The contact created in this guide has the Name, Phone number and Client fields populated as we created it in this guide.
- The contacts imported in this guide have their Name, Phone number, Client and Document fields populated as we imported the file in this guide.
- The two custom Contact Properties created and edited in this guide appear in the last two columns of the report.
Download history tile
In the Contacts section, click on the Download history tile to view a list of your past downloads. The list displays:
- Creation date: The date and time the download file was created.
- From and To: The time range selected for the report.
- Options: The download button to download the report again.

Using Contact Properties in your Flows
You must be familiar with WhatsApp flows to better understand this section. If not, please visit the Create WhatsApp flows guide to learn more.
When creating or editing your WhatsApp flows, you can save user responses to flow questions as contact properties. If required, these responses can overwrite property values each time a user goes through the flow, allowing for dynamic data management.
Keep in mind:
- Only properties matching the block’s Expected response type will be listed in the block configuration.
- The Answer Options block can save the response as a text or list property. However, for a list property, the response options must exactly match the predefined options; otherwise, the response won’t be saved.
Example
In a previous section of this guide, we created two Contact Properties of different types, which we’ll use in this example:
- Client of type Text
- Document of type Number
To save a user response as a contact property:
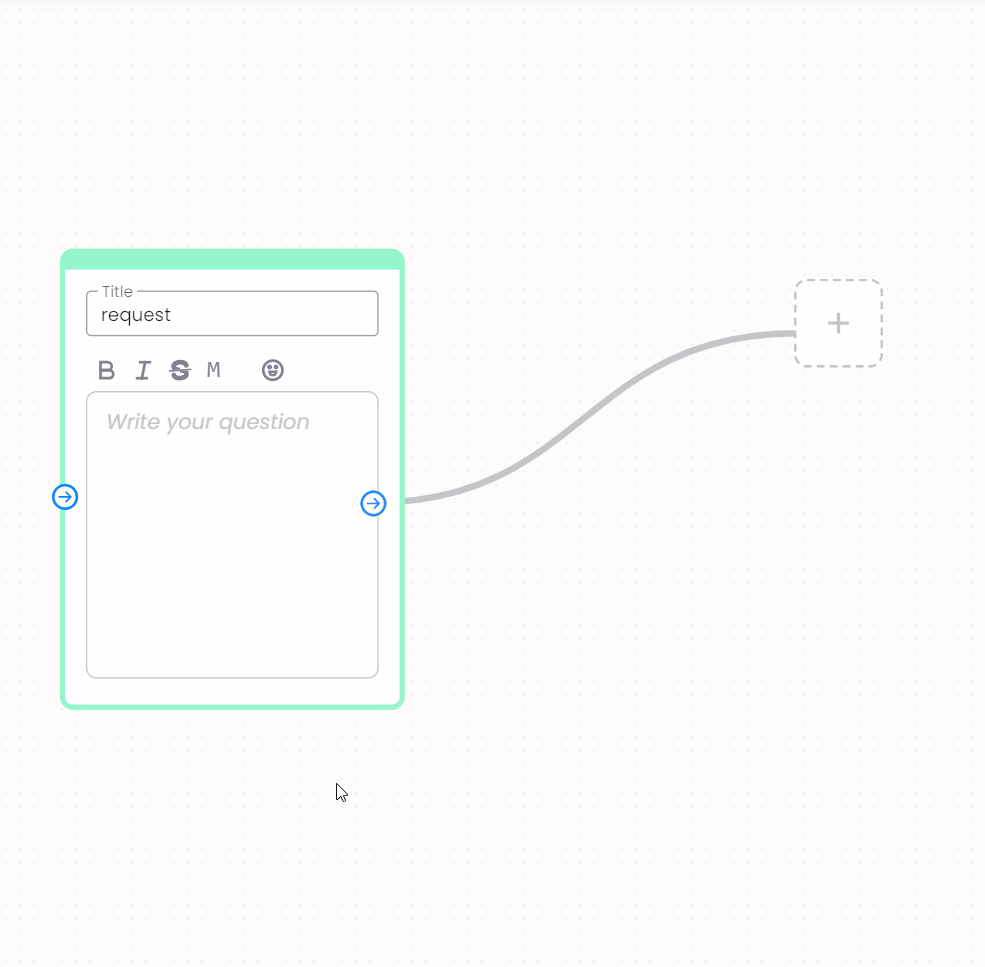
- Click on the Open Question block of your flow to show its properties.
- Set the Expected response type to match the contact property type (Text for Client, Number for Document).
- In Contact properties, enable “Save response as contact property” and select the available property. Here you will notice that only the matching type property will be available.
- Overwrite previous value: If you want the new response to replace an existing property value, check this box.