Guide to integrate Electronic Signature in Web Flows
When creating a Web Flow, you can select the Electronic Signature option from the validator blocks. This module provides a link for electronically signing a document or template created in your ZapSign account. The following steps will show you how to integrate Electronic Signature in your Web Flows
Create Zapsign and Truora Integration
To start using electronic signature as a validator, it is essential to configure the Zapsign integration in your Truora account. This process can be carried out through Truora´s platform or via the API.
To do it from Truora’s platform, follow the steps detailed below:
-
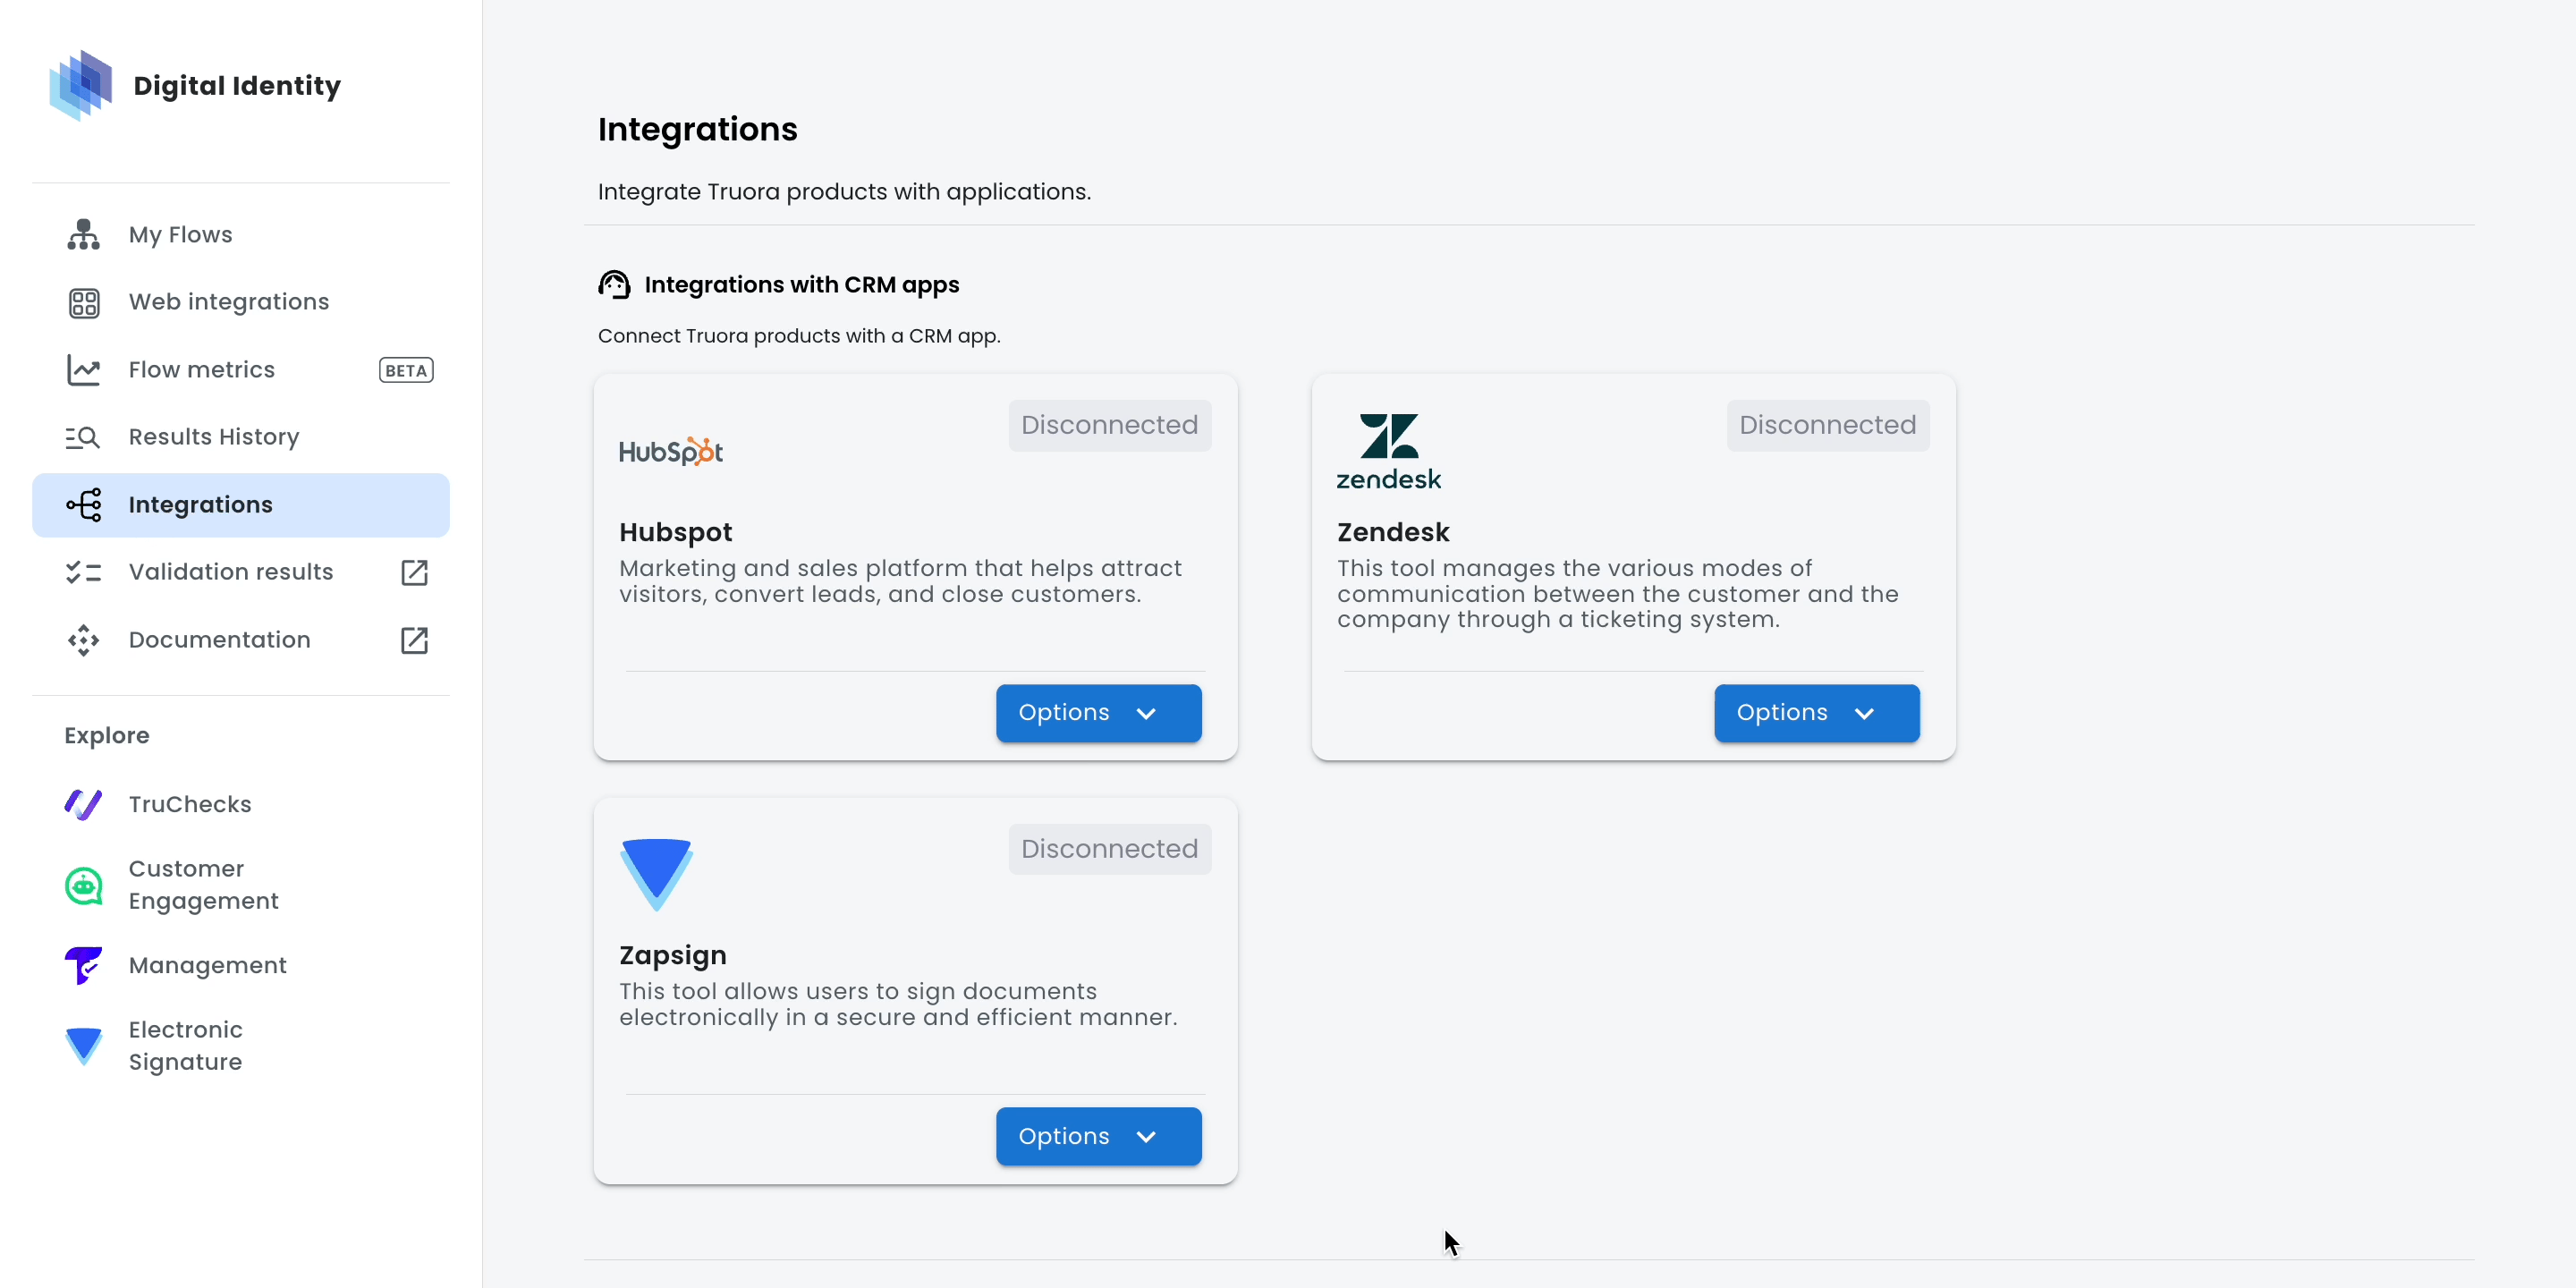
Once you have accessed Truora’s platform, navigate to the Digital Identity section and select the Integrations option. Look for Zapsign and click on Options, then proceed to click on Connect.
-
Enter the API token generated in Zapsign and click on Finish integration. Don´t worry, in the next section we’ll show you how to generate the Zapsign Token.
Create ZapSign Token
-
Sing in in your ZapSign account or create one.
-
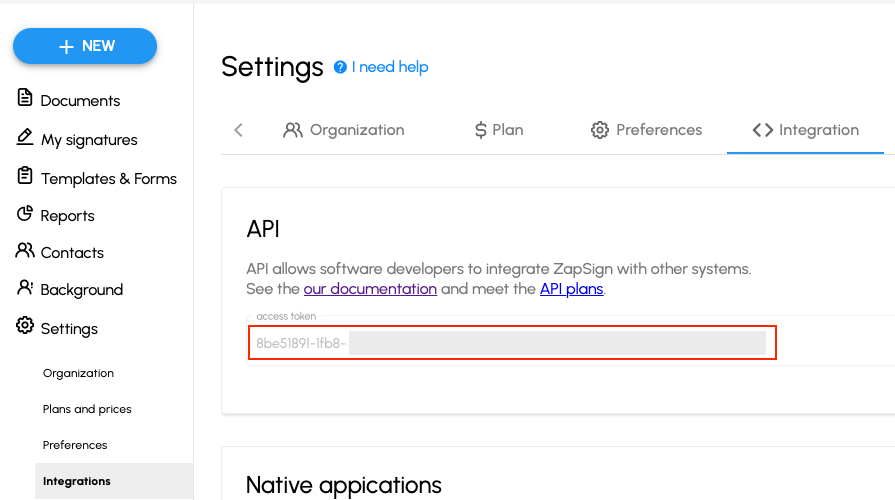
Within your Zapsign account, select Settings > Integration. Bellow, in the API section, you can copy your Zapsign token:
Creating the flow
-
To get started, log in to the Truora dashboard. For instructions on how to create a Web Flow, please refer to the Create a Web flow. We will start by logging in to Truora dashboard.
-
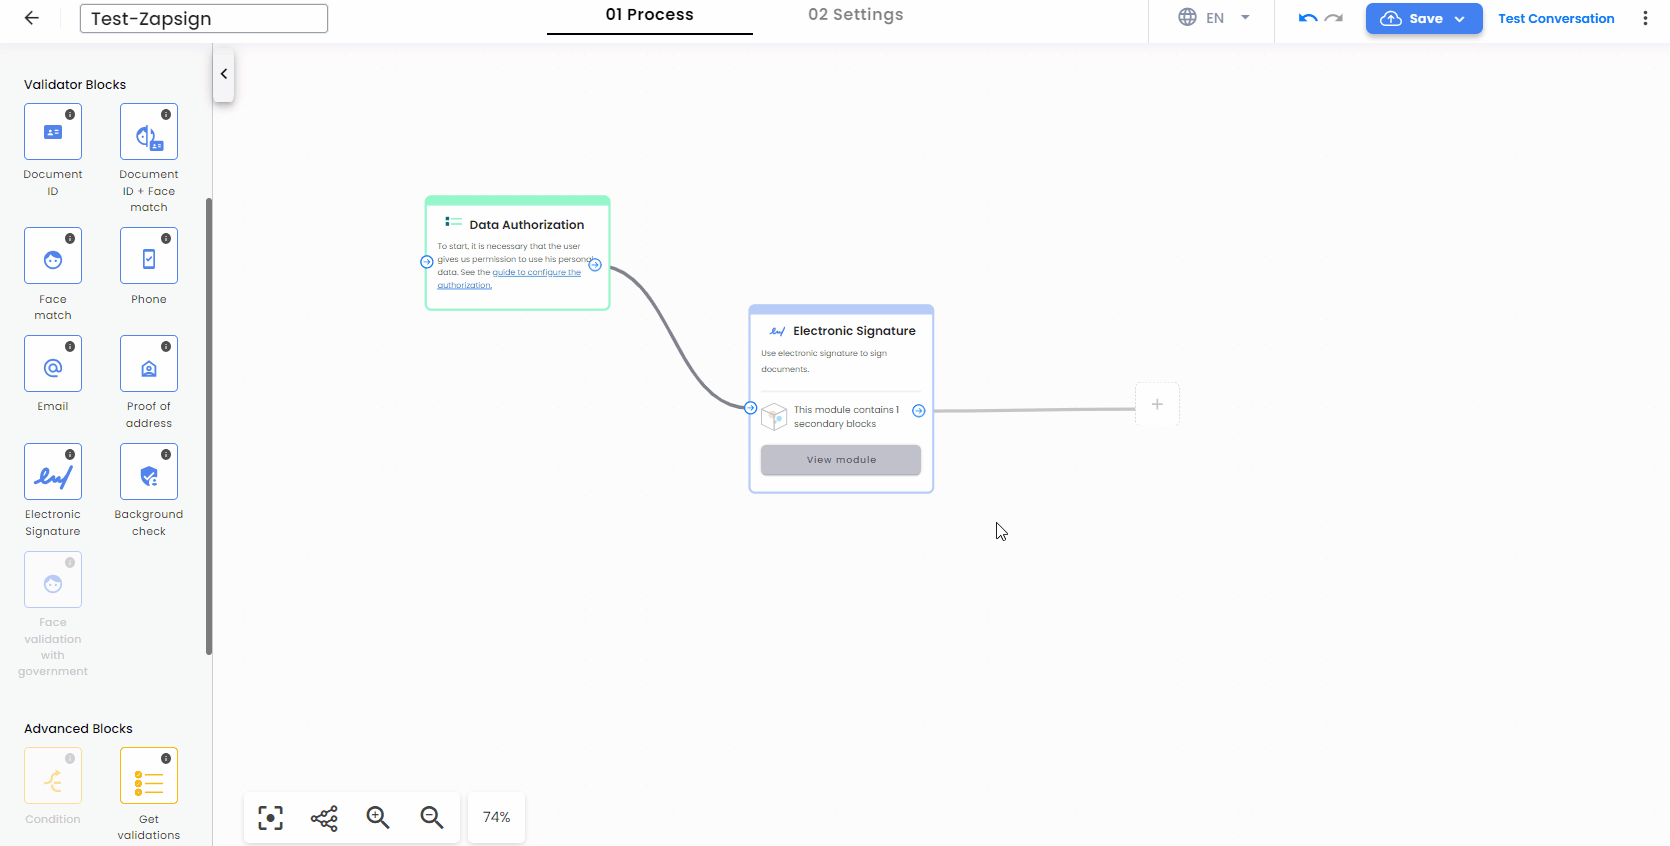
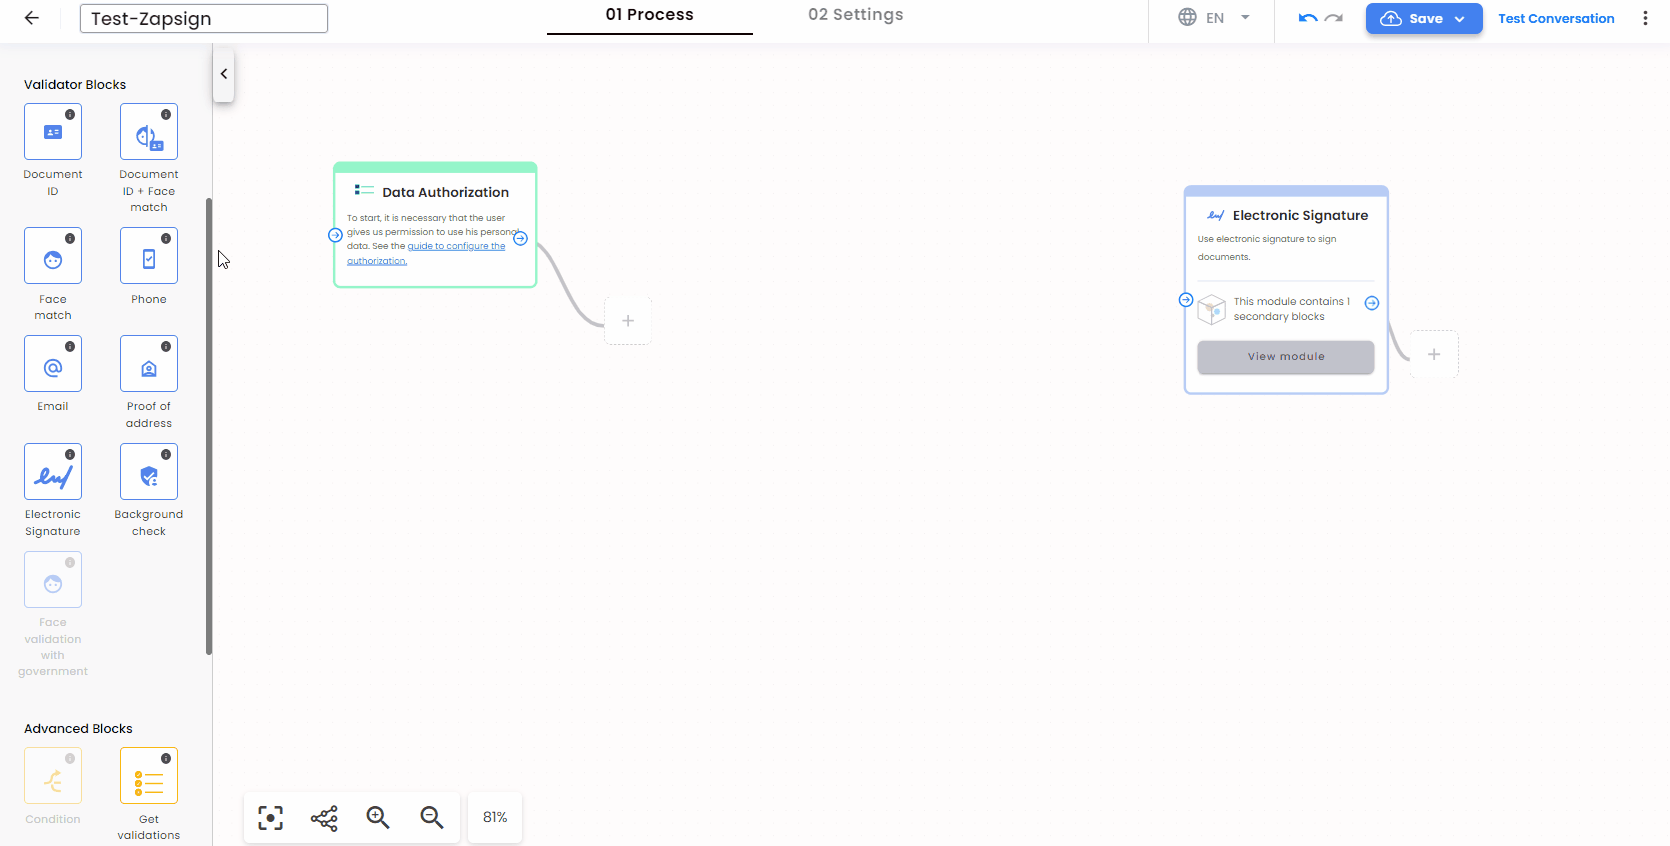
Once you have created and named your flow, navigate to the flow builder and select the Electronic Signature option from the left-hand menu. Drag and drop this block to add it to your flow.
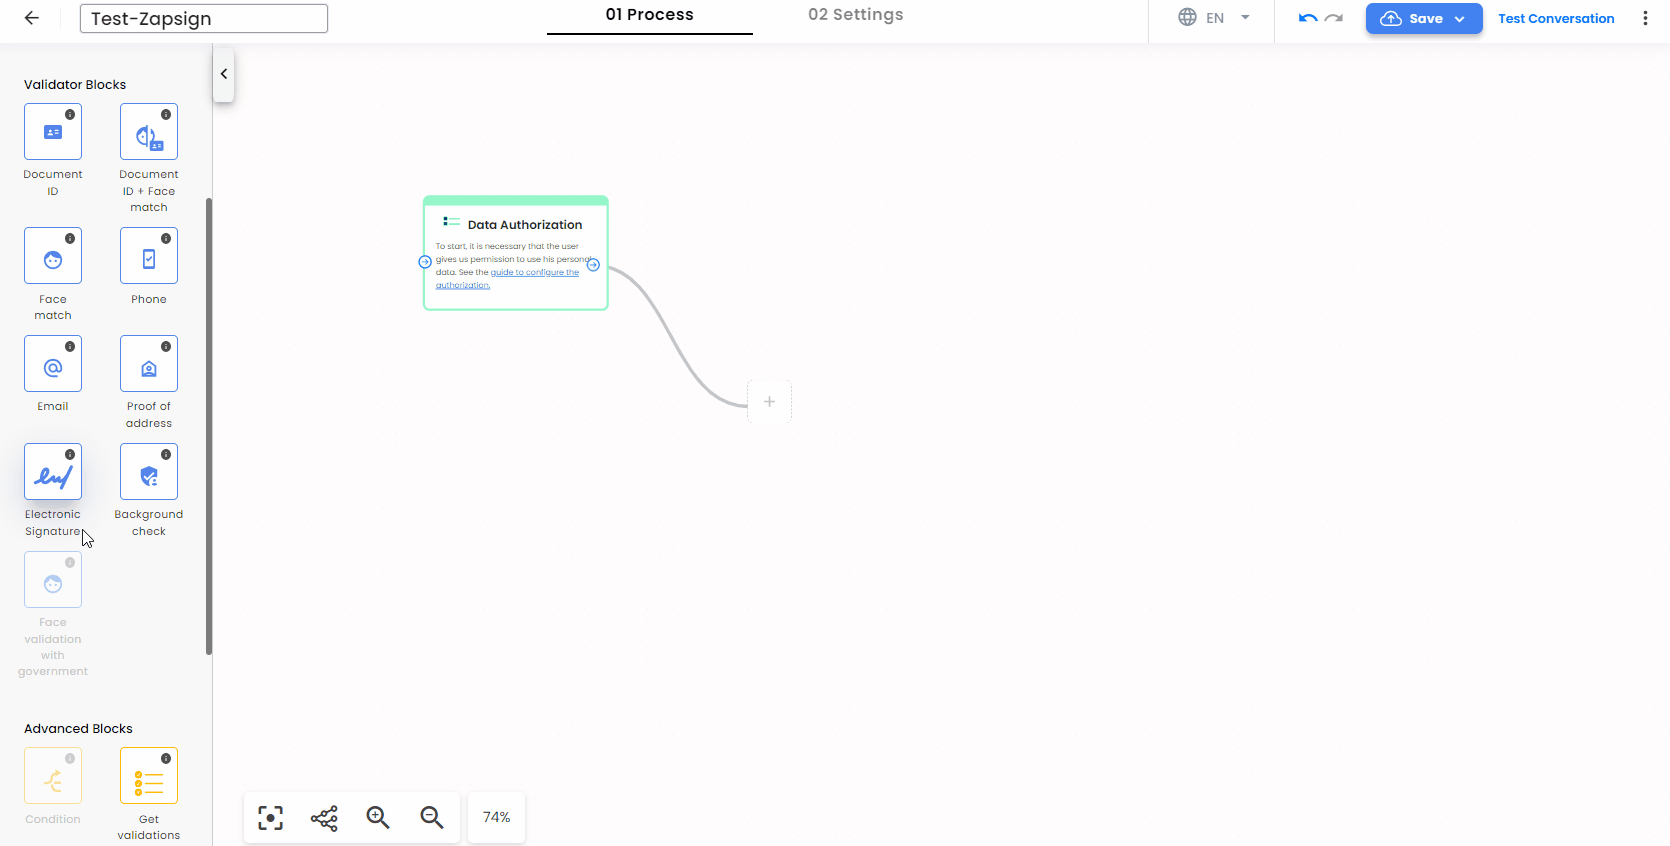
- Note: The Data Authorization block is required to start all web flows, as you must have the user’s authorization to use their personal data. For more information please refer to the Data Authorization guide.
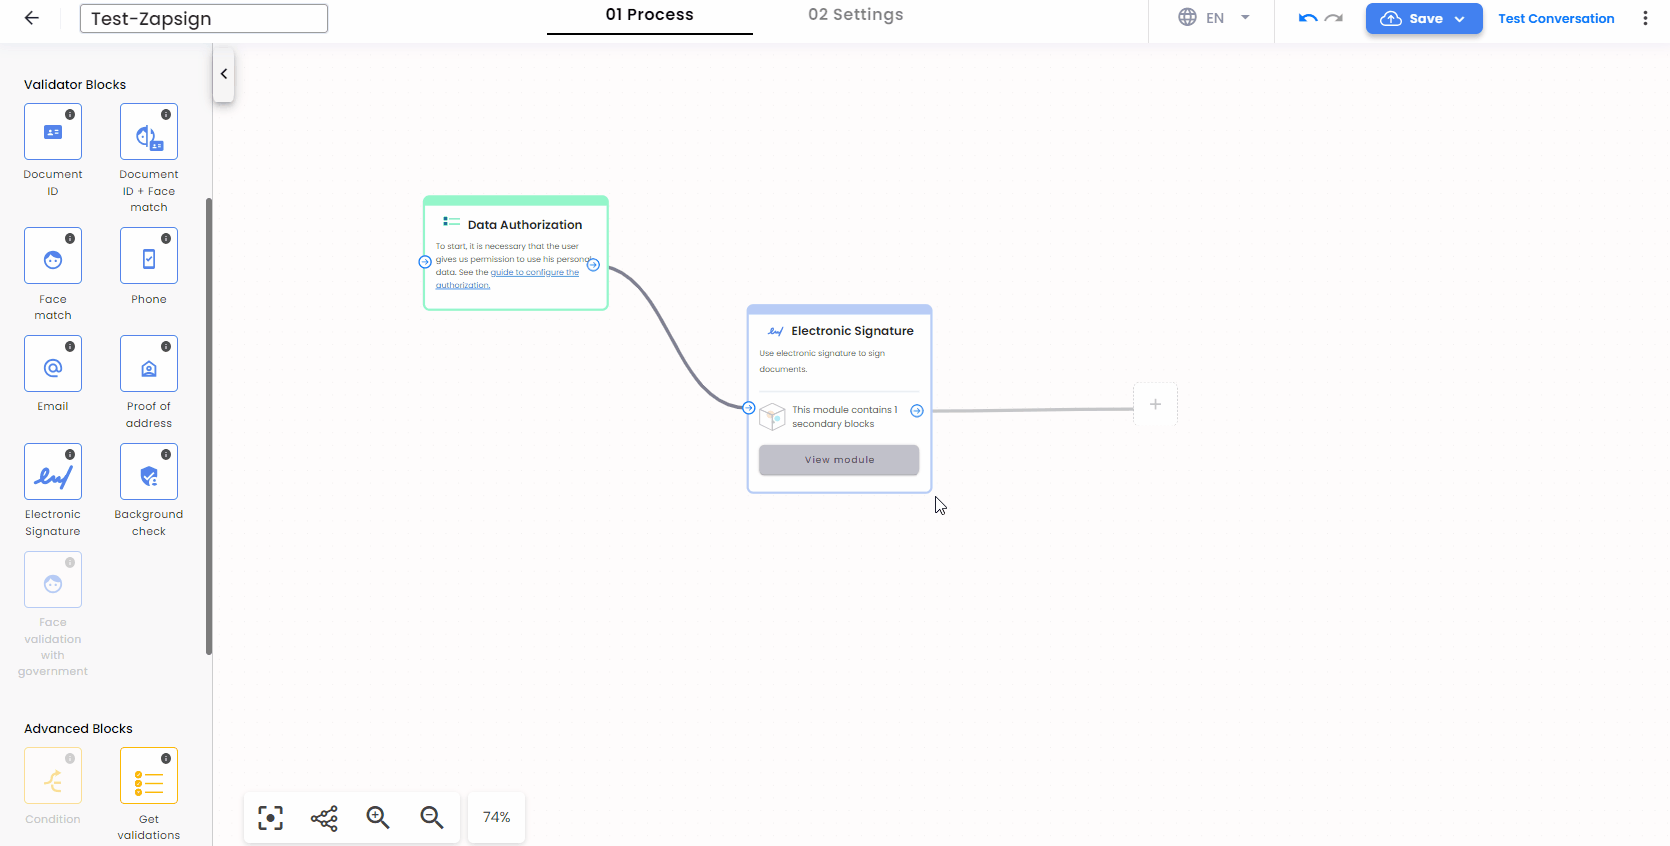
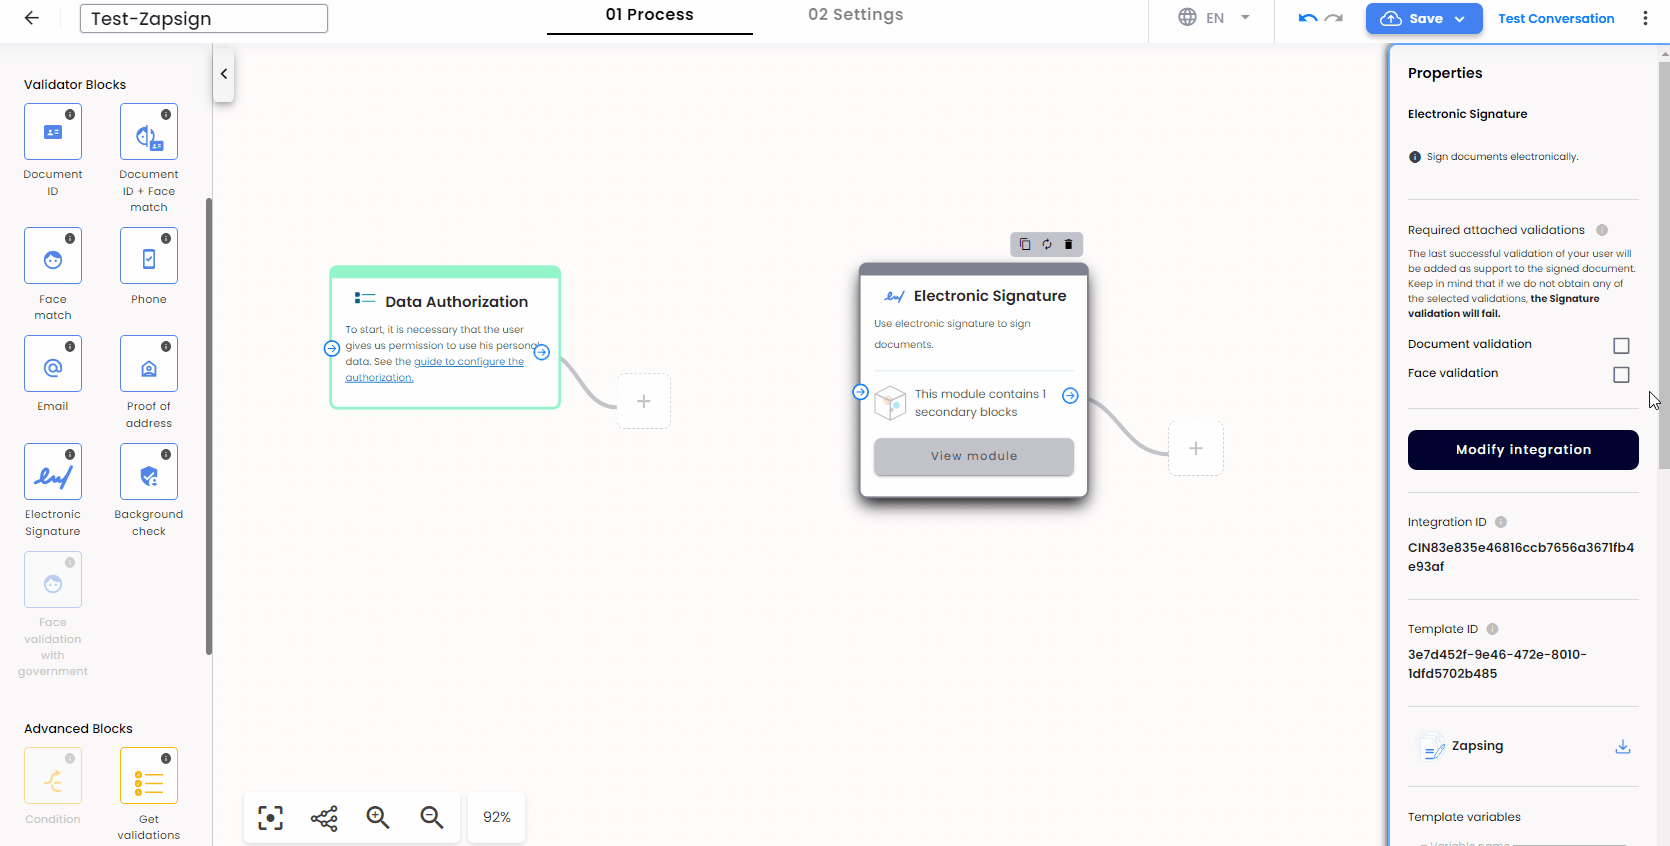
- When you select the Electronic Signature option, the properties will appear on the right side of the screen. You must configure the integration in order to save and publish the web flow.
- Once you click on Configure Integration, a window will open where you’ll need to select the format of the document you previously created in Zapsign. You have the option to choose between Document or Template. Once you’ve determined the format type, the documents created earlier and available for association in the validation will appear.
- If you select the Template option, the variables you’ve created will be displayed, and you’ll have the choice to fill in the information or leave it blank for the user to complete those fields.
- When configuring your flow, you can choose to include a Document Validation, a Face Validation or both, before the signature of your document:
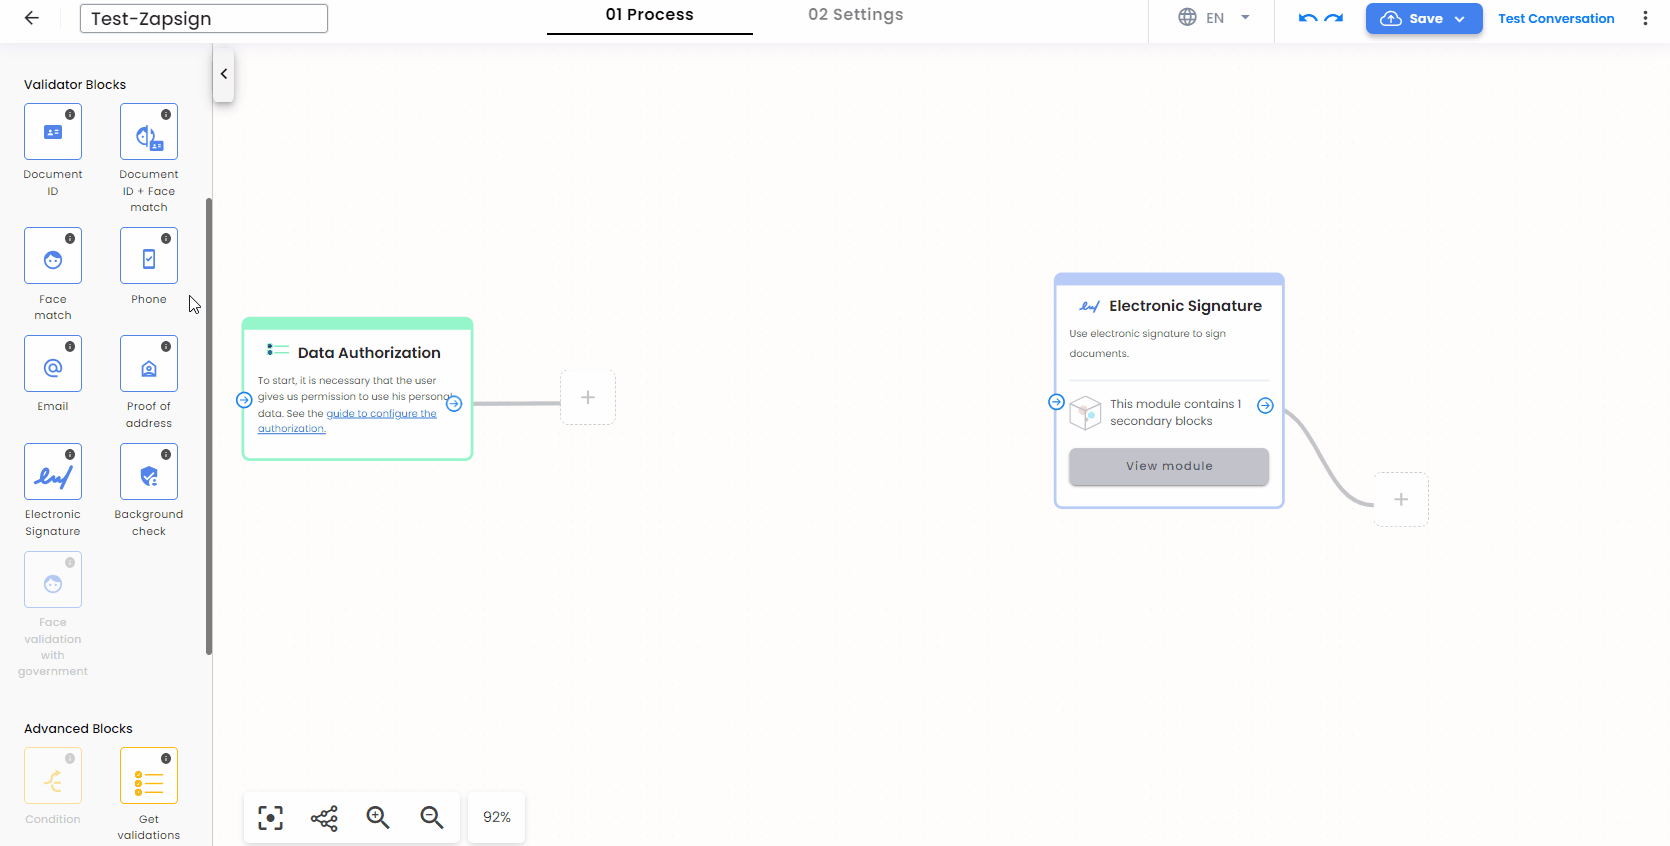
- If you select a single validation, whether it’s a Document Validation or Face Validation you should drag the corresponding Document ID Block or Face match Block before the Electronic Signature Block:
- If you choose to include both Document Validation and Face Validation you have two options:
- Drag both the Document ID and Face match Blocks before the Electronic Signature Block:
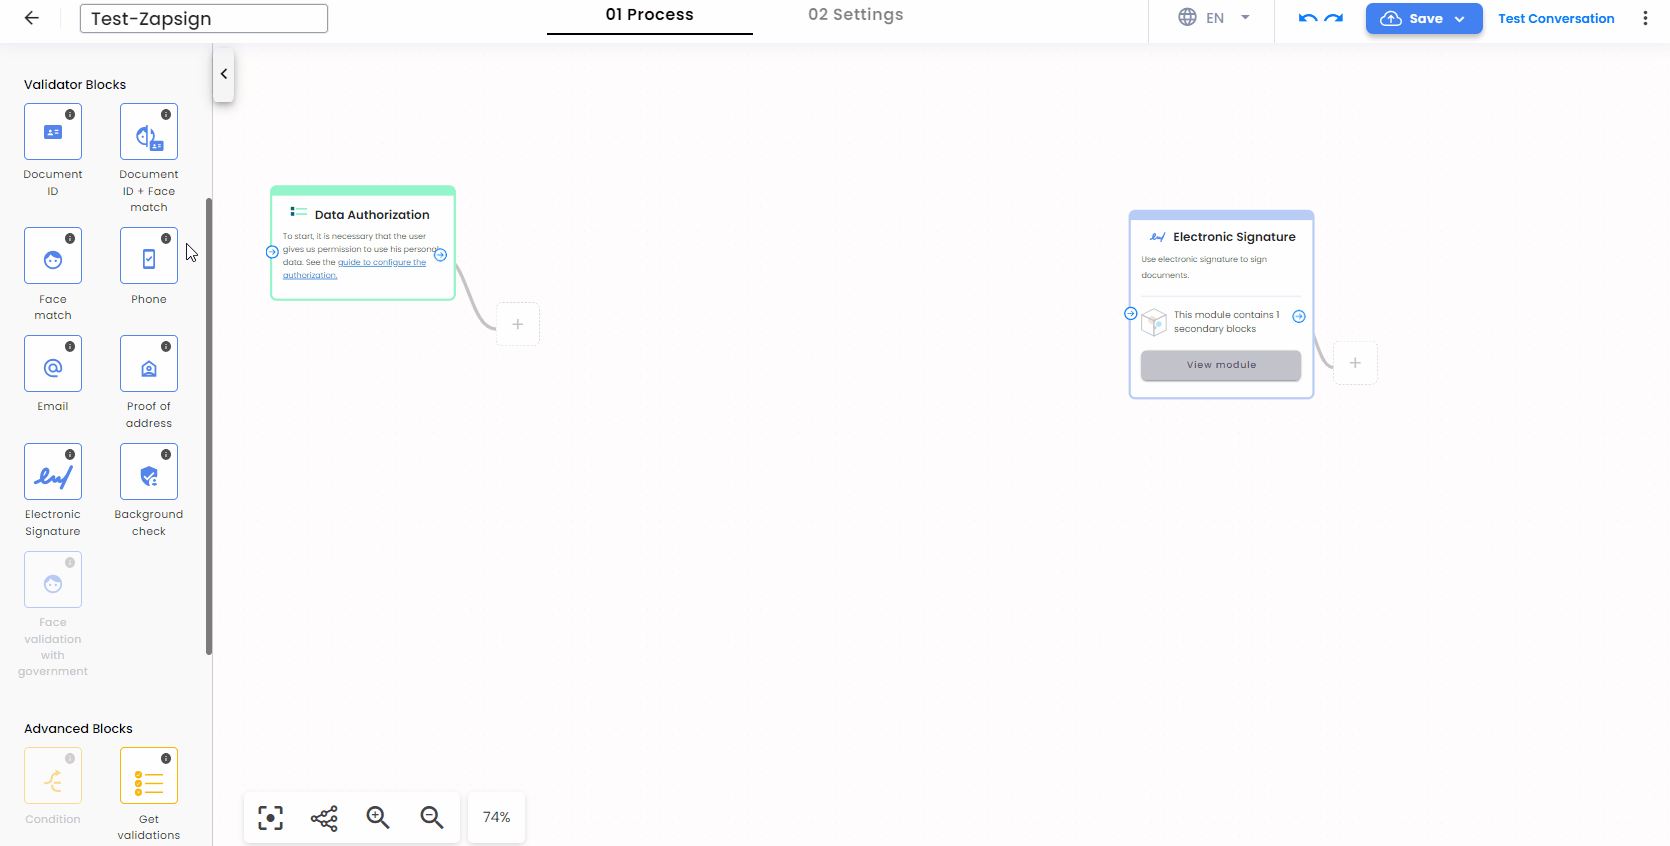
- Or, use the Document ID + Face match single Block and drag it before the Electronic Signature Block:
- Drag both the Document ID and Face match Blocks before the Electronic Signature Block:
NOTE: The last successful validation of your user will be added as support to the signed document. Keep in mind that if we do not obtain any of the selected validations, the Signature validation will fail.
- Finally, save and test your flow! Remember that this link is only for testing purposes and will expire after 15 minutes. If you want to generate a link for PRODUCTION, follow the next steps.
Dynamic document configuration in electronic signature
In certain scenarios, you may have an identical flow across multiple processes, with the only variation being the document to be signed. Creating separate flows for each process can be cumbersome and inefficient when they are essentially identical. This feature enables you to:
- Utilize a single flow and seamlessly change the document to be signed.
- Prefill template variables directly from the request, streamlining the customization of your signature documents, thus simplifying the process for your users.
Change the document to be signed in the same flow via-API
-
You must have already created a Web Flow, since you will need its flow_id.
-
Create a
POSTrequest with the following URL:https://api.account.truora.com/v1/api-keys -
Add the following params in the request body with their respective values:
key_type:webgrant:digital-identitykey_name: api-key user name (Optional)country: The country where the validation is to be performed. Allowed:ALLredirect_url: The URL where the user is to be redirected once the validation is completedflow_id: from the Flow creationaccount_id: The account ID linked with the validation. Use this ID to trace the validations performed by the account later on. Note that only Account IDs following the regex pattern [a-zA-Z0-9_.-]+ are supported. Please go to Create an Account ID to learn more about it.electronic_signature_config.document_type: set whether the document isdocumentortemplatetype.electronic_signature_config.zapsign_id: the id of the document that you are going to use for the client to sign.
-
Send the request, and you will receive an
api_keyfrom the response, which you will use to link the flow with the URL for your user to proceed with the validation process:
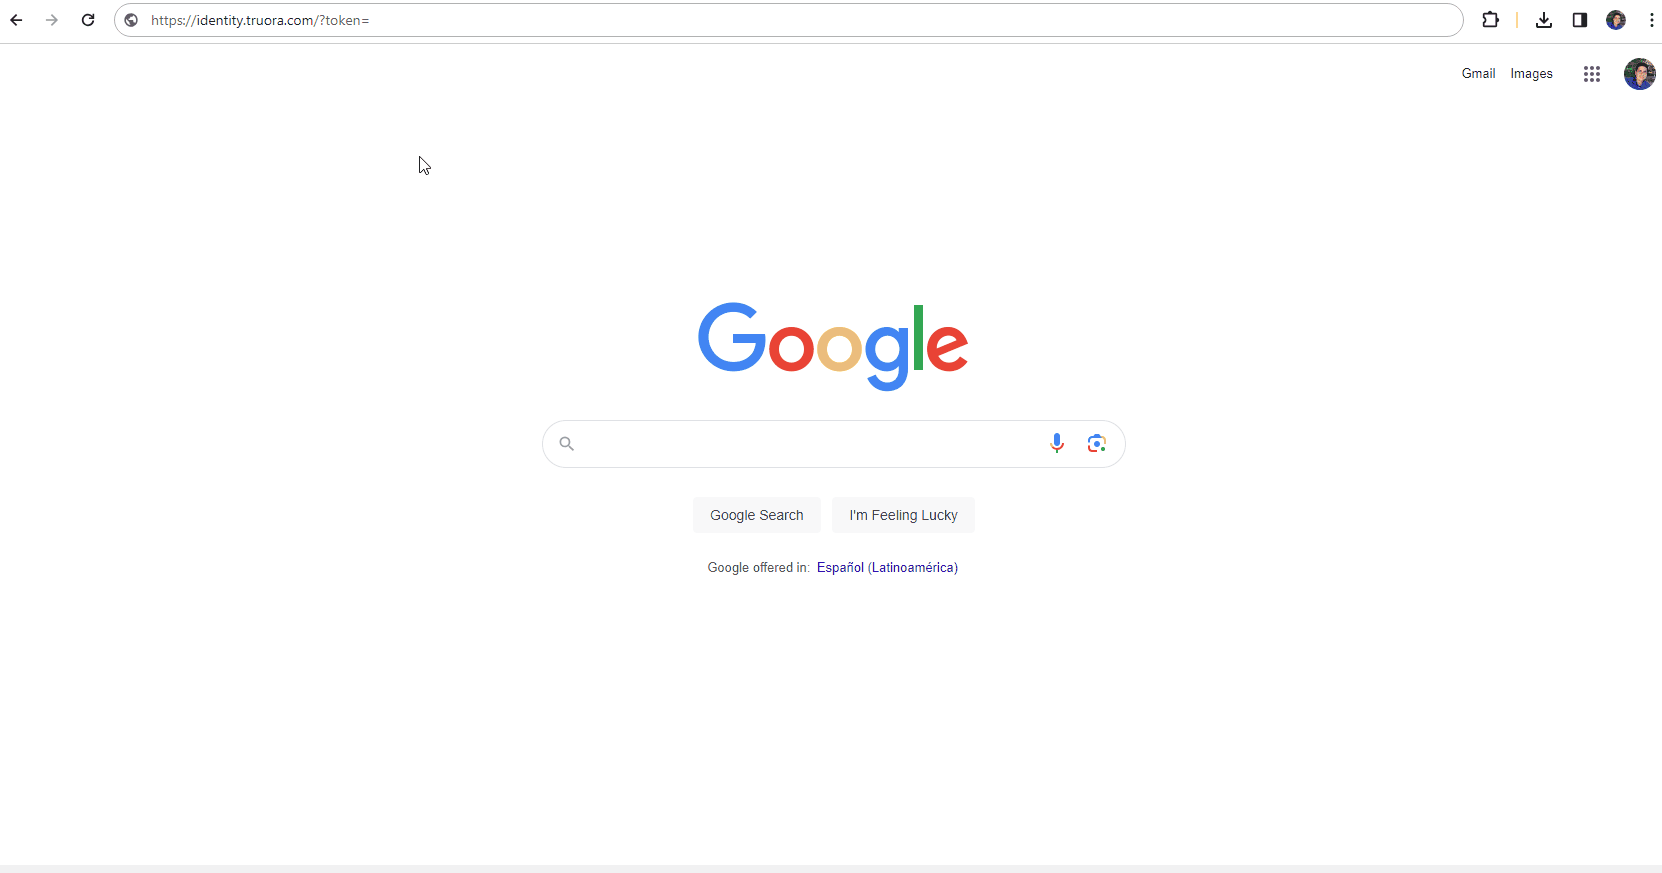
Now use https://identity.truora.com/?token=<api_key> and set the api_key you just generated to create the URL to perform the new validation process with the new document you have specified:
- You have now successfully changed the document (
electronic_signature_config.zapsign_id) to sign in your process and created the URL for the new process.
If you need to use another document for the same user, make the request in step 3 with the sameflow_idandaccount_idchanging theelectronic_signature_config.zapsign_id(document id) value and the response will return a new api-key for a new process with the same flow.
Prefilling the variables of my template via-API
In case your document type is “template”, you can prefill the configured document variables by using the following format in your request:
- key:
electronic_signature_config.var.{VARIABLE NAME} - value: VARIABLE VALUE
For example, if your document includes a variable and value VARIABLE NAME: FULL NAME, and you want to set FULL NAME to Alberto Perez, you would use the following key:value pair in the request body (step 3):
electronic_signature_config.var.{FULL NAME}: Alberto Perez
Learn how to Create a dynamic template at ZapSign