Create a Web flow in 5 minutes or less
Using Digital Identity Verification, you can create a flow in 5 minutes or less. A flow is a sequence of steps that you can use to interact or collect information from your users. You can create a flow to perform identity validations such as a user’s document identification, driver’s license, collect your user’s digital signature or other validations available in our Validators’ Suite.
It is important that after creating the final Flow, this mandatory step must be done. You have to generate a token and final link for each user to perform validations.
Note: If you have a free trial account or a different view than what you’ll find in the examples of this guide, please see Digital Identity Verification Flow guide.
Creating flows
In order to use a flow, you need to create a flow template. A flow template is a reusable flow that you can use in one of our integrations such as Web, iFrame or Webview. You can create a flow template using API or using the dashboard.
Create a flow template using the Digital Identity Verification Dashboard
To create a flow template using the Digital Identity Verification dashboard, follow these steps:
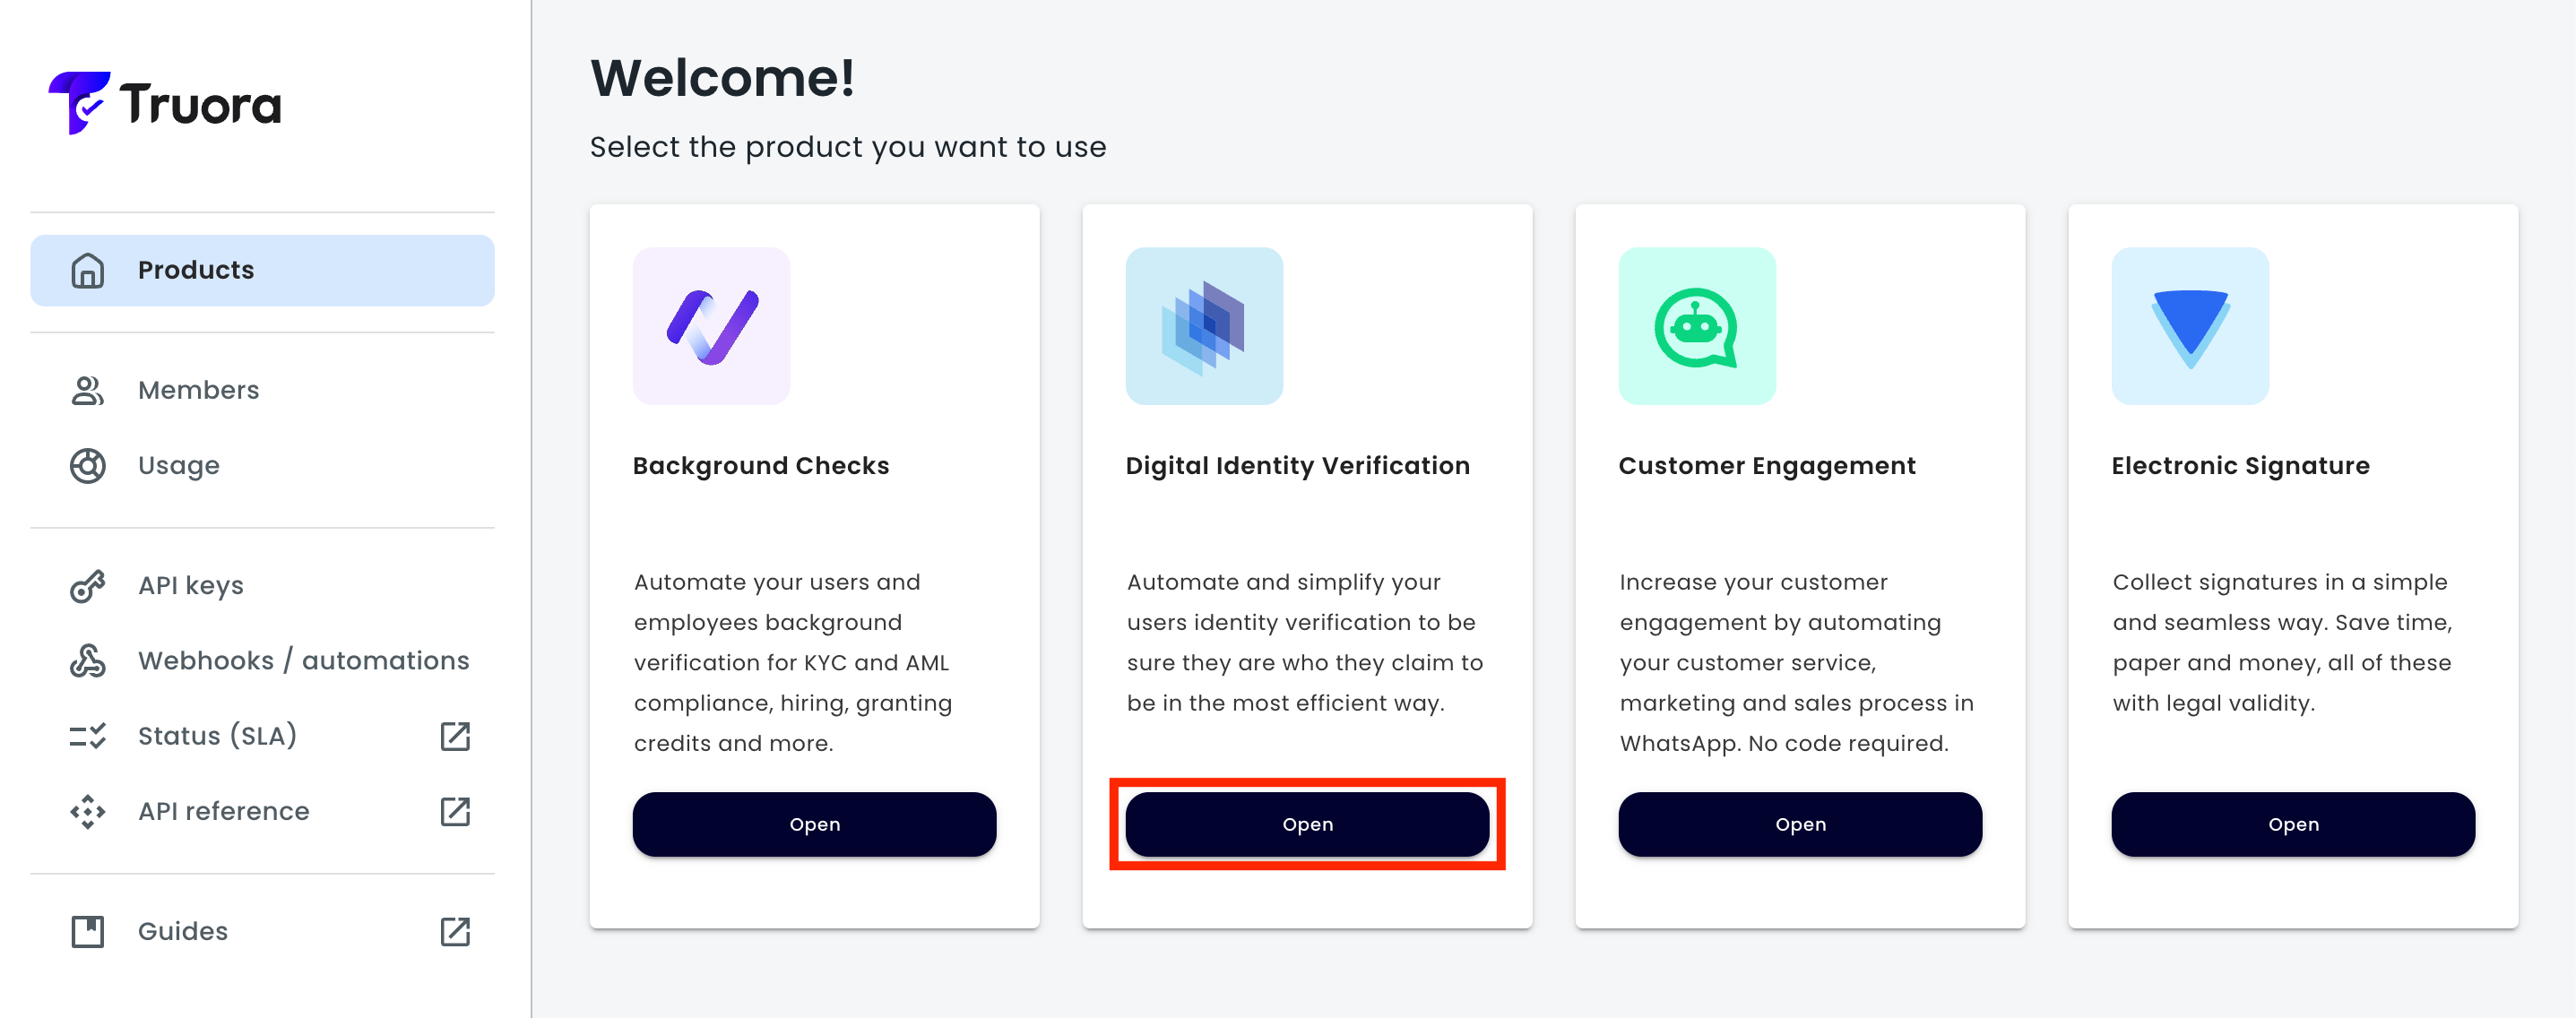
- Once you are in our products’ Dashboard, click the Open button in the Digital Identity Verification product.
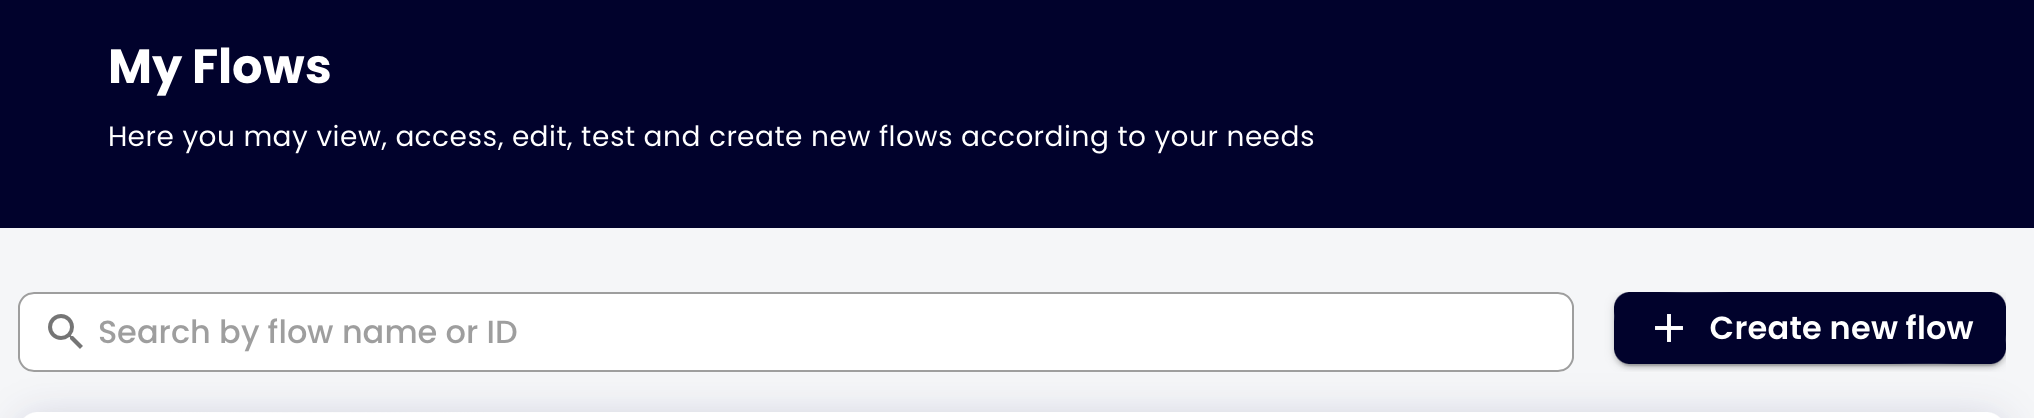
- Click on the Create New Flow button.
- Give a name to your flow template.
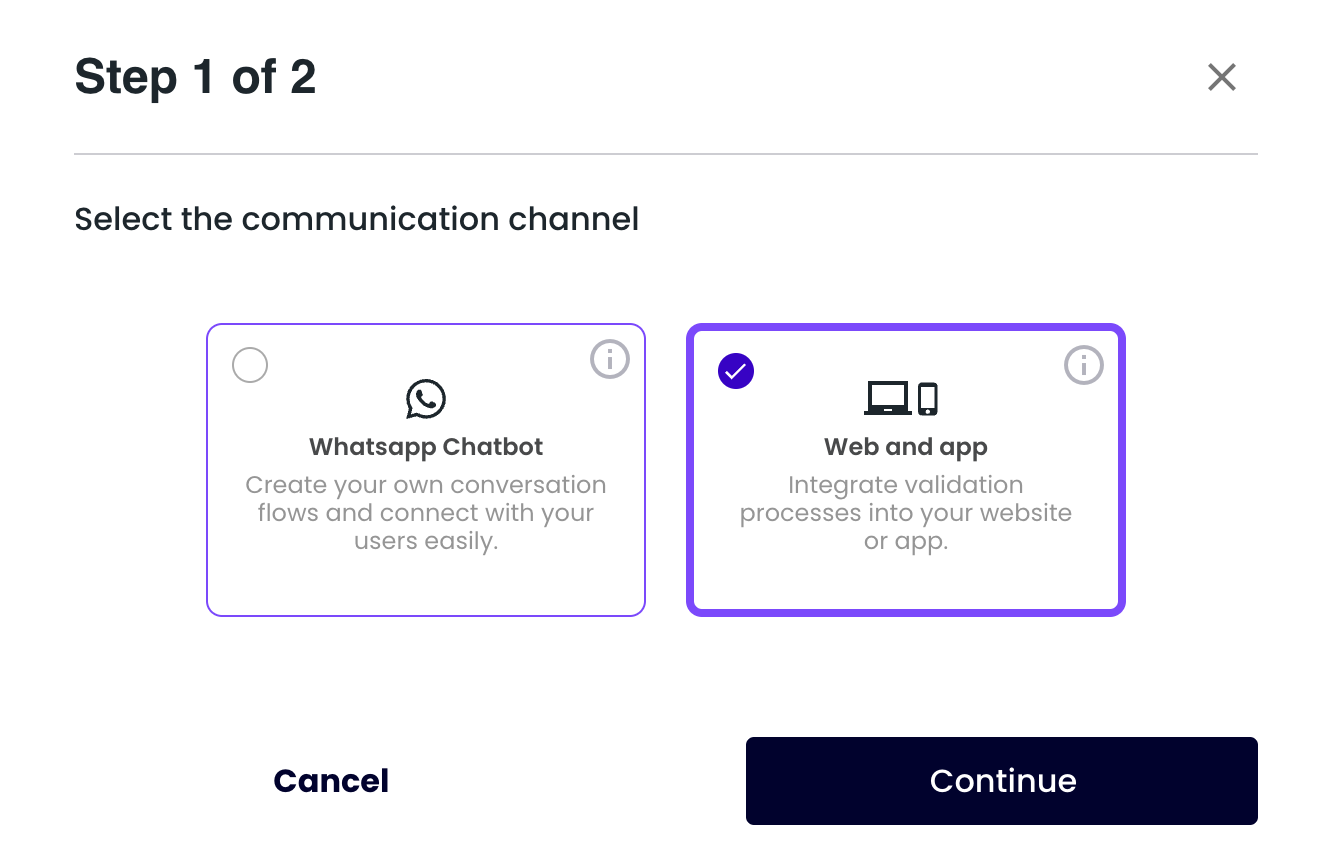
- Select the communication channel you want to use to interact with your users in this case Web.
- Click on the Continue button.
- Select the template Blank Template.
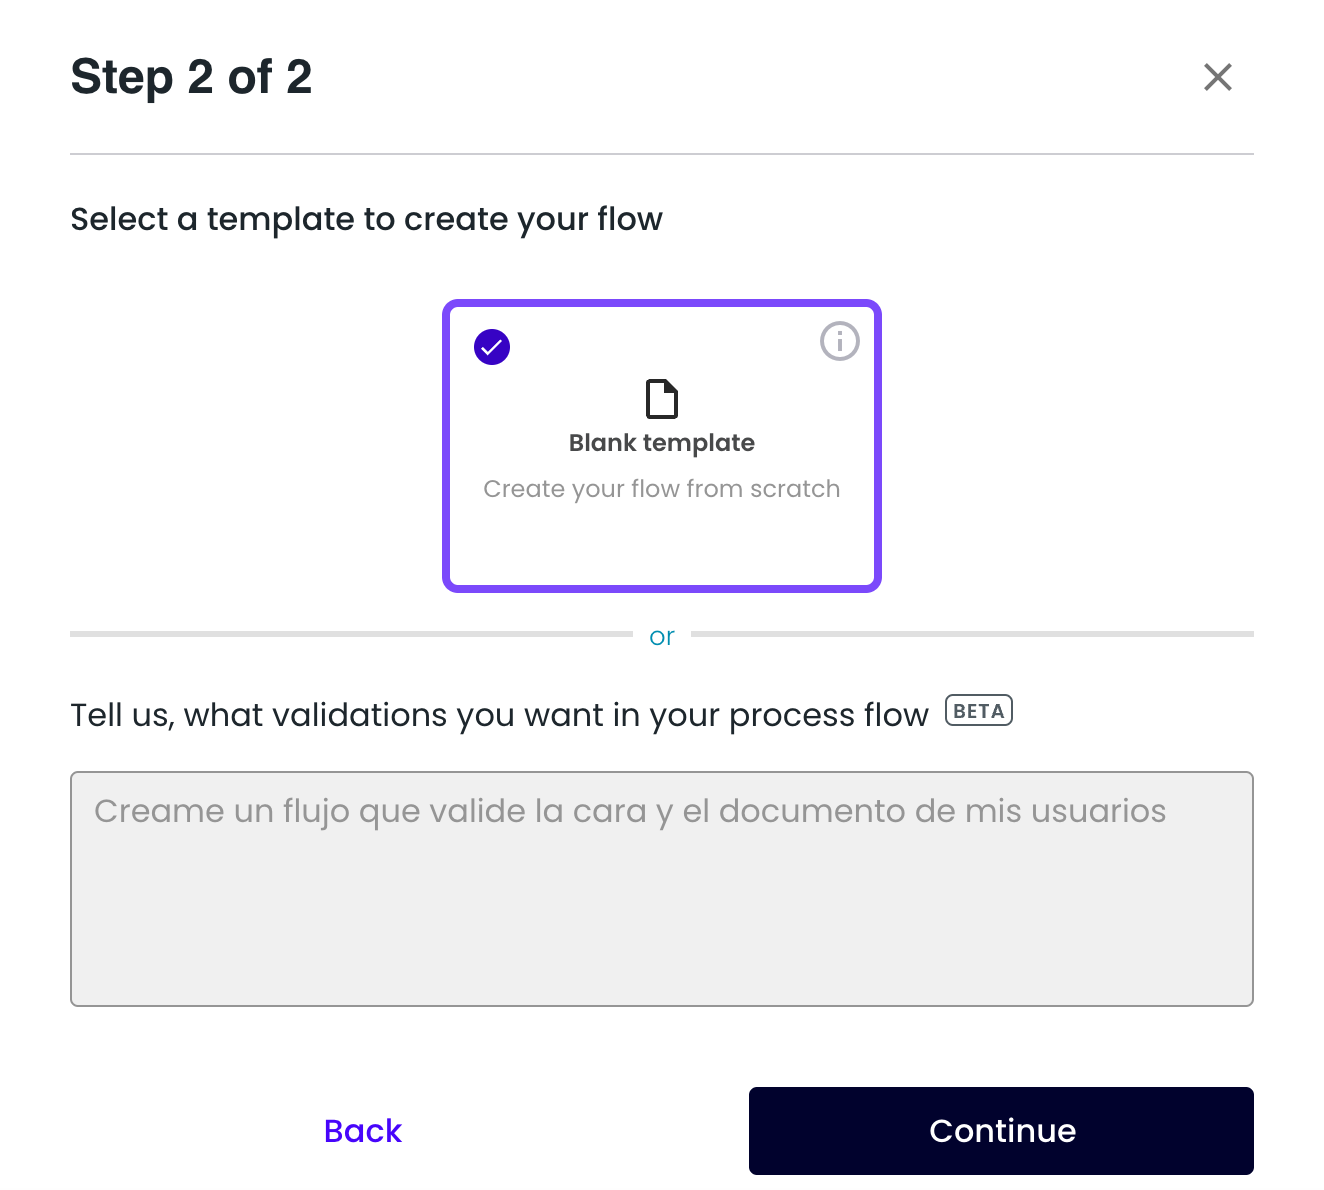
- Click on the Continue button.
- In the tab Process add the steps you want to use in your flow considering your use case using our drag & drop flowbuilder’s steps. For example, you can add a step to data authorization or steps to perform the validations like document ID, face match, email or phone number.
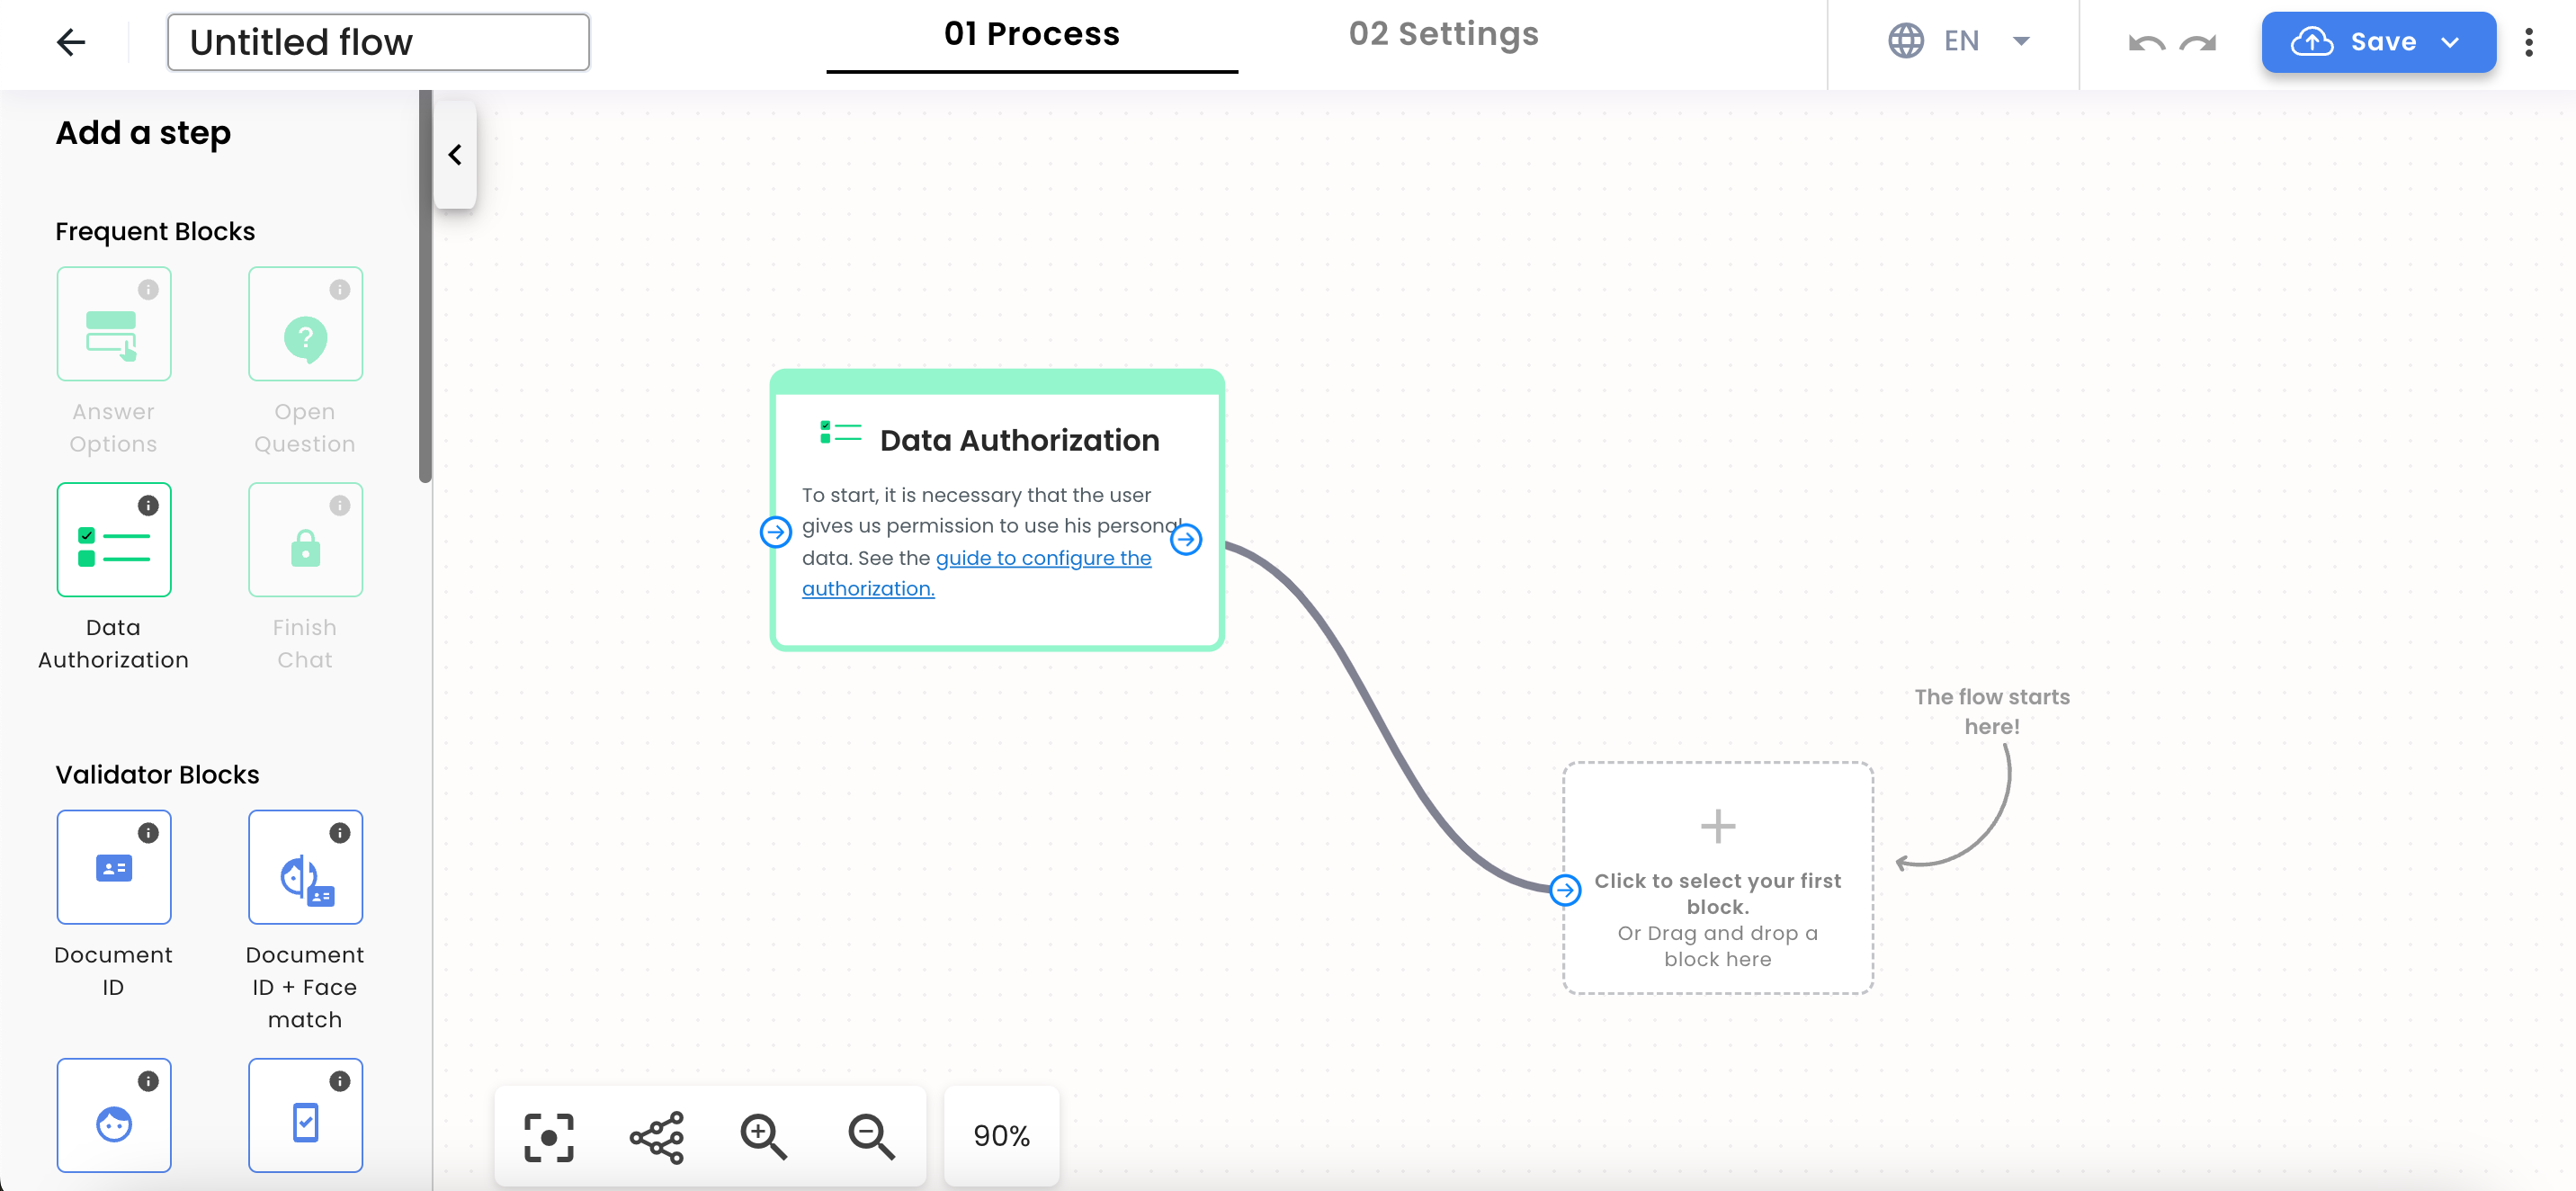
- Note: The Data Authorization block is required to start all web flows, as you must have the user’s authorization to use their personal data. For more information please refer to the Data Authorization guide.
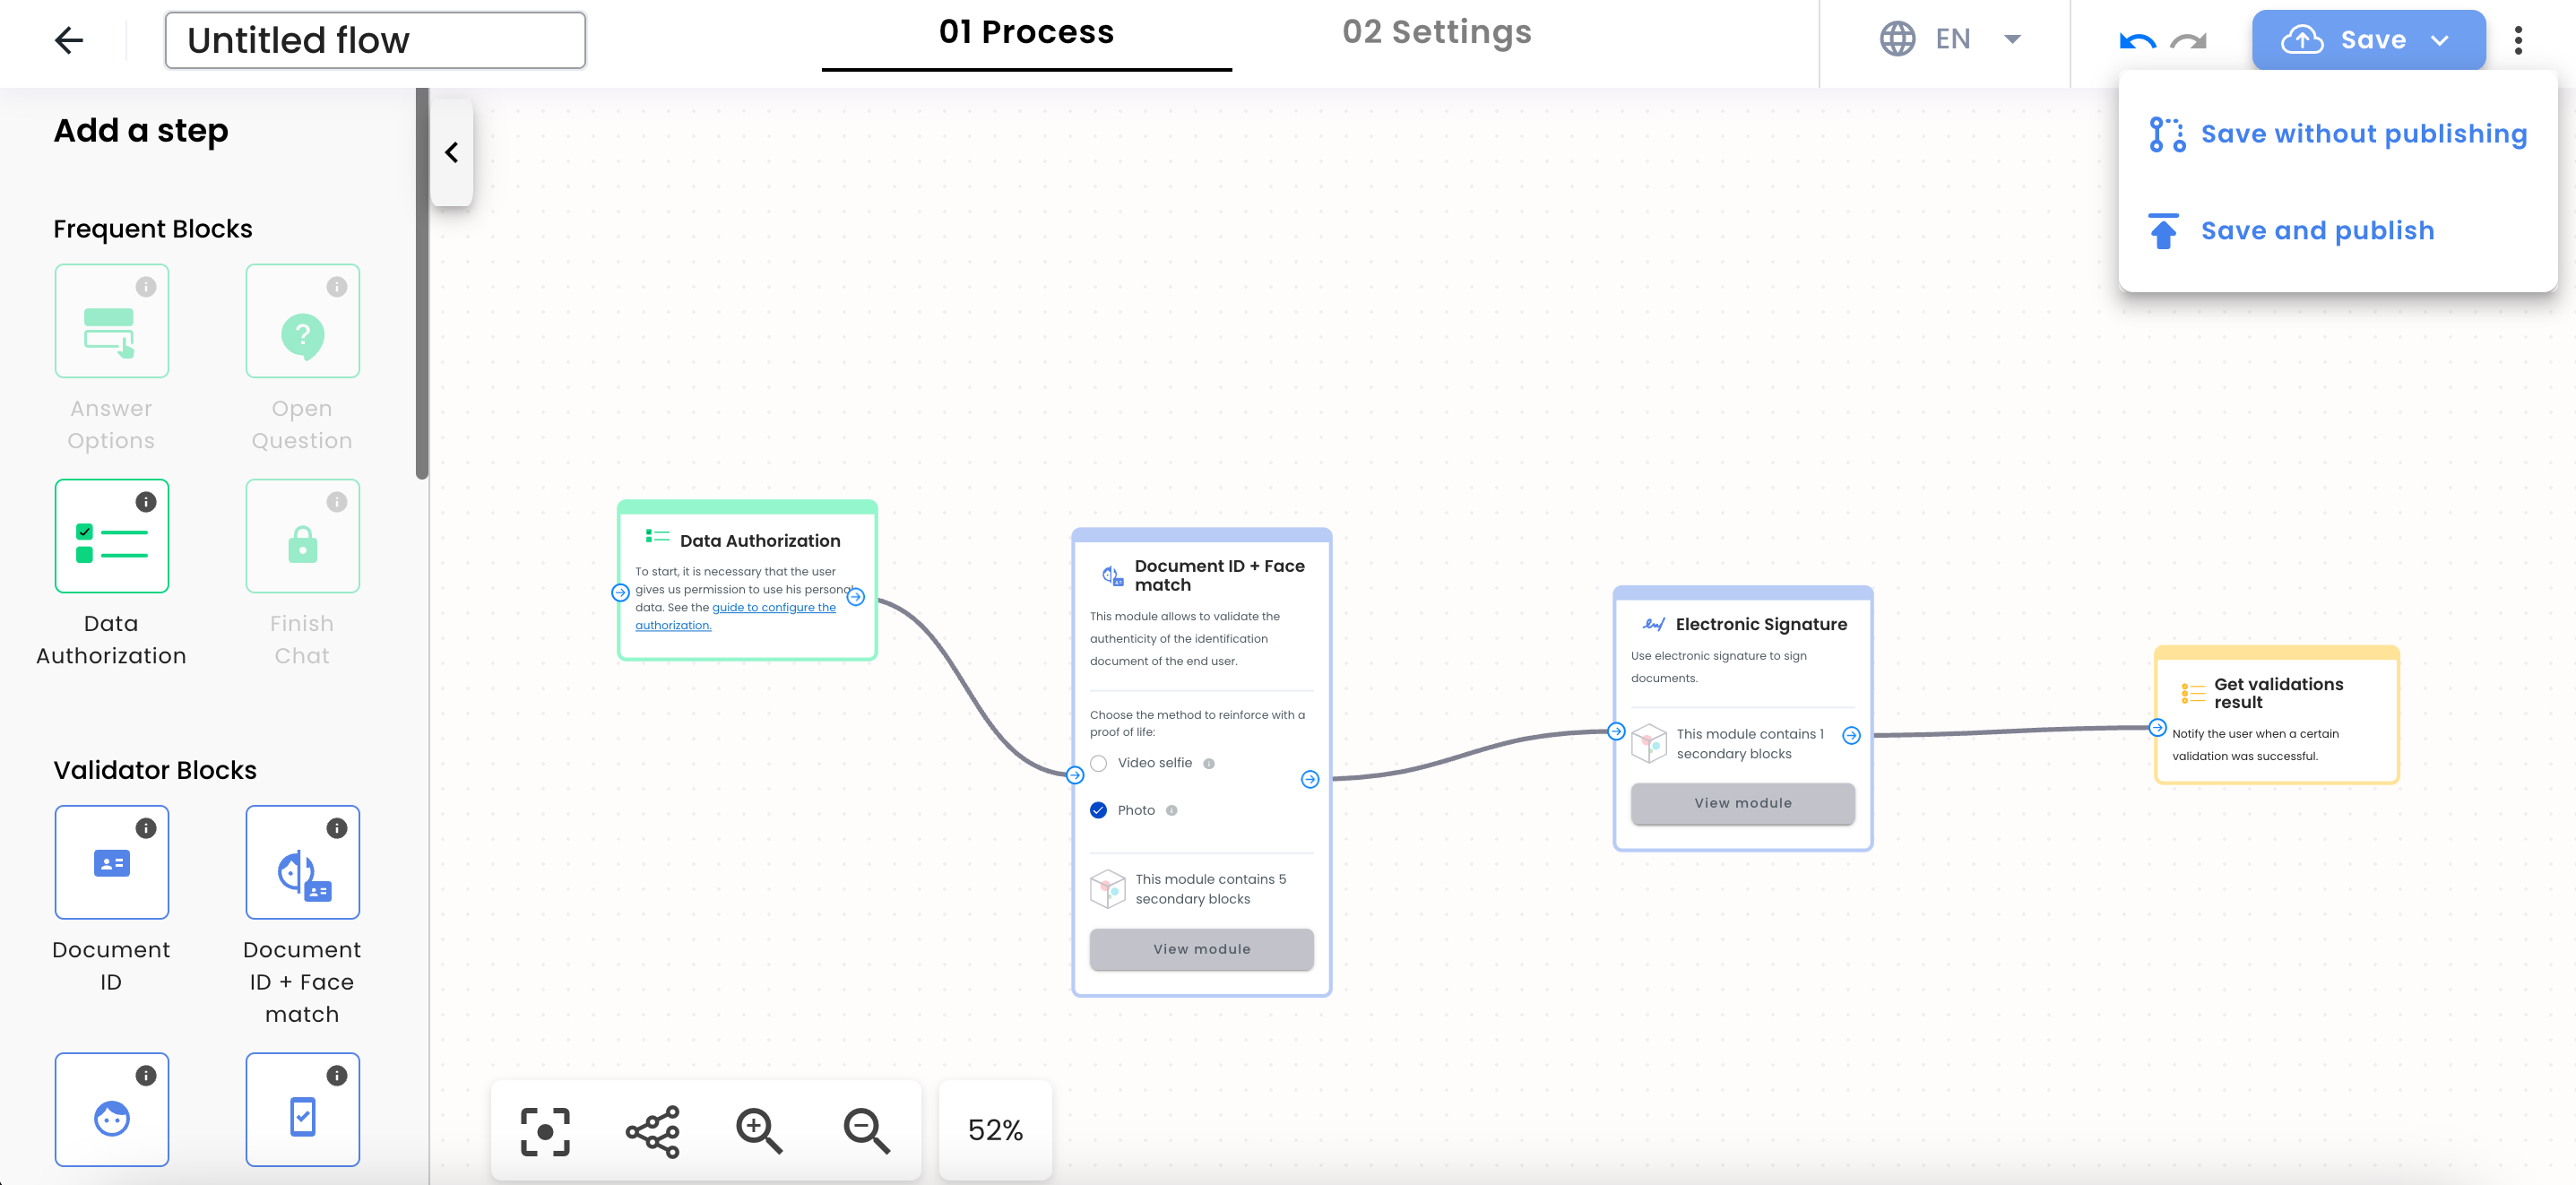
Saving your flow template
Once you have created and configured your flow template, you can:
- Save it as a draft (option save without publishing)
- Save the template and publish it
- Save the template as a copy
- Test the flow template (only if you have saved it)
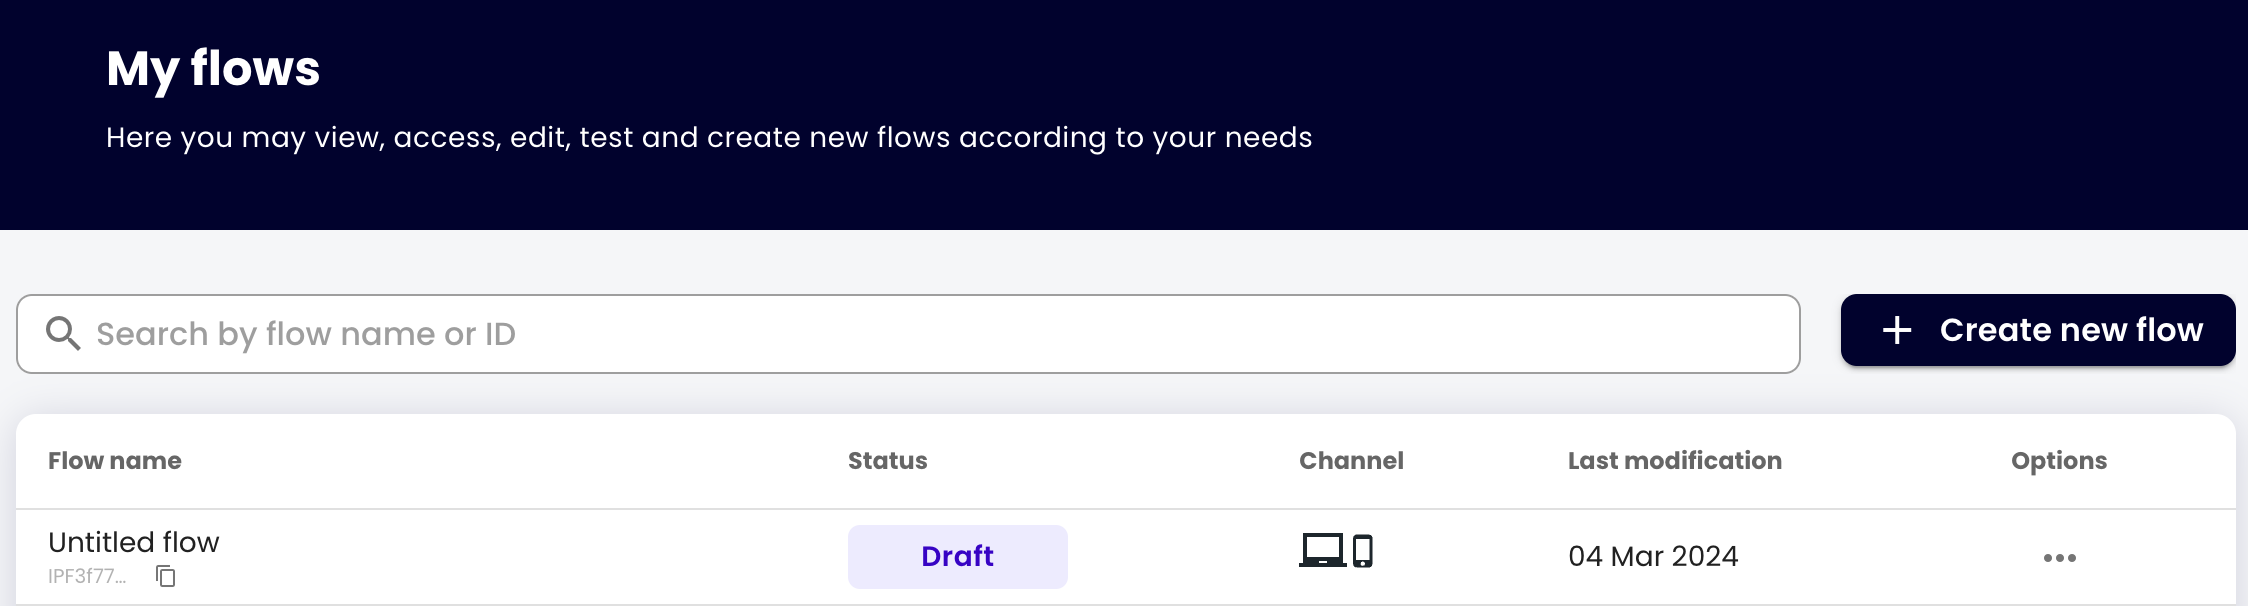
- Once you have saved the flow , the
Flow IDis generated. You can see it in My Flows:
Configuring your flow template
Configure your flow template using the Settings tab.
If you selected any of our communication channels, Web, iFrame or Web App, you will be able to:
- Configure aspects of the flow behavior through Flow Config.
- Configure your flow’s look and feel through Brand Theme.
- Set up a Whatsapp message for users who abandoned the process through User Recovery.
For more information, please visit the Customize your web flow guide.

Testing the flow template
Once you have configured your flow template, you can test it using the browser. To do this, follow these steps:
- First save and publishing
- Click the Test conversation button in the upper right side of the screen
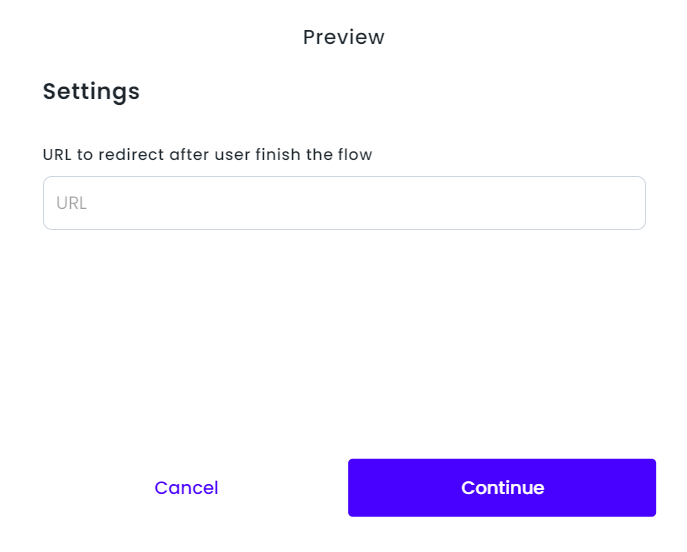
- Insert URL to redirect after user finish the flow
- Click the continue button
- Copy the autogenerated link and paste it in a new tab in your browser or Click the Open preview button
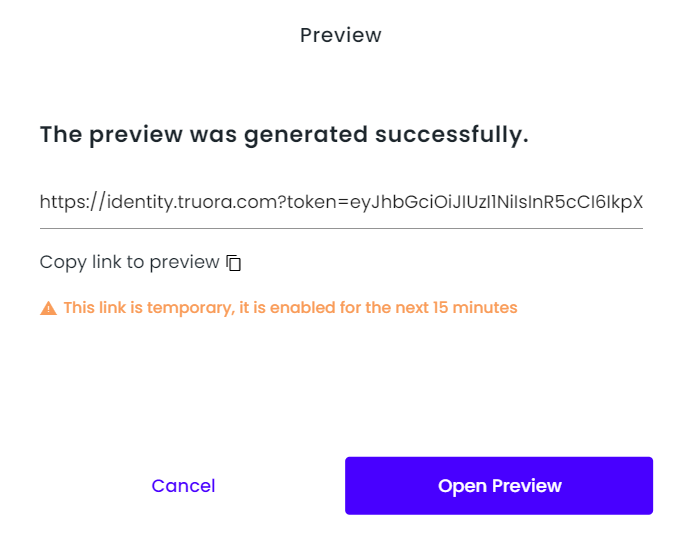
NOTE: The identity process expiration time has a shelf life of 15 min by default.
Web Integration of your flow
To integrate the flow template, you need to generate a token and a final link for each user to perform validations. You can see all the information in this guide.
Get Results of process
- You can get the process (or flow) results with a query to the truora’s API or from the dashboard. For more information, please see Guide to Get Results.
- To get process (or Web flow) result automatically, you must subscribe webhooks. For more information, please see Webhooks guide.
Supported Browsers and Devices
The tables below show the minimum supported versions of web browsers for desktop and mobile, as well as mobile operating systems, to ensure optimal performance of our solutions:
Disclaimer: Compatibility information provided here reflects the most up-to-date details at the time of publication. As platforms, devices, and browsers continue to evolve, future updates may impact compatibility. For the latest information or questions, please contact our support team.
Minimum Supported Desktop Browsers
| Browser | Version |
|---|---|
| Chrome | 87 (Released 2020-11-17) |
| Edge | 88 (Released 2021-01-21) |
| Firefox | 78 (Released 2020-06-30) |
| Opera | 62 (Released 2019-06-27) |
| Safari | 14.1 (Released 2021-04-26) |
Minimum Supported Mobile Browsers
| Browser | Version |
|---|---|
| Chrome for Android | 113 (Released 2023-04-06) |
| Firefox for Android | 113 (Released 2023-05-09) |
| Opera Android | 73 (Released 2023-02-02) |
| Safari for iOS | 14.5 (Released 2021-04-26) |
| Samsung Internet | 11.1 (Released 2020-02-25) |
| WebView Android | 113 (Released 2023-05-03) |
*Some versions may have restrictions. For any information or questions, please contact our support team.
Minimum Supported Mobile Operating Systems
| Operating System | Version | Comment |
|---|---|---|
| Android | 5 (Current: 14) | - Versions 12 and 13 may experience issues with web camera access. - Some Galaxy S and Xiaomi devices may have limited functionality in specific areas of our solution. |
| iOS | 14.1 (Current: 17) | Apple no longer provides maintenance for versions below 14.8, which may affect reliability. |
NOTE: The listed versions are the minimum required to ensure the proper functioning of our system. While earlier versions of iOS and Android may still work, these versions are at risk of becoming obsolete. This means that Apple and Google could stop supporting them, increasing possible functionality issues.