Face Validation
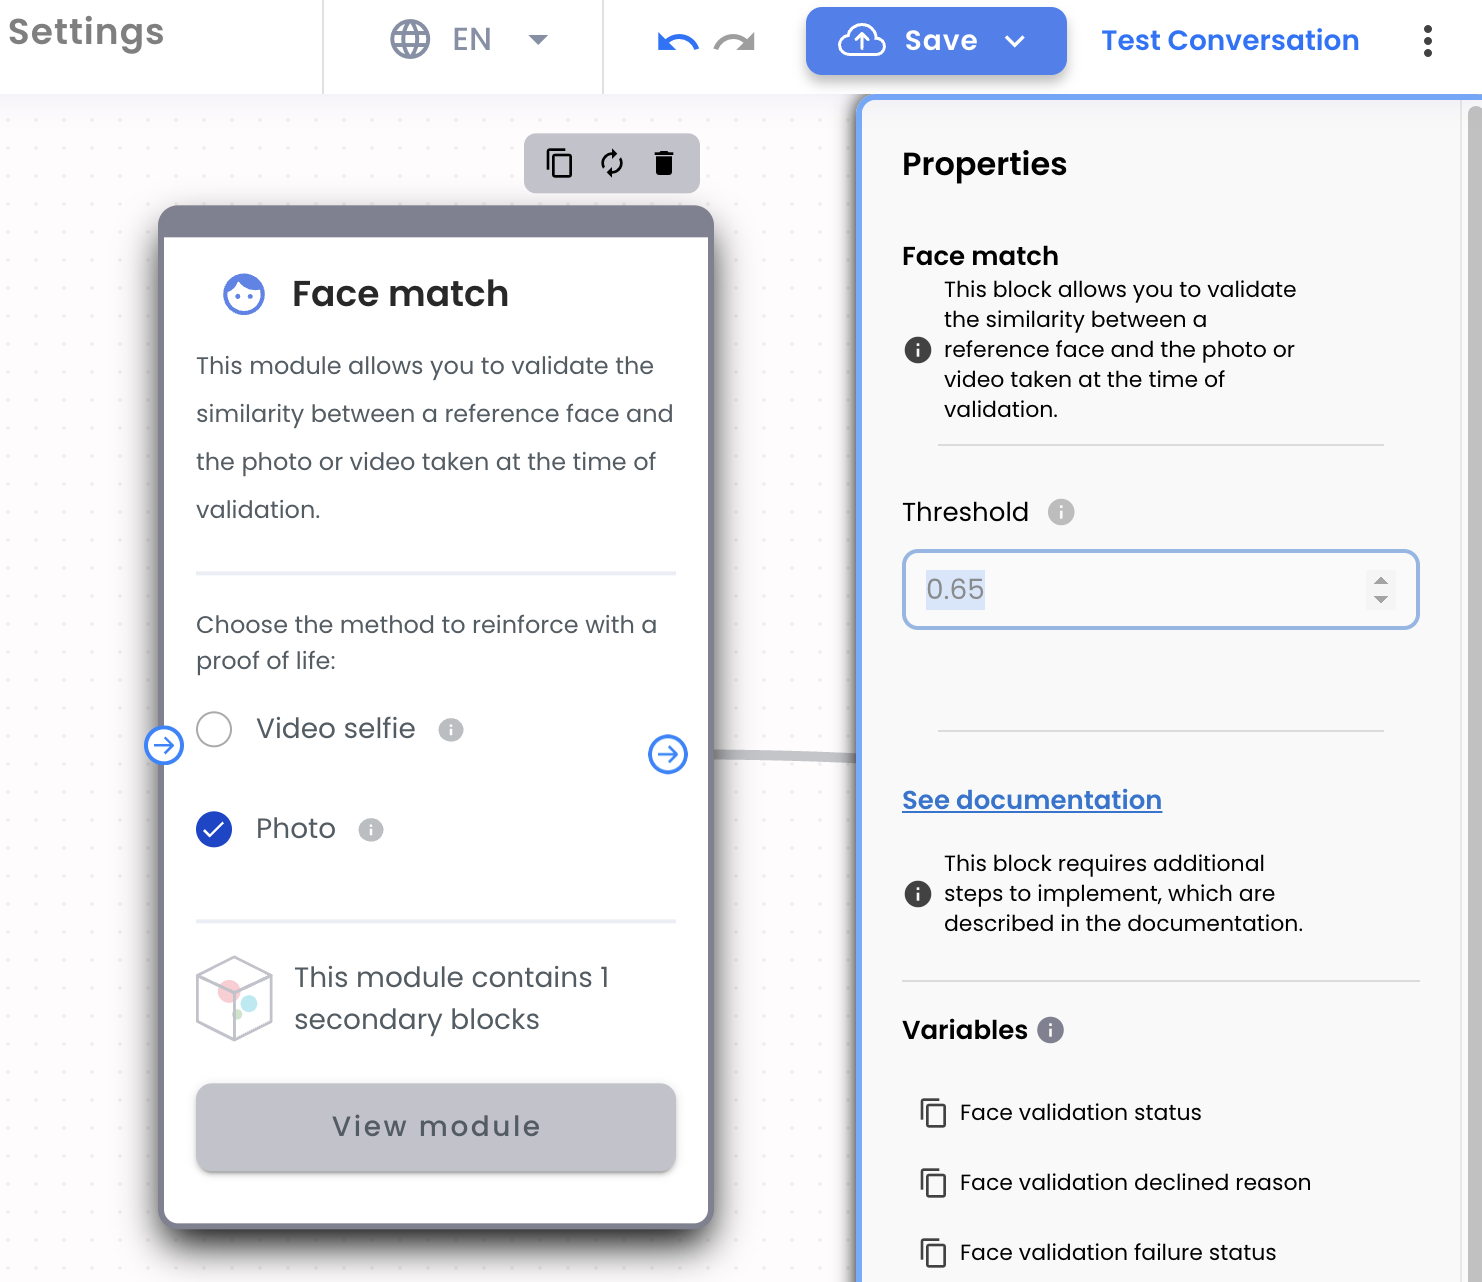
When you are creating the Web Flow, from the Validator Blocks you can select the Face Mach Block. This module allows you to validate the similarity between a reference face and the photo or video taken at the time of validation.
Prerequisites
In order to make the comparison between faces you must upload a base photo, which will be compared with the photo uploaded by your user.
To upload the base photo, please follow these steps:
1. Create enrollment
Setup main Request Headers and Body
To configure the main request headers and body, follow these steps:
-
Create a
POSTrequest to the endpointhttps://api.validations.truora.com/v1/enrollments. -
Set the Headers
Truora-API-Key: enter your Truora API-key. If you don’t have one already, set up an account and then go to Authentication to obtain your Truora API-key.Content-Type: the value should beapplication/x-www-form-urlencoded.
-
Set required values for the request body
type[Required]: Indicates the type of validation to be performed. Set this value toface-recognitionuser_authorized[Required]: This indicates that you have the authorization of the person to be verified. This is mandatory in order to comply with data protection laws. Value must be set totruein order to perform the validation.account_id[Optional]: The account_id is a unique value assigned to each user in the system to distinguish them and access their information and processes. Only Account IDs following the regex pattern [a-zA-Z0-9_.-]+ are supported. Please go to Create an Account ID to learn more about it.confirmation[Optional]: Allowed:none. Used to specify the creation of enrollment that does not require an identity validation to complete. Set asnoneto skip the required validation. If omitted, the enrollment will require the normal validation process to be successful.*
*Note 1: To use the
confirmationparameter your company’s account must be authorized. To request authorization, please contact our Support Team. This authorization will affect only your Truora-API-Keys created after the approval.
*Note 2: If your company requires this functionality, read the next section Enrollment without validation to learn about this special process.
The Create Enrollment endpoint will return a 409 Conflict if the account already has an associated enrollment. This is non-blocking when using the SDK — both the Android and iOS SDKs handle this gracefully by proceeding to validation without raising an error to the user.
When integrating via API directly, you should handle the 409 response and proceed to the validation step.
Send the Create enrollment request you just created, and you will receive a response similar to the following:
/v1/enrollments
Note:
- Enrollment
statuswill initially bependingwith thereasonset towaiting_file_uploaduntil the reference image is successfully uploaded in the next step. Once the image is uploaded, thestatuswill remainpending, but thereasonwill change towaiting_face_validation.- The
account_id,enrollment_idandfile_upload_linkreturned by this endpoint will be used in subsequent steps.
Enrollment without validation (auth required)
To request authorization for this feature, please contact our Support Team. This authorization will affect only your Truora-API-Keys created after the approval.
In certain scenarios, such as when migrating faces from old databases or when a known user cannot pass validation post-migration, your company may need to manage face enrollments without requiring face validation. To handle this, we offer the following solution:
-
Create Enrollment without validation: The
confirmationbody parameter set tononein the Create enrollment endpoint allows you to enroll faces via API without requiring face validation. This is useful for updating the database without revalidating users. -
Delete Enrollment: This endpoint allows you to delete an existing enrollment, enabling you to manage and update face data as needed, such as in cases of picture updates, impersonation, or user data deletion requests. Visit the Delete enrollment endpoint section to learn more.
This ensures a streamlined process for managing your face database in special cases.
If you send the Create enrollment request with the body parameter confirmation set to none, then no face validation will be needed for a successful enrollment, and your response should look as follows:
/v1/enrollments
Note:
- Enrollment
statuswill initially bependingwith thereasonset towaiting_file_uploaduntil the reference image is successfully uploaded in the next step. Once the image is successfully uploaded, thestatuswill change tosuccess- The
account_id,enrollment_idandfile_upload_linkreturned by this endpoint will be used in subsequent steps.
In case your account is not authorized, you will receive an “Insufficient permissions” message:
/v1/enrollments
2. Upload reference image
The reference image must be submitted through a PUT request to the URL returned in the file_upload_link field of the previous step, selecting the Binary type in the Body.
The image formats supported are: jpeg, png and webp. Maximum size is 10 MB.
After sending the PUT request you will receive a response similar to the following:
{{file_upload_link}}
3. Get enrollment
The Get enrollment request checks the status of the enrollment, which can be either pending, success or failure:
Pending Status
- The
statusstarts at pending with thereasonset to waiting_file_upload, and remains that way until the image is successfully uploaded (previous step). - After the upload, the
statusremains pending, but thereasonchanges to waiting_face_validation.
Note: After a successful upload, if the body parameter
confirmationwas set tononein the Create enrollment step, no validation will be required so thestatuswill change to success.
Success Status
Success can occur in two scenarios:
-
Once the face validation is successful (next steps), the enrollment
statuswill change to success. -
After a successful reference image upload, if the body parameter
confirmationwas set tononein the Create enrollment step, no validation will be required so thestatuswill change to success.
NOTE: After a successful enrollment, no further enrollments can be performed with the same
account_id.
Failure Status
- The enrollment
statuscan also be failure if the enrollment is declined or due to an internal error. Here´s a complete reference of the reasons why an enrollment can be declined:
| Failure status reason | Description |
|---|---|
no_face_detected |
Indicates that no face has been detected in the image that will be used as a reference to compare the next photo or video. |
face_in_blocklist |
Indicates that the face in the base image has been detected in the client’s block list. Click Here to learn more about TruFace block list. |
file_format_not_supported |
Indicates that the format of the base image is not compatible with the system. Allowed formats: JPG, PNG, and JPEG. |
face_validation_failed |
The performed face-recognition validation to confirm a match between the face in the reference image and the user’s face was unsuccessful. |
system_error |
An error occurred while processing the enrollment inputs. |
Get enrollment request
To check the status of the enrollment, send a GET request to the endpoint https://api.validations.truora.com/v1/enrollments/{{enrollment_id}}.
If the file has not yet been uploaded successfully, you will receive a response with status pending with the reason set to waiting_file_upload, similar to the following:
/v1/enrollments/{{enrollment_id}}
If the file is successfully uploaded, you will receive a response with the status pending and the reason will change to waiting_face_validation. This indicates that the image was successfully uploaded and is now awaiting a face validation (next steps):
/v1/enrollments/{{enrollment_id}}
If the file is successfully uploaded and body parameter confirmation was set to none in the Create enrollment step, no validation will be required so the status will change to success:
/v1/enrollments/{{enrollment_id}}
Face Match Block
Now add the Face Match Block to your flow and choose the method with which you want to perform the face matching:
-
Video Selfie: The user must upload a short video looking at the camera, without instructions. Formats supported are: webm, mp4, avi, and mov. Maximum size is 10 MB Recommended for: WhatsApp, API integration, Web.
-
Guided video The user must upload a short following some instructions (e.g: look up, look down, look right). Formats supported are: webm, mp4, avi, and mov. Maximum size is 30 MB. Recommended for: WhatsApp, Web.[Deprecated] -
Photo The user must take a picture of his or her face. formats supported are: jpeg, png and webp. Maximum size is 10 MB. Recommended for: API integration, Web.
Properties
- Threshold: Similarity between the provided picture and video that is required to pass the validation from 0 to 1. By default, the threshold is set to 0.65.
-
Additionally:
- Using our API you can configure other parameters to improve the behavior of the validators and the user experience according to your particular needs. Please see the Config Validator Guide for more information on customization.
Please Note:
- The config parameters you will see in the Config Validator Guide are global parameters for your account and will affect all the validations across your account.
- However, validations performed using the flow you created will prioritize the configuration in the Validator Block of your flow. All other parameters, not configurable within the Flow Builder, will take the global configuration values.
-
If face recognition fails you can see declined reason here: **Face Recognition declined reason.
-
Remember also you could customize your web flow. For more information please visit Customize Web Flow guide.
Integrating Your Flow
Once you have finished and testing the Flow, you need to integrate it. Please check out the following guide for more information: How to create a Web Integration Token
Note: Please keep in mind that at this point you may be asked for the account_id parameter with which you performed the enrollment process.
Delete enrollment (auth required)
To request authorization for this feature, please contact our Support Team. Remember this special feature will be enabled upon your company’s request, and will be automatically enabled when requesting the Enrollment without validation feature. This authorization will affect only your Truora-API-Keys created after the approval.
In order to delete an enrollment you must:
- Know the
enrollment_idreturned in Create enrollment step. - Create a DELETE request to the endpoint
api.validations.truora.com/v1/enrollments/{{enrollment_id}}.
Be sure to keep track of the account_id of any deleted enrollment, as you will need it to create a new enrollment for the same account_id.
The following success message confirms that the enrollment has been deleted, indicating that no enrollment is now associated with the account_id of this user:
/v1/enrollments/{{enrollment_id}}
In case your account is not authorized, you will receive an “Insufficient permissions” message:
/v1/enrollments/{{enrollment_id}}
Get Results of Validation
-
You can get the validation results with a query to the Truora’s API or from the dashboard. For more information, please see Guide to Get Results.
-
The information about the results of the validations made to the user can be notified through Webhooks. This alternative allows you to receive hooks of the actions/rules created.