Outbound Message Guide
The Outbound Buttons block still works as before, but it will soon support multiple button paths. The new feature enables flexible configuration of these paths, with a mandatory fallback path called ‘In Other Case’ for unmatched responses. More details and documentation will be available soon!
Outbound Messages are those sent directly to users without any prior interaction on your WhatsApp Business Account (WABA) line. According to META’s policies, an approved Outbound Message is the only permitted method for initiating contact with customers. To send these messages, the following two requirements must be met:
- User Opt-In: The user must grant explicit permission to your business, allowing you to contact them via Whatsapp for business purposes. This is known as an opt-in. For more guidance on obtaining opt-ins, visit this link.
- Message Approval: The Outbound Message you will use to initiate interaction with users must be approved by Whatsapp (META), to ensure compliance with requirements and guidelines and prevent user spam, fraud and other policy violations.
Prerequisites
To flawlessly perform all the steps of this guide, the following prerequisites must be met:
- Truora Account: If you don’t already have one, learn how to Set up a Truora account.
- Activated Whatsapp line: Follow this guide to acquire and activate WhatsApp lines in Truora.
- A Created Whatsapp Flow: Have at least one flow already built. Learn how to Create a WhatsApp Flow in Truora.
Create an Outbound Message
To create and send an Outbound Message for approval, follow these steps. Please note that each message can only be sent for approval once:
- Log in to the Truora dashboard and click Open in the Customer Engagement section.
- Click on Outbound Messages and then on Create new message:
- Fill in the required fields:
-
Outbound name: Enter a name for the Outbound Message.
-
Message category: Select a category that best describes the message:
Marketing: Use this category to send promotional offers, product announcements, and other marketing content to increase awareness and engagement.Utility: Use this category for messages related to a specific transaction or subscription that the user has already agreed to. These messages will typically be used to confirm, suspend, or change the details of that transaction or subscription.OTP Code: Use this category to authenticate users with one-time passcodes, which can be used at multiple steps in the login process.
-
Line that sends the message: Choose the Line that will send the Outbound Message.
-
Message language: Select
English,Spanish, orPortuguese, for the language of the message. -
Message type: Choose the type of content for the Outbound Message, such as
Text,Video,Image, orDocument. If Message Category is set toOTP CodeonlyTextwill be available. -
Select the conversation type:
- Notification: If the Outbound Message is a single notification. When Message Category is set to
OTP Codethis will be the only available conversation type. - Flow: If the Outbound Message will be used for starting a Flow once the user accepts to continue. Fill in the required fields:
- Option for continuing conversation: Contains a text specifying a continue message that will appear as a button to the user. For example: “Continue”.
- Option for finishing conversation: Contains a text specifying a cancel message that will appear as a button to the user. For example: “Cancel”.
- Notification: If the Outbound Message is a single notification. When Message Category is set to
- Enter the message: Enter the message to be sent to the user, such as: “Hello, are you ready to start the process?”. If the message includes variables, insert them using Insert customizable word and provide a name and an example of the variable. Please keep in mind that the message should not be finished with a variable.
- Message actions: When you select Notification as the conversation type, you can add buttons that invoke different types of actions:
- Call: When the user taps this button, the specified phone number will be dialed.
- Link: When the user taps this button, the specified URL will be opened.
- Once you have completed the message, click on Submit for approval. Please note that the message must be approved by the Facebook (Meta) team and this process can take anywhere from 5 minutes up to 5 business days.
Get the Outbound ID (Optional)
Once the message is approved by Facebook (Meta), you might need to obtain the Outbound ID of your message for other purposes within Truora, such as including your message as part of the OTP verification in a Phone Validation process. To obtain it, follow these steps:
- Click on Outbound Messages in the sidebar.
- Locate the desired Outbound name in the list of outbound messages.
- Click on the copy icon below the Outbound name to copy its Outbound ID.
Send Outbound messages
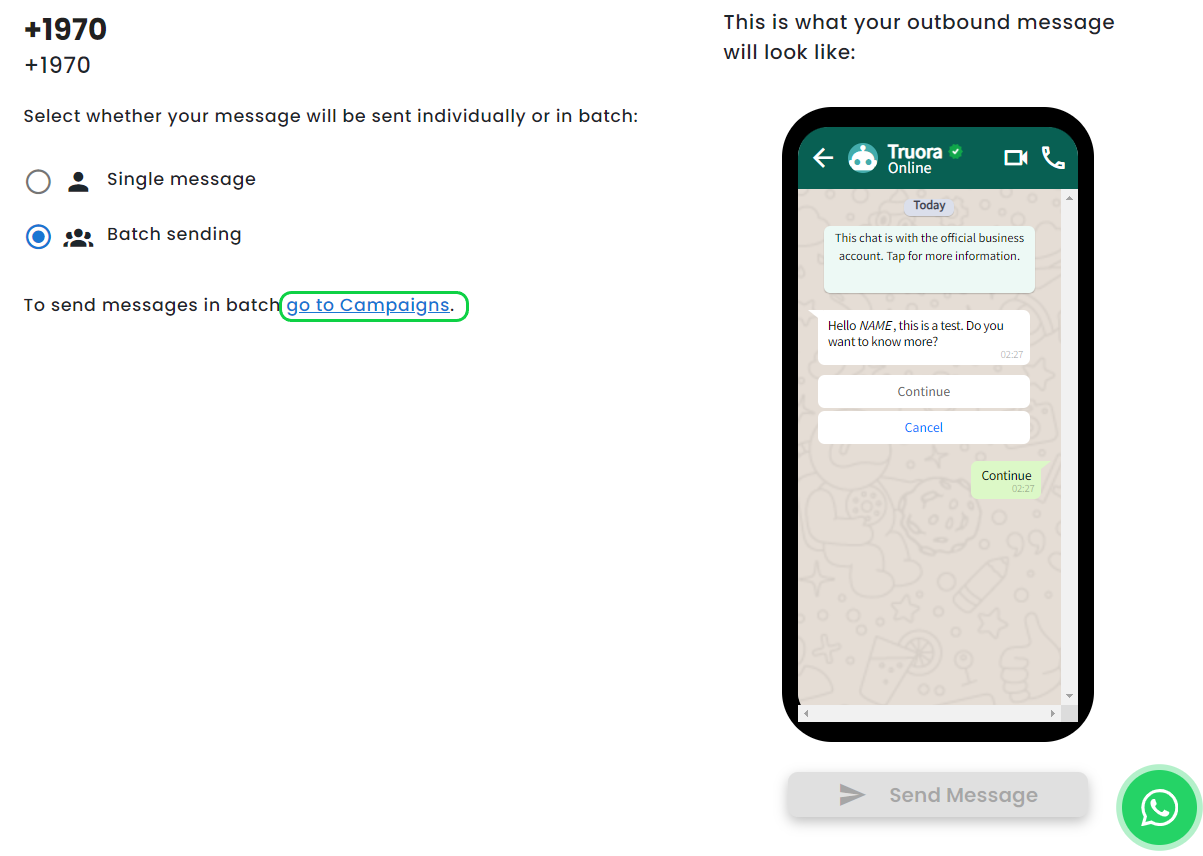
Once the message is approved, click on Outbound Messages and select the approved message. You can either choose Single message or Batch sending.
Single message
To send the Outbound Message as a single message:
- Select Single message.
- Select the country and enter the phone number.
- Fill in any required variables for the outbound message.
- Enter or paste the flow ID if the message will start a flow.
- Click Send Message to send the message.
Batch
If you select Batch sending, you will be asked to go to Campaigns to crate a New campaign and then upload an Excel (.xlsx) file that contains the following columns:
- Country code
- Phone number
- Variable: name
Please visit the Create Massive WhatsApp Campaigns guide to learn the details of this process.
If you want to send outbound messages via API, check out the Start Conversations via API guide or our API documentation.
Create an Outbound message in flow builder
You can create an Outbound Message while creating a flow that will start with this message:
Learn how to create a flow by following the Create WhatsApp flow guide.
- Select the You send it box in the flow builder.
- Click on +Create initial message in the right sidebar.
- Fill in all the required fields.
- Click Submit message for review. Remember that review times by META team can range from 5 minutes up to 5 business days. Once approved, you can use it to start conversations with your customers.
- When the message is approved, you will see a notification stating Message approved by Meta.
Testing your Outbound message
Once you reach the Test Conversation option in the flow creation steps, you have the opportunity to verify the message or select another approved outbound message. Then, to send your message, you can either choose Single message or Batch sending. For Batch sending you will be asked to upload an Excel (.xlsx) file as explained in the previous step Send Outbound messages..
To test sending your outbound message as Single message, after Creating WhatsApp flow:
- Save and publish your flow.
- Click on Test Conversation.
- Click on You Send it and Continue.
- Select the Message that will start the conversation and Continue. This is your approved message.
- Select the country and fill the recipient phone number, then click Next.
- Review the message and recipient details, then click Send.