
Activate User Recovery
In a digital identity landscape one of the primary challenges is related to user abandonment - individuals who start but don’t finish the verification process, making it tricky to validate their identity. This implies that the process will remain active for a set period (usually 2 hours by default). If there’s no response within this window, the process will conclude and be marked as expired.
To address this issue, we have introduced a feature that enables users to return and complete the verification process, by sending them a WhatsApp message with a link to resume the verification process where they left off.
We provide two methods: Automatic recovery and User triggered recovery.
✓ Note: You can use either method, or activate both at the same time.
Automatic Recovery
When a process is initiated and the user abandons it before completion, if Automatic Recovery is enabled in the flow, a WhatsApp notification will be sent to prompt the user to resume the process. The process will then wait for the user’s return, allowing them to pick up where they left off and successfully complete the process. Please note the following:
-
The return point will always be at the beginning of a validation. For example, if the workflow involves two validations (document validation and facial recognition), and the user abandons the process during the facial recognition validation after completing the document validation, the recovery process will start again from the beginning of the facial recognition validation. The document validation does not need to be repeated.
-
If a process or validation expires, its status will remain pending rather than being updated to failure. The expiration time of the process will be reset to 2 hours, the user´s phone number will be added to the process and the variable
is_postponedwill be set to true. Consequently, a link will be sent to the user’s phone number allowing them to resume the process from where it was left off. Please note that these processes can only be recovered once, and the process time will resume from the moment of recovery.
Enabling Automatic Recovery in a Flow
1. Flow configuration - Flow Builder
Within the Settings of the Flow Builder, you will find an option to enable Automatic Recovery. Additionally, you should include a URL (Redirection link) to redirect your user to your own page once the validation is completed, enabling them to continue with the remaining process of your company.
To set up this feature, navigate to 02 Settings > User Recovery tab in the editor mode:
- Select the Automatic recovery method.
- Introduce the Redirection link which will be used to redirect the user once the process has finished.

2. Get phone number from user
It is crucial to have a phone number to which the recovery link can be sent. The following options are available based on the possible scenarios:
-
If you already have your user’s phone number before initiating the validation process, you can include it when generating the process token by means of the phone parameter, and then it can be used to resend the recovery link if applicable (for more information refer to the Web Integration Token Guide).
-
If you don’t have the user’s phone number at the beginning of the validation process, perhaps because the validation occurs before requesting data from the user or due to any other reasons, the validation process will prompt the user for their phone number in the initial views. This number will be used to send the recovery link later on.
Note: Providing a phone number is mandatory for the user when the automatic recovery option is enabled.
3. Whatsapp Line (WABA)
The Whatsapp line will be used to send the recovery link to the user. You can decide whether to use a Truora line or use your own WhatsApp Business Account (WABA) (recommended).
Using Truora’s line
Within this option you will use Truora’s line which already has a predetermined outbound message. There is a field labeled company name (assigned to the internal variable customerName) where you can input your company´s name and it will be integrated into the predetermined outbound message content.

Using your own WABA line (recommended)
You have to provide your Company’s name which will be used in the message to be sent to users, so it is a required input. It is necessary to have an activated whatsapp line:
- This guide explains how to create a WABA line.
- This guide explains how to activate the line in Truora.
Once you have created and activated the WABA, you must create an outbound message (message that will start the communication with the users):
In the next images, we have filled out a sample message to serve as your guide. However, for more details please visit:
- How to create an outbound message in our platform:
- Navigate to the title “Create an Outbound message in flow builder” to learn how to do it from the flow builder.
- You can also find Create Outbound Message endpoint in our API, to create your outbound message.
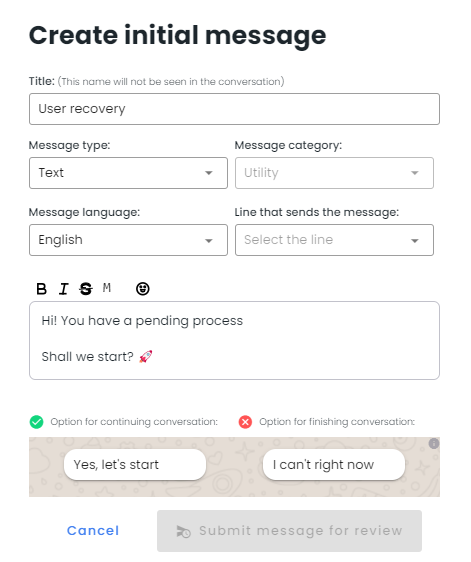
Example: Create an Outbound message in flow builder
After creating a new message, there are 3 possible states: pending, failed and succeeded. If the message approval fails, you will need to create a new one. User recovery will work as soon as the message approval is accepted and the rest of required inputs are valid.

Finally, from the User Recovery configuration, you can now select the line and the outbound created above:

About links sent to users
- A link will be sent to the WhatsApp number provided by the user when the initial process and validation TTL (Time to Live) has expired. The user will be able to resume the process from the same validation where it was left off.
- The link received by the user will remain valid for 2 hours. (This timing depends on the expiration time configured in the flow.)
Implementation: Client Side
After enabling automatic recovery from the flow builder configuration option, it’s essential to provide the URL (Recovery link) that allows the user to continue with the client´s side flow after the validation process is completed. This configuration is necessary because your company might integrate the verification process in a different order within the steps of your own processes:
-
When verification is the first step, the retrieved user will be redirected to the usual URL handled by the client.
-
When verification is a middle step, there can be two situations:
- If the client has stored the information from the previous steps, when redirecting the user, they will be able to recover the data previously filled in by relating it to the Process ID, the Document Number or the Account ID.
- If the client has not stored the information from the previous steps, the user can be redirected to a step where this data is requested again using the URL configured for the postponed processes and by means of the validation of the
is_postponedvariable the verification step can be skipped.
-
By generating the process token, the customer will be able to share the user’s phone number, using the phone parameter in the body of the request (for more information refer to the Web Integration Token Guide).
-
It will be necessary to add a new condition to identify the process status, for example if a process was postponed, using the variable
is_postponedas a reference.
User Activated Recovery
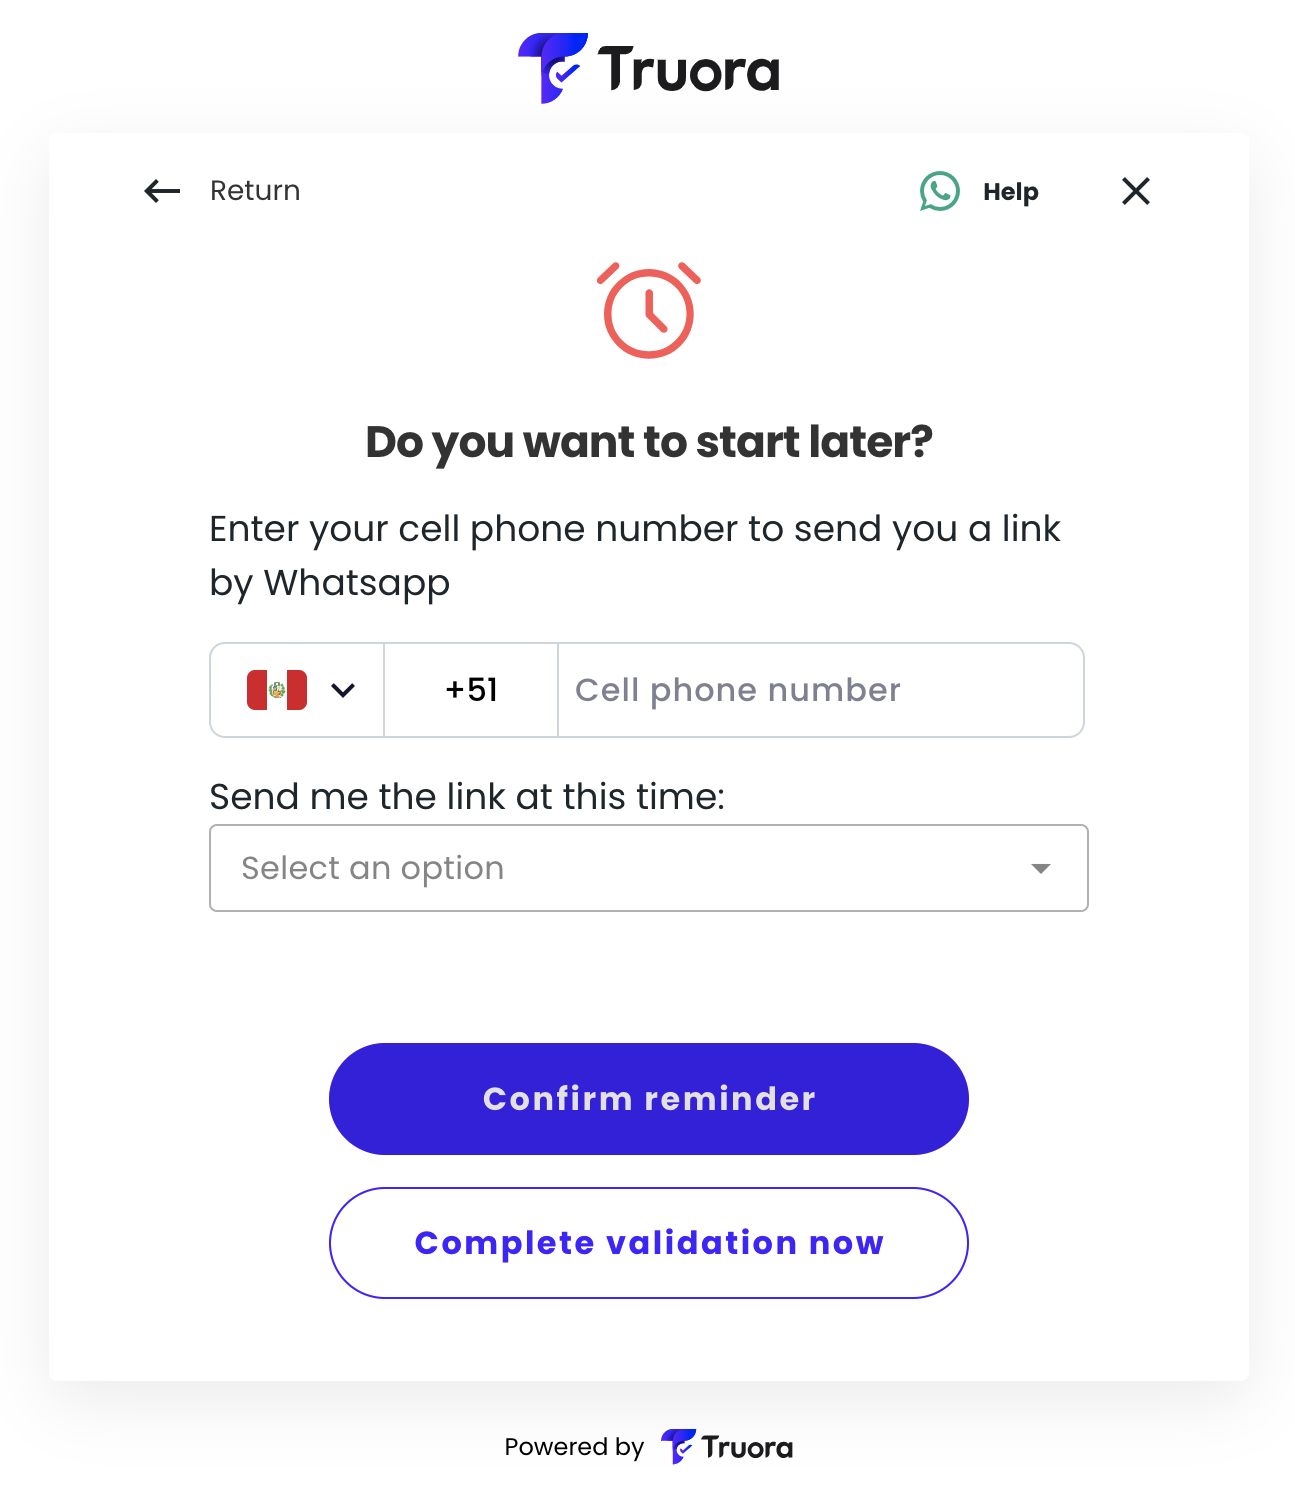
This option lets users postpone a verification process to a specific time (not exceeding 24 hours) if they don’t have all the required conditions at the moment of initiating the process. If the user decides to postpone the process, the following steps will occur:
- The user must choose the time they would like to be recontacted to complete the verification process.
- The process that had already been initiated will fail (without incurring a charge to your company) with the decline reason
user_process_postponed. - At the time scheduled for recontact, the user will receive a URL from the client’s page where they can resume the abandoned process.
Enabling User Activated Recovery in a Flow
This option requires no additional development from the client, and the activation process is similar to that of automatic recovery.
Simply navigate to 02 Settings > User Recovery tab in the editor mode:
- Select Activated by user
- Introduce the Process link to which the user will be redirected to start the validation process.

User Experience
When you enable any user recovery method, all created processes will ask the user to submit their phone number, so that they can be contacted later.
Automatic Recovery View
The user will be asked at the beginning of the process for their phone number too. This is how this view looks like:
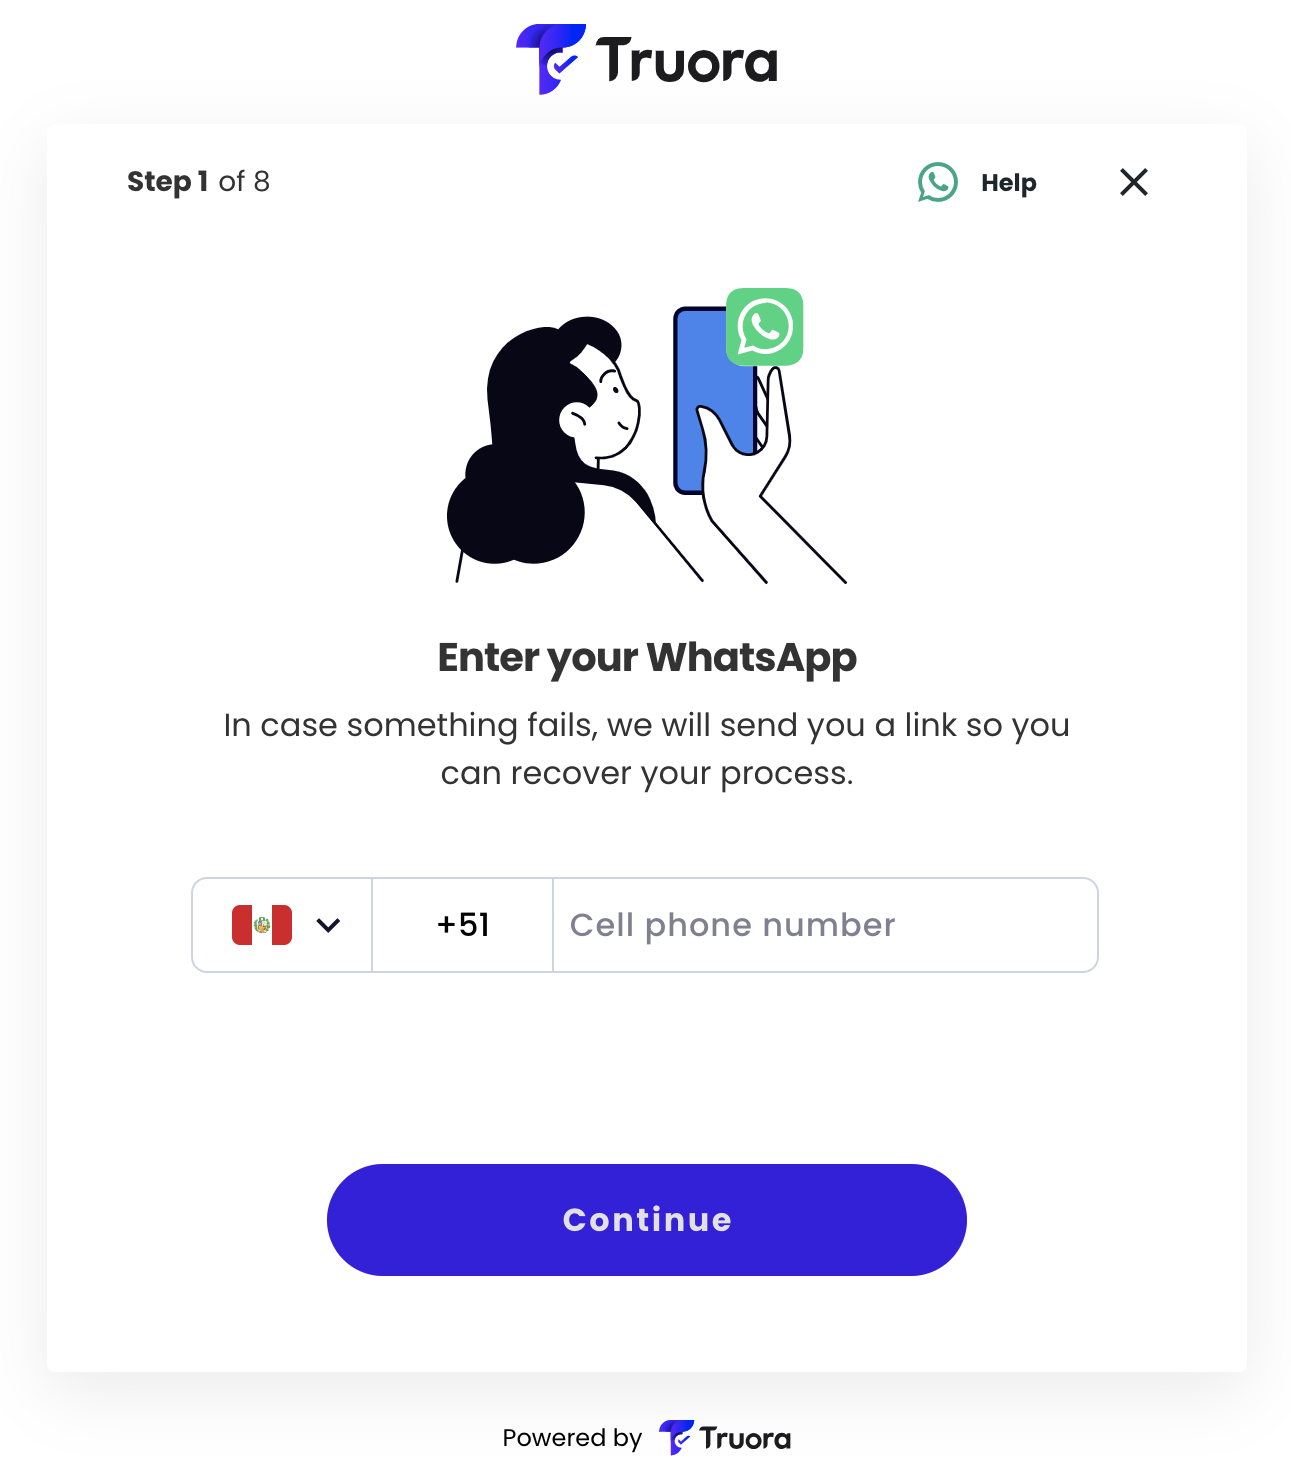
Note: Remember you can set this phone number value if you already have it. You just need to pass the phone key with the value in this format +country_code phone_number (e.g.: +573100000000) when you are generating the process link.
User Activated Recovery View
The user will be asked to start the validation process or to postpone it. If the second option is selected, they will have to provide their phone number and the time when they want to be contacted.