

Getting started: Hybrid frameworks
Introduction
Truora ships official plugins for the two most common cross-platform frameworks:
If you are using either of those, use the official plugin — you do not need this guide.
This guide is for every other hybrid framework — Capacitor (Ionic), Apache Cordova, NativeScript, .NET MAUI, or any web-in-a-native-shell stack we do not yet provide a turnkey plugin for. In all of these cases you can still integrate the Truora Validations SDKs by writing a thin native bridge around our Android and iOS SDKs.
The Validations SDKs are fully native (Kotlin on Android, Swift on iOS). They render their own camera UI, run on-device anti-injection security, and talk to the Truora API directly. There is no pure-JavaScript build, so the integration always follows the same shape regardless of framework: your web layer calls down to a small native module, and that module drives the native SDK.
Why native? Document and face capture rely on camera access, on-device liveness, and injection-attack detection that cannot run inside a WebView. The bridge pattern lets your web app trigger that native experience and receive the result back.
The bridge pattern
The three layers
Every hybrid integration has the same three layers: your web code calls a small native bridge, and the bridge drives the Truora SDK and hands the result back.
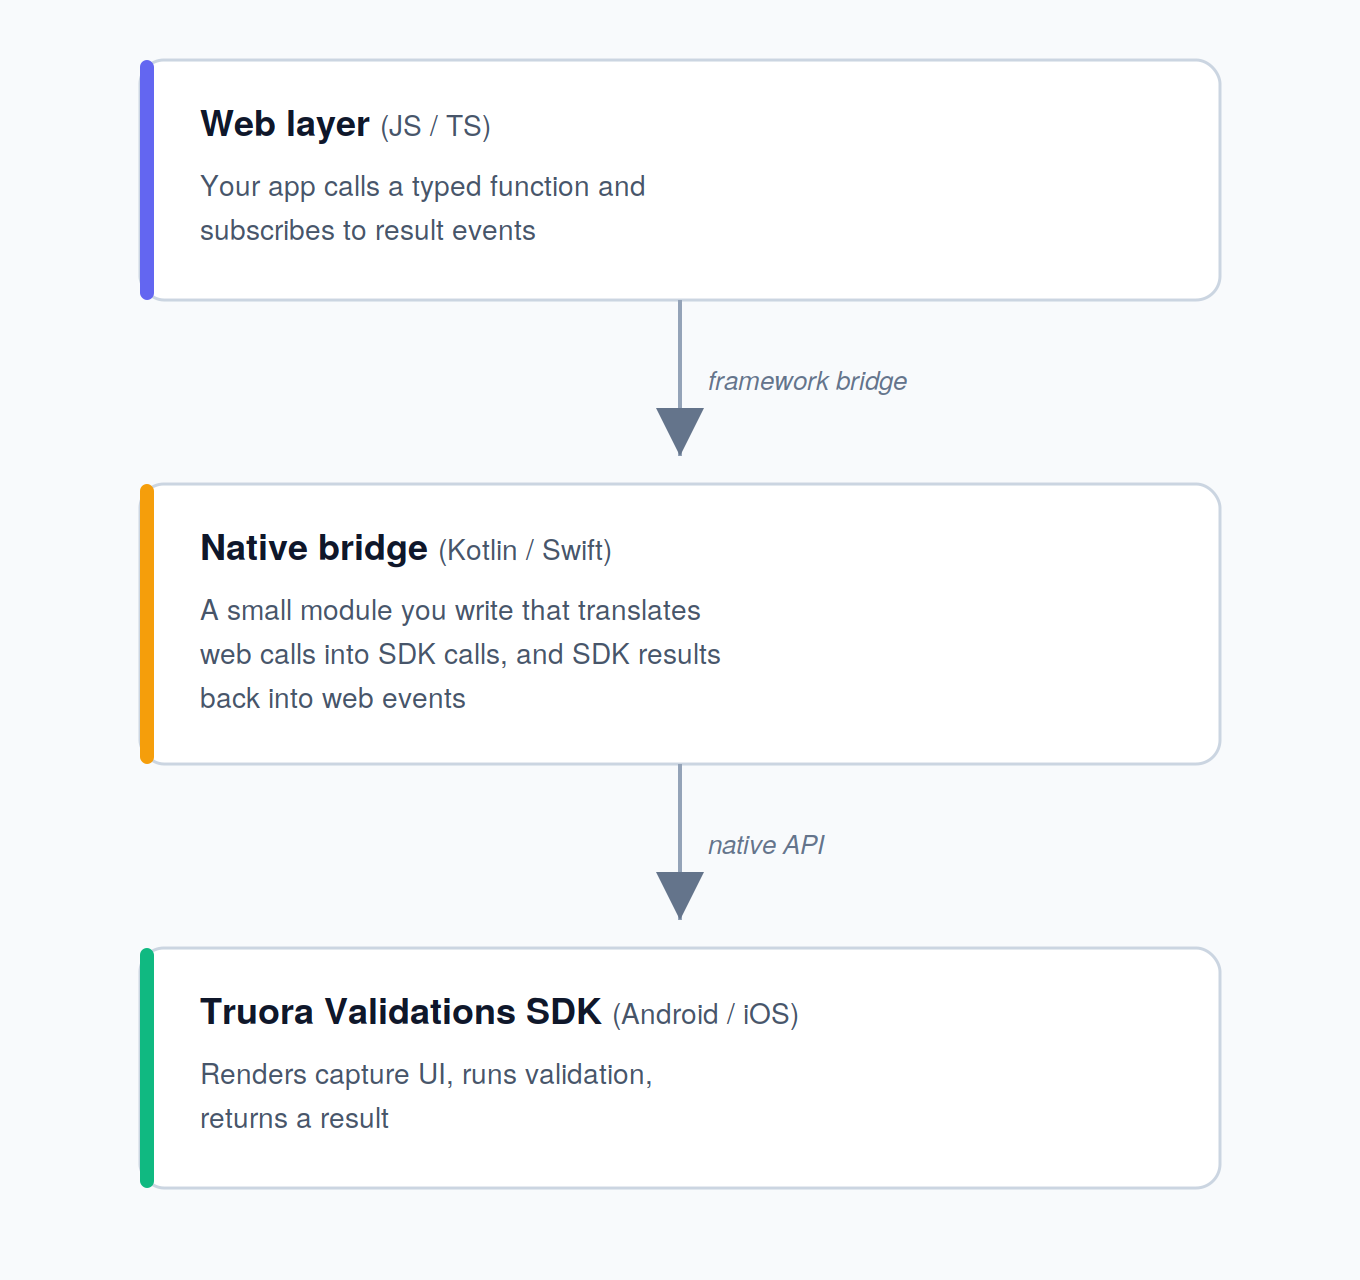
The only part that is framework-specific is how the web layer reaches the native layer. Capacitor calls it a plugin, Cordova a plugin, NativeScript a native module, MAUI a platform service — but the responsibilities of the native bridge are identical everywhere.
What the native bridge must do
Whatever framework you use, your native bridge needs to cover these four responsibilities. Once you understand them, porting to a new framework is just wiring them up to that framework’s bridge API.
- Receive a start request from the web layer. Accept the API key, a
userId/accountId, the validation config (type, autocapture, country, etc.), and optional UI customization. - Provide the API key to the SDK. Both SDKs ask for the key through a key provider interface (
TruoraAPIKeyGetter) instead of taking it as a plain argument. Your bridge implements that interface and returns the key it received from the web layer. The key must be an SDK (temporary) key — see Shared logic for the full two-key model. - Build and launch the validation. Use the SDK builder to configure the validation, then start it from the current Activity (Android) /
UIViewController(iOS). - Send the result back to the web layer. Translate the SDK’s
completed/canceled/errorresult into an event or callback your web code can consume.
Constraint that applies everywhere: each SDK builder accepts only one validation type. To run document and face, run two validations sequentially (document first, then face using the document photo as reference). The Capacitor example shows the full pattern in both Kotlin and Swift.
Building the integration
General steps
The concrete steps are always the same four; only the bridge API changes per framework:
| Step | What you do | Where |
|---|---|---|
| 1 | Define a typed web interface | Web layer (TS/JS) |
| 2 | Add the Android SDK and write the bridge | Kotlin |
| 3 | Add the iOS SDK and write the bridge | Swift |
| 4 | Register the bridge, then call it | Per-framework |
Native SDK references
For the native SDK details — dependency coordinates, permissions, the builder API, configuration options, and result types — follow the platform guides; the bridge code calls exactly those APIs:
- Android SDK getting started
- iOS SDK getting started
- Shared logic — API keys,
userId, language, and UI customization (identical across every integration)
A complete worked example: Capacitor (Ionic)
The fastest way to understand the pattern end to end is to read a full, working integration. The Capacitor + native SDKs guide walks through every layer with copy-pasteable code:
- the TypeScript plugin interface,
- the Android bridge (Kotlin),
- the iOS bridge (Swift),
- registration, permissions, and build configuration,
- configuration options, result handling, and troubleshooting.
Even if you are not using Capacitor, the Kotlin and Swift bridge code is reusable almost verbatim — only the registration glue (the steps that connect the web layer to the native module) differs for your framework.
Where to go next
Pick the path that matches your stack:
| Your framework | Recommended path |
|---|---|
| React Native | Use the official React Native plugin |
| Flutter | Use the official Flutter plugin |
| Capacitor / Ionic | Follow the Capacitor + native SDKs guide |
| Cordova, NativeScript, MAUI, other | Apply the bridge pattern above; use the Capacitor example as a reference implementation |
| Native Android / iOS | Integrate the SDK directly — Android · iOS |