Configure your flows to perform API requests
After configuring a Custom integration you’re now ready to use it within your flow to perform API requests during users’ WhatsApp interactions. In this guide, you will learn how to use the Custom integration block within Truora´s Flow builder through a practical example.
Before beginning
-
If this is your first time exploring our Customs integrations feature, you’ll need to understand how to set up an integration for your external API service before proceeding with this guide. We strongly recommend reading our Custom integrations guide to better understand how these integrations work. The integration configured in that guide will also be used as an example in this one.
- If you’re unfamiliar with WhatsApp flows, we recommend reading the guide on how to Create a WhatsApp flow using Truora’s flow builder.
To summarize, the integration mentioned above contains two actions:
- Create user validation: This action receives a username provided by the user, makes a request to the API, which sends an OTP code to the user’s email, and returns a Validation ID if the user exists. This Validation ID will be the input for the next action.
- Validate code: This action receives the Validation ID from the first action, along with the OTP code entered by the user, and makes an API request to validate the code.
Flow structure
For this guide’s purposes, we’ll create a flow that follows this simple process:
- The user sends a specific Inbound message to the chatbot to initiate the login conversation.
- The bot asks the user for their username, and the user provides the requested username.
- The bot makes an API request using the provided username as an input to the Create user validation action of the Custom integration.
- The Create user validation action responds with the status of the API request. If successful, it returns a Validation ID, and the OTP Code is sent to the user’s email.
4.1. If the request fails, the chat ends, notifying the user with “User not found”. - The bot asks the user for the OTP Code, and the user provides the requested OTP Code.
- The bot makes the API request using the provided OTP Code and the validation ID as inputs to the Validate code action of the Custom integration.
- The Validate code action responds with the Validation status. If success occurs, the chat ends, notifying the user with “Login Successful”.
7.1. If the Validation status is not success, the chat ends notifying the user with “Login Failed”.
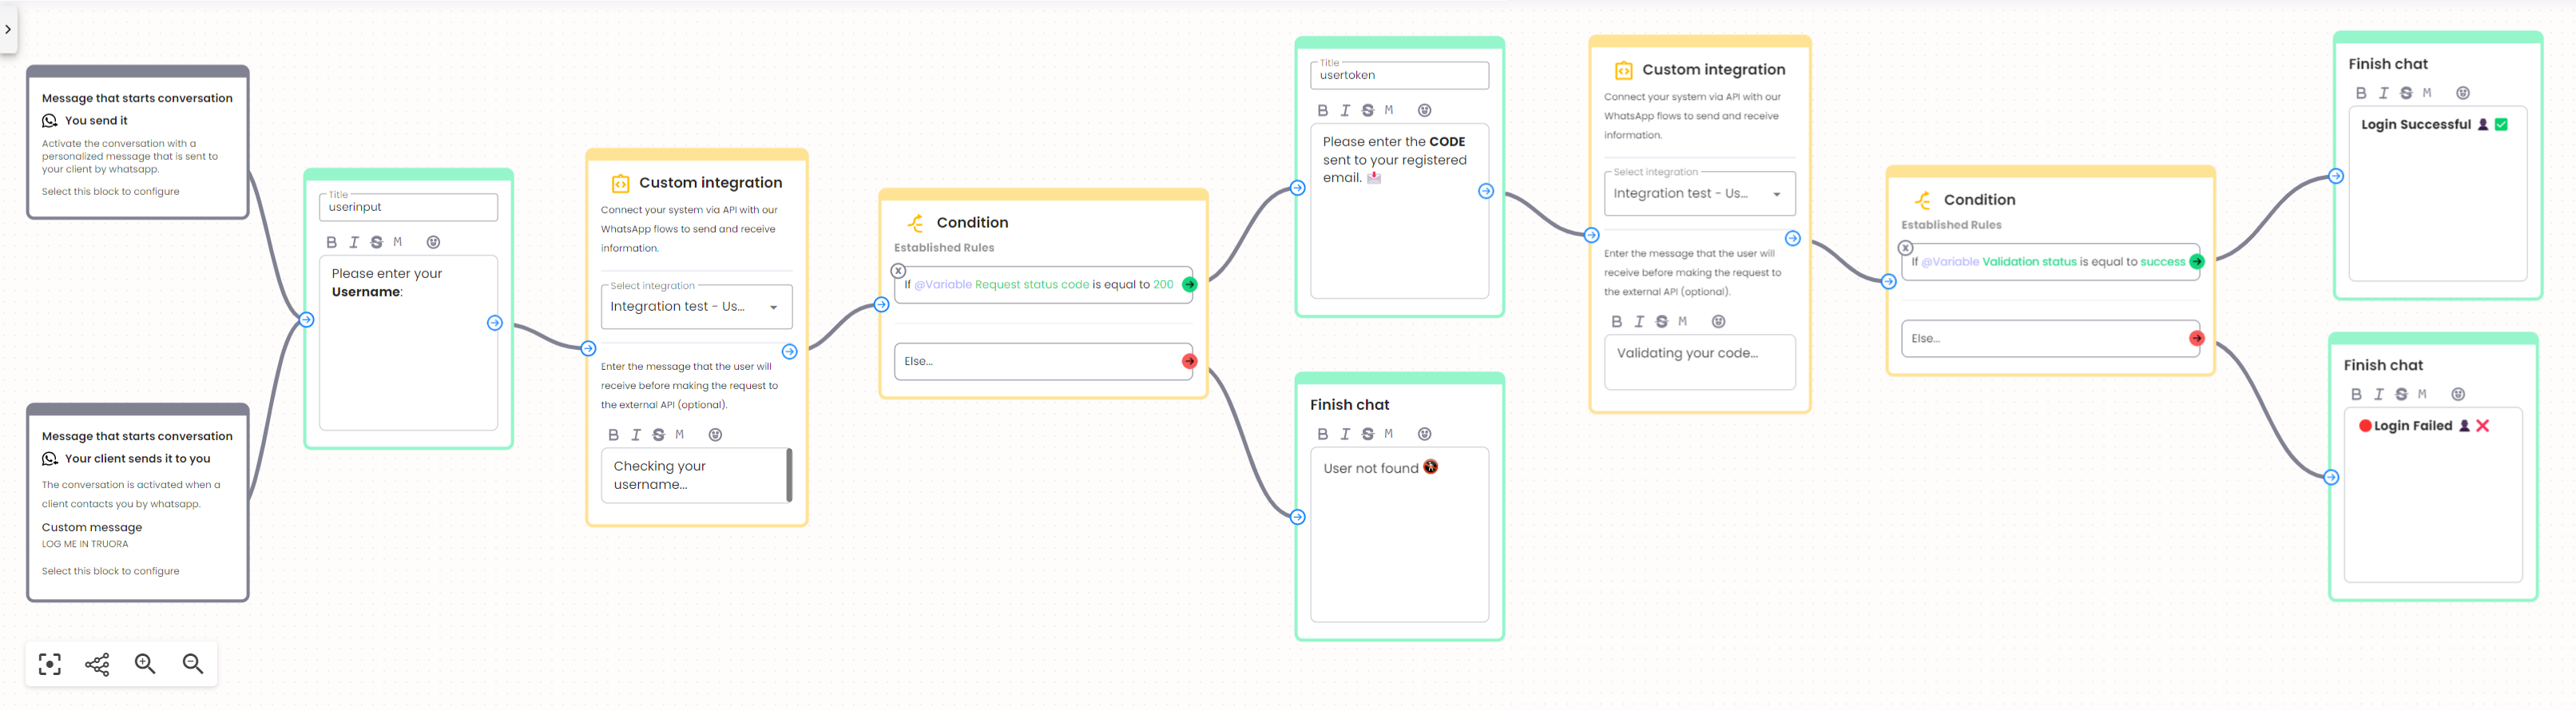
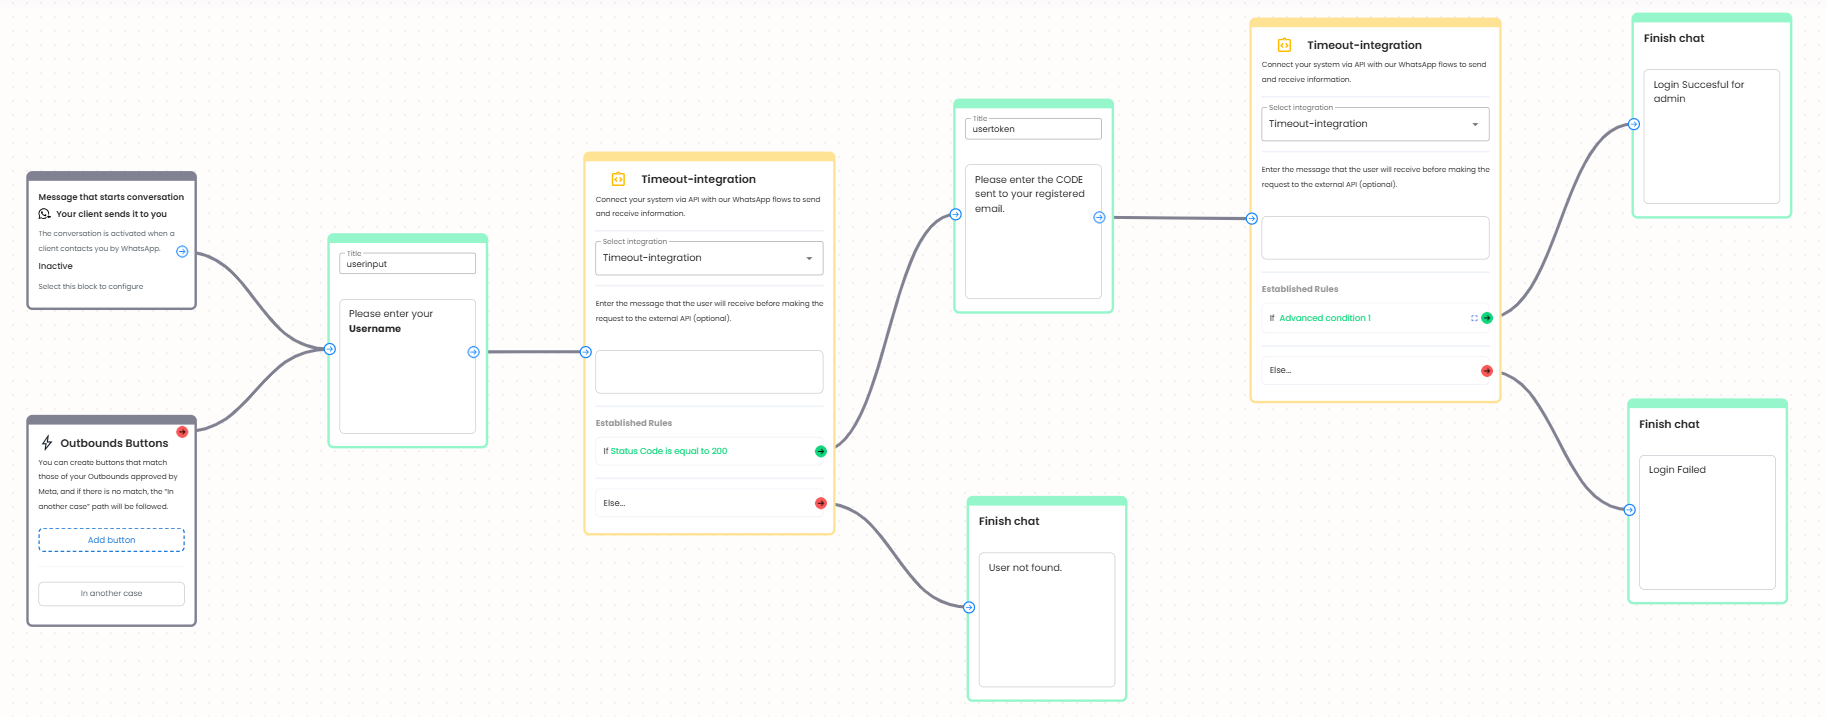
The following is a wide image of the created flow. Scroll horizontally to view each step of the chatbot process. In the upcoming sections, we’ll walk you through the creation process for each of these steps:
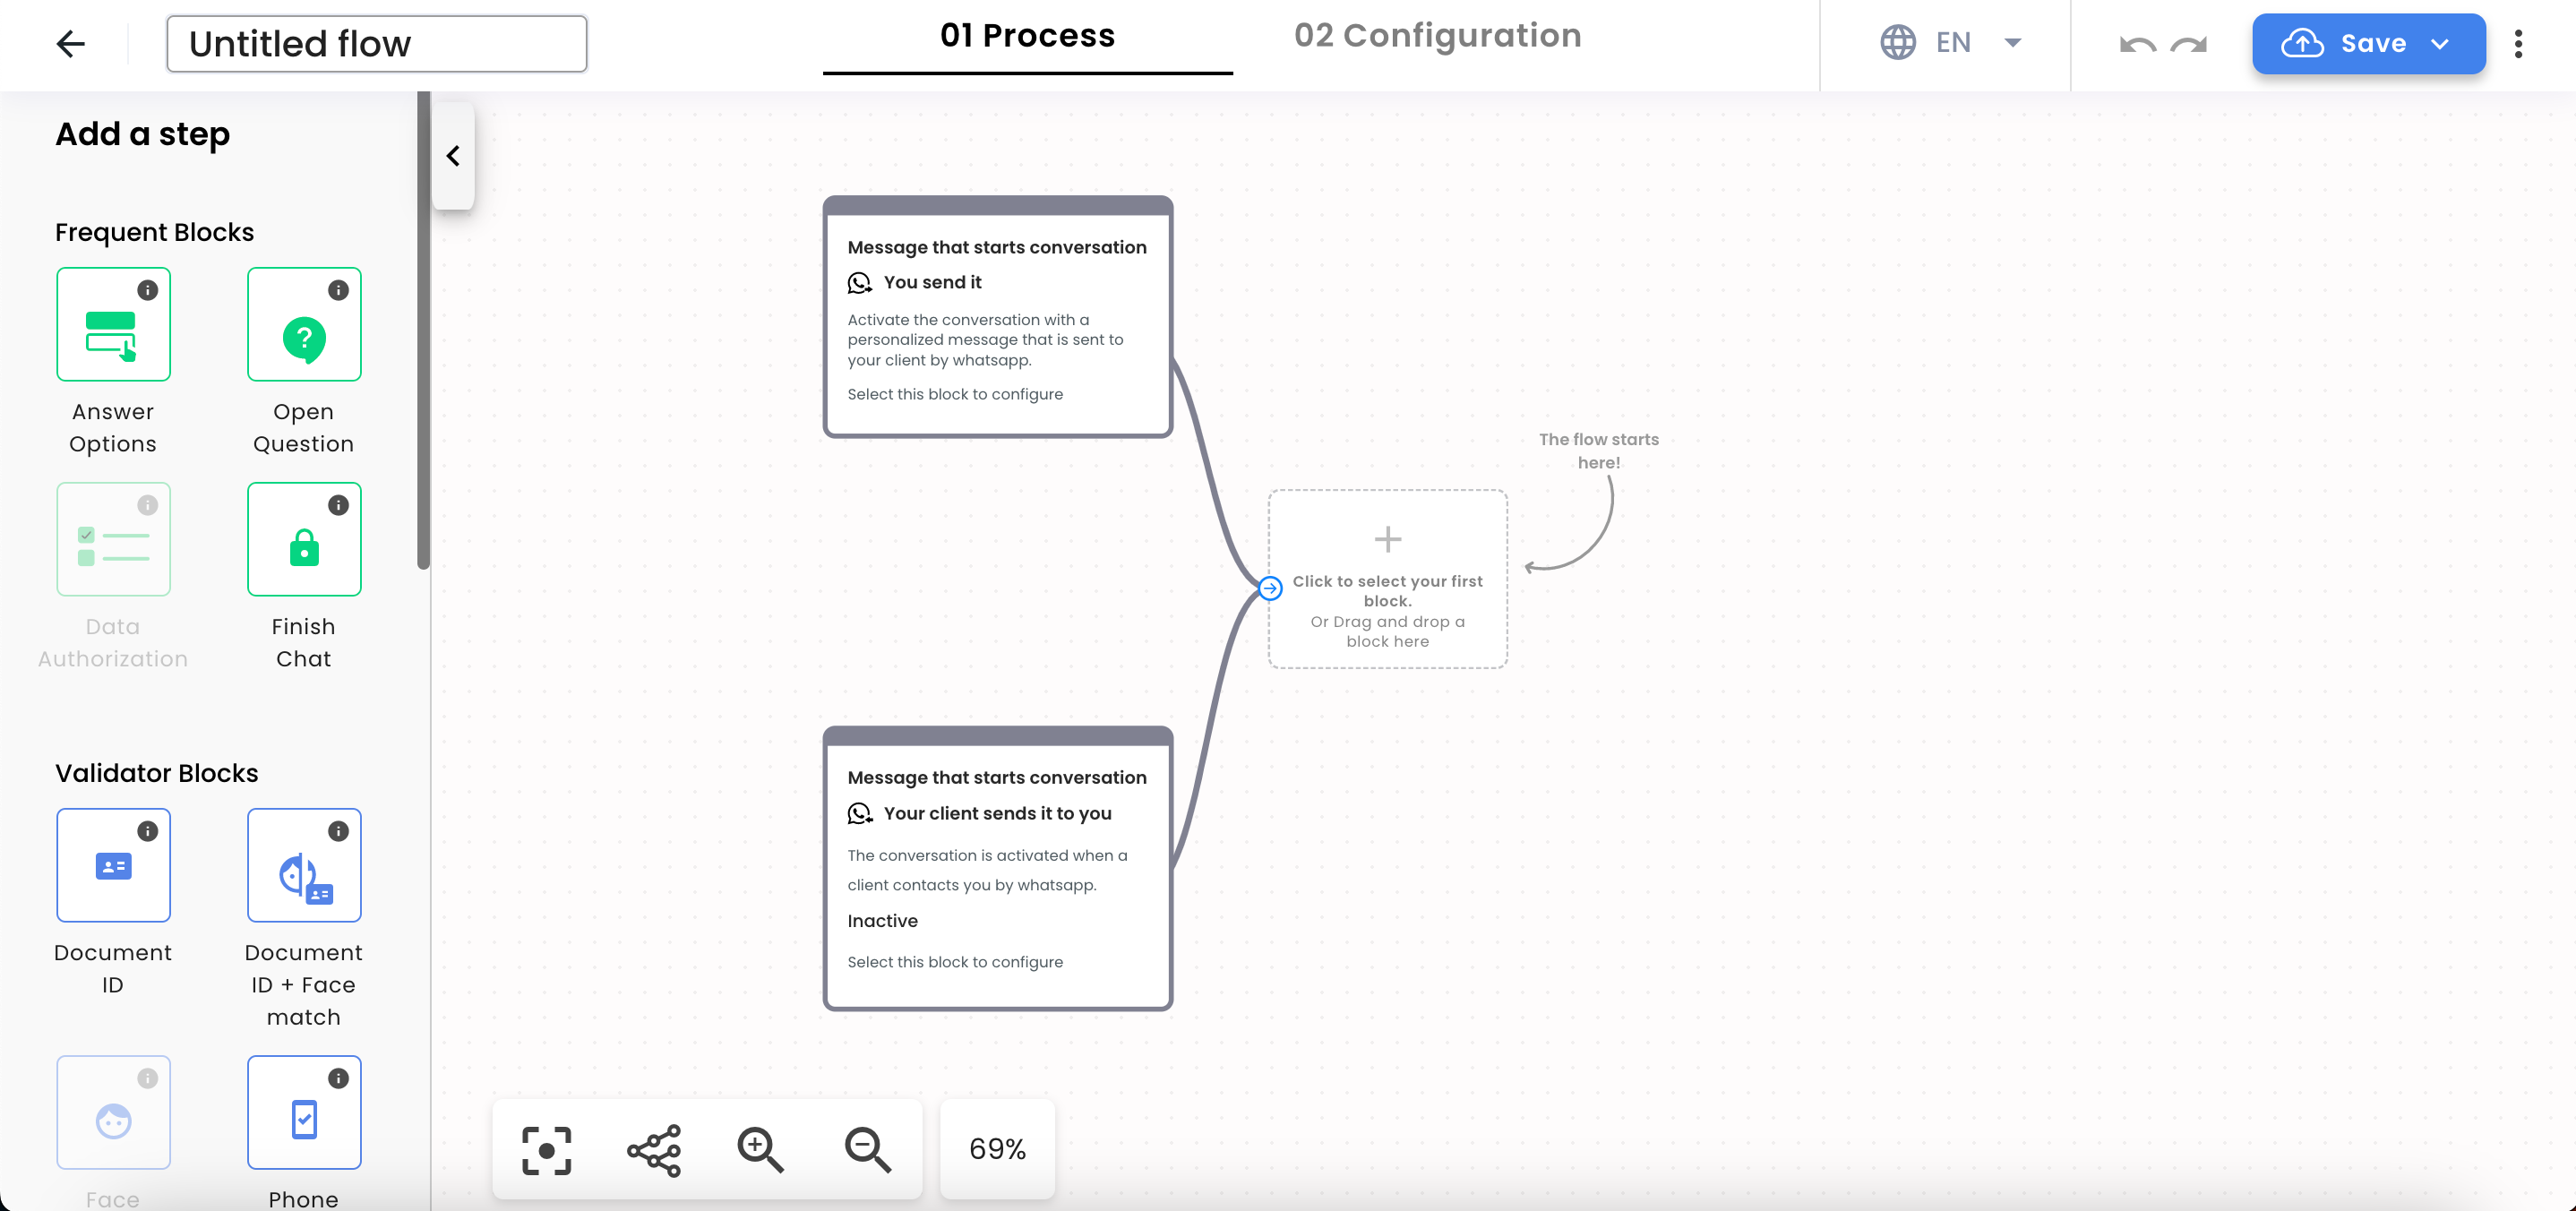
Creating the flow
Setting up the template
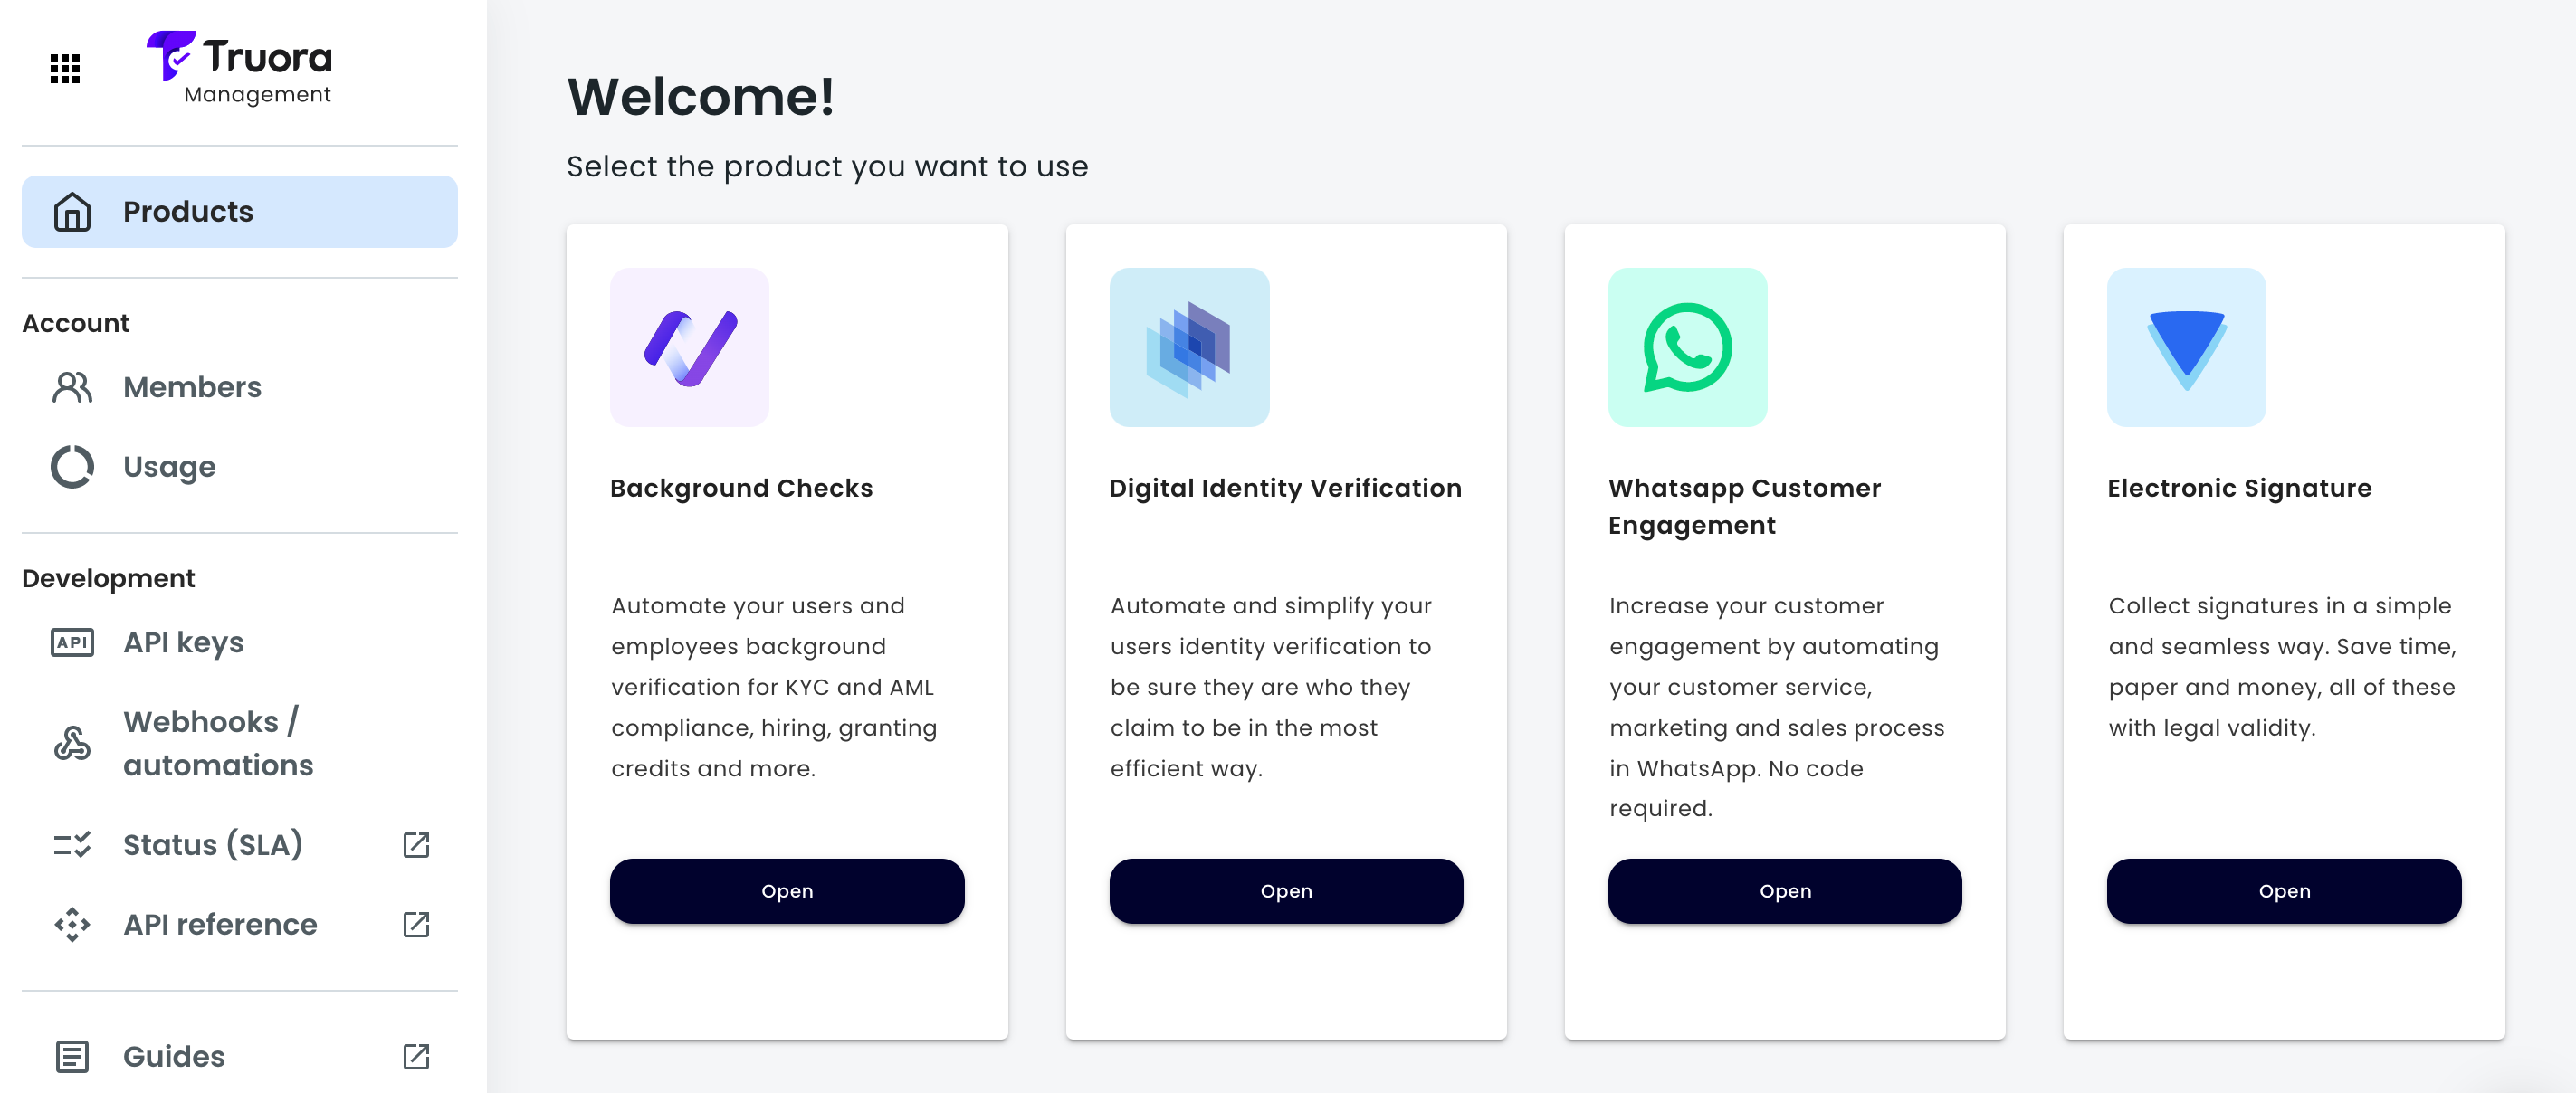
- Log into the Dashboard, and click the Open button in the WhatsApp Customer Engagement product.
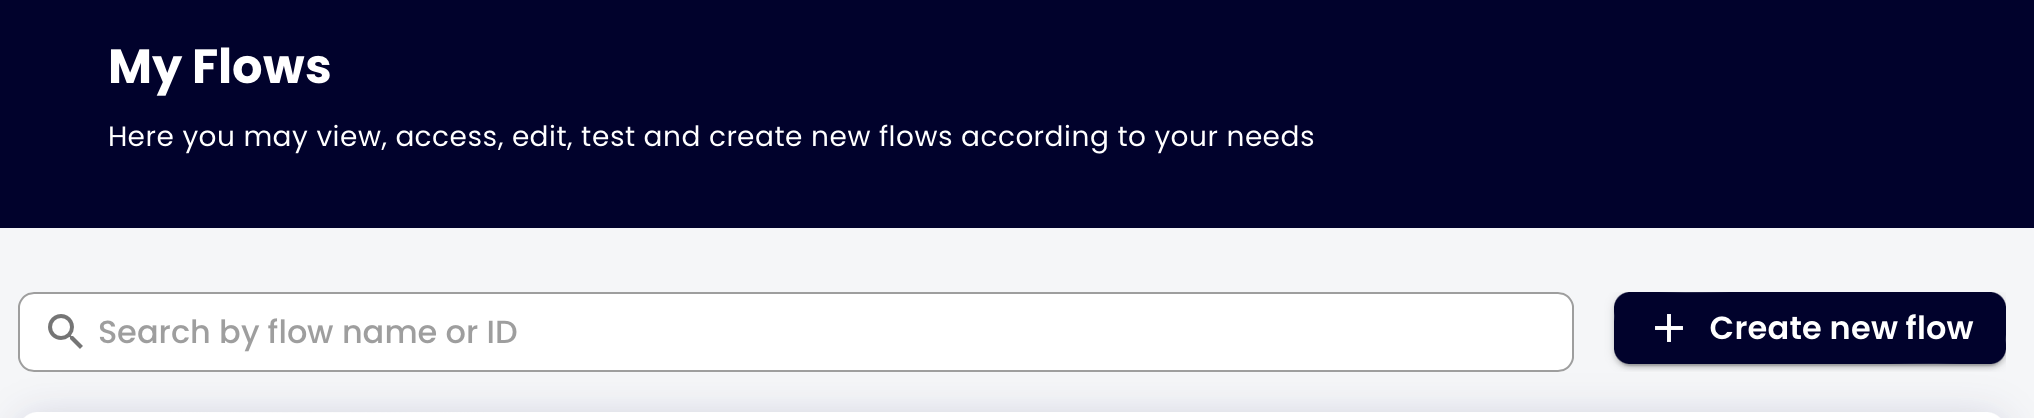
- Click on My flows and then on the Create new flow button.
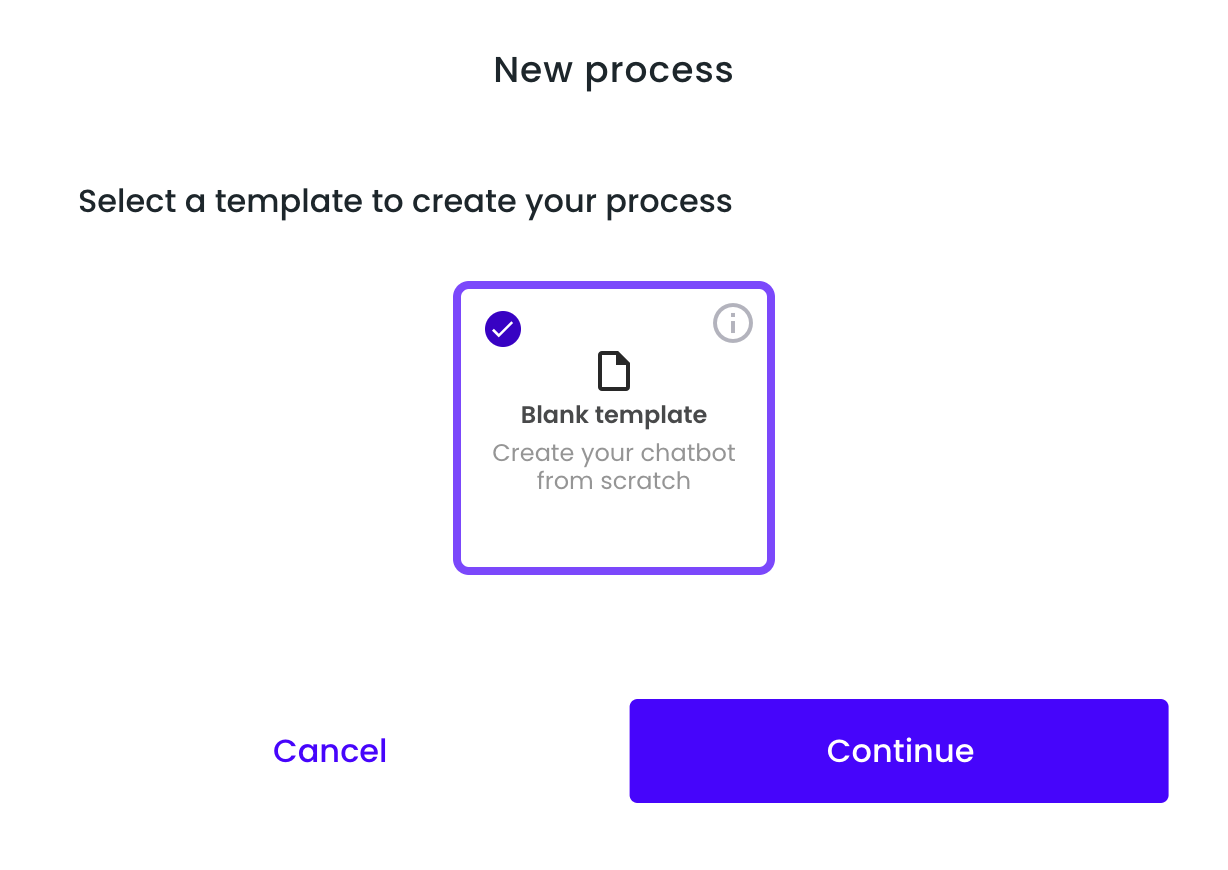
- Select Blank Template and click on the Continue button.
- Now, in the tab Process using our flowbuilder’s drag & drop system, we will proceed to organize the next steps into sections that follow the flow structure mentioned before.
Setting a message to trigger the flow
A flow can be triggered either by an approved Outbound Message (where you send the message to the user) or by a specific Inbound Message (where the user sends a message to your chatbot). To better understand both processes, we strongly recommend visiting the following guides:
While this guide’s primary focus isn’t on message triggers, we’ll show you how to set a Specific Inbound Message to trigger the flow for our example:
- Select the Your client sends it to you box at the beginning of the flow.
- In the Initial message configuration right side bar, select Custom message, and in Chatbot phone select your business’s WhatsApp line.
- Write the exact message that your client will send to trigger the conversation. For example “LOG ME IN TRUORA”.
- Click on Save Message.
- Once saved, you have the option to either clear or edit the message if needed.
When the flow is ready Saved and Published, if a client texts “LOG ME IN TRUORA” to the Chatbot phone, it will trigger the associated flow.
Asking for the Username
We need the user to provide their username in a message, so the first block in our flow will be an open question.
- Drag and drop an Open Question from the Frequent Blocks in the sidebar and connect it with the Your client sends it to you block.
- Set a Title for this block. For example, “userinput”. A variable with this title will store the user’s answer.
- Enter the question for the user. For example, “Please enter your Username: “
Creating the validation with our Custom Integration
Next, we’ll send an API request using the provided username (userinput) as an input to the Create user validation action.
- Add a Custom Integration Block: Drag and drop a Custom integration block from the Advanced Blocks section in the sidebar and connect it with the Open Question block from the previous step. Note: If your account has no custom integrations, you won’t be able to select this block.
- Configure the Integration Block: Click on the block to display its menu and fill in the required fields:
- Integration: Select your created Custom integration from the dropdown menu. For this example, we selected Integration Test - User Login, which was set up in the Custom integrations guide.
- Credential: Select your created credential from the dropdown menu. In this example we only have 1 credential, so it’s straightforward.
- Action: Select the action of the Custom integration from the dropdown menu. For this step of the flow, we’re using the Create user validation action.
- Message (Optional): Enter the message that the user will receive before making the request to the external API. For example, “Checking your username…”.
- Inputs: Click on Add Inputs. Set or select the Variables for your inputs and click Save. In this example the action receives only the Username as an input, so we’ll use the Open Question variable created in the previous step, “userinput (Variable)”. This variable is automatically recognized in the list because the Open Question block is connected to our Custom integration block.
- Outputs: No action needed here, but take note of the following in the Outputs section:
- There are two default outputs for this block: “Custom integration status” and “Request status code”.
- The “Request status code” output will be used in the next step to evaluate whether the user exists.
- The “Validation ID” output (created when setting up the Custom integration) will be used as an input in the last Custom integration block of this example.

Verifying the username and asking for the code
Next, we’ll need to check the “Request status code” from the previous Custom integration block. If the request is successful (i.e., the user exists), we’ll proceed by asking the user for the OTP Code that was sent to their registered email, otherwise, if the request fails, we’ll end the chat and notify the user with “User not found”.
- Add a Condition Block: Drag and drop a Condition block from the Advanced Blocks section in the sidebar and connect it with the previous Custom integration block.
- Configure the Condition Block: Click on the block to display its menu, and in Set the conditions click on the default condition to edit it:
- If this…: Select “Variable” since we’ll check the status of a variable.
- With value: Choose the name of the variable to check. For our example, we’ll select “Request status code” which is generated by the connected Custom integration block.
- Has the following condition: Choose a comparison operator. In our example, we’ll select “is equal to”.
- Fulfills: Enter the value to compare against the variable. In this example, we’ll set it to “200”, which represents a successful “Request status code” response from the API.
- Finish chat if request is not successful: Drag and drop a Finish Chat block from the Frequent Blocks section in the sidebar, connect it to the “else” red arrow of the Condition block, and click on it to open its menu.
- Set a message to notify the user, such as “User not found”.
- Set Final status of the verification to failure.
- Ask for the OTP Code if request is successful: Drag and drop an Open Question from the Frequent Blocks in the sidebar and connect it to the “if” green arrow of the Condition block.
- Set a Title for this block, for example “usertoken”. A variable with this title will store the user’s answer.
- Enter the question for the user, for example, “Please enter the CODE sent to your registered email.”
Validating the code with our Custom Integration
Next, we’ll send an API request using the OTP Code (usertoken) provided by the user and the “Validation ID” output from the Create user validation action as inputs to the Validate code action.
- Add a Custom Integration Block: Drag and drop a Custom integration block from the Advanced Blocks section in the sidebar and connect it with the Open Question block from the previous step.
- Configure the Integration Block: Click on the block to display its menu and fill in the required fields:
- Integration: Select your created Custom integration from the dropdown menu. For this example, we selected Integration Test - User Login, which was set up in the Custom integrations guide.
- Credential: Select your created credential from the dropdown menu. In this example we only have 1 credential, so it’s straightforward.
- Action: Select the action of the Custom integration from the dropdown menu. For this step of the flow, we’re using the Validate code action.
- Message (Optional): Enter the message that the user will receive before making the request to the external API. For example, “Validating your code…”.
- Inputs: Click on Add Inputs. Set or select the Variables for your inputs and click Save. In this example, the action receives two inputs:
- OTP Code: We’ll use the Open Question variable created in the previous step, “usertoken (Variable)”. This variable is automatically recognized in the list because the Open Question block is connected to our Custom integration block.
- Validation ID: We’ll use the “Validation ID (Variable)” output from the Create user validation action.
- Outputs: No action needed here, but take note of the following in the Outputs section:
- There are two default outputs for this block: “Custom integration status” and “Request status code”, which you can use for other purposes. We won’t use any of these at this point.
- The “Validation status” output (created when setting up the Custom integration) will be used in the final steps to validate the login process in our example flow.
Showing the login process status to the user
Finally we’ll need to check the “Validation status” output from the previous Custom integration block. If the value is “success” (i.e., the OTP code is correct), the chat ends, notifying the user with “Login Successful”, otherwise the chat ends notifying the user with “Login Failed”.
- Add a Condition Block: Drag and drop a Condition block from the Advanced Blocks section in the sidebar and connect it with the previous Custom integration block.
- Configure the Condition Block: Click on the block to display its menu, and in Set the conditions click on the default condition to edit it:
- If this…: Select “Variable” since we’ll check the status of a variable.
- With value: Choose the name of the variable to check. For our example, we’ll select “Validation status” which is generated by the connected Custom integration block.
- Has the following condition: Choose a comparison operator. In our example, we’ll select “is equal to”.
- Fulfills: Enter the value to compare against the variable. In this example, we’ll set it to “success”, which represents a successful “Validation status” response from the API.
- Finish chat if Validation status different to success: Drag and drop a Finish Chat block from the Frequent Blocks section in the sidebar, connect it to the “else” red arrow of the Condition block, and click on it to open its menu.
- Set a message to notify the user. We’ll set it to “Login failed” for our example.
- Set Final status of the verification to failure.
- Finish chat if Validation status is success: Drag and drop a Finish Chat block from the Frequent Blocks in the sidebar and connect it to the “if” green arrow of the Condition block.
- Set a message to notify the user. We’ll set it to “Login Successful” for our example.
- Set Final status of the verification to success.
Testing the completed flow
The final step is to test the flow. After you have Saved and published the flow, follow these steps:
- Click on Test Conversation.
- Select Your user sends it and Continue.
- Review the Chatbot phone and Message and click on Continue.
- Test your conversation:
- Click on Open conversation to directly open and test the WhatsApp conversation with the Chatbot.
- Or click on Copy link and use this link to test the conversation on any device.
Example Interactions with the Chatbot
-
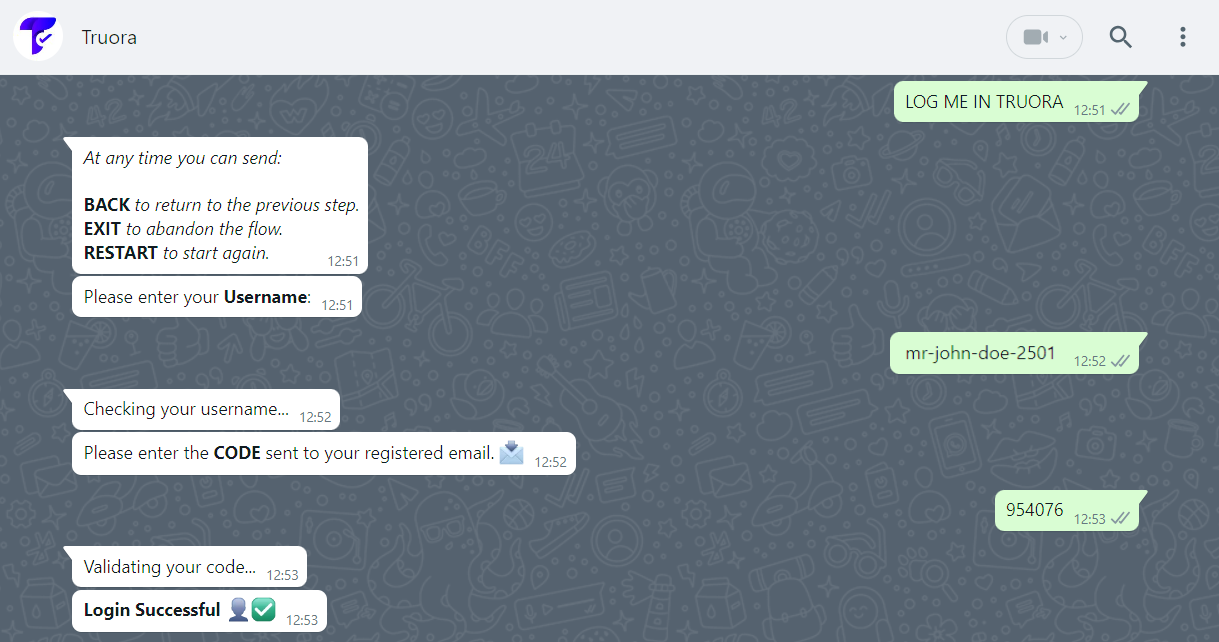
Existent username and correct OTP Code provided - Login Successful:
-
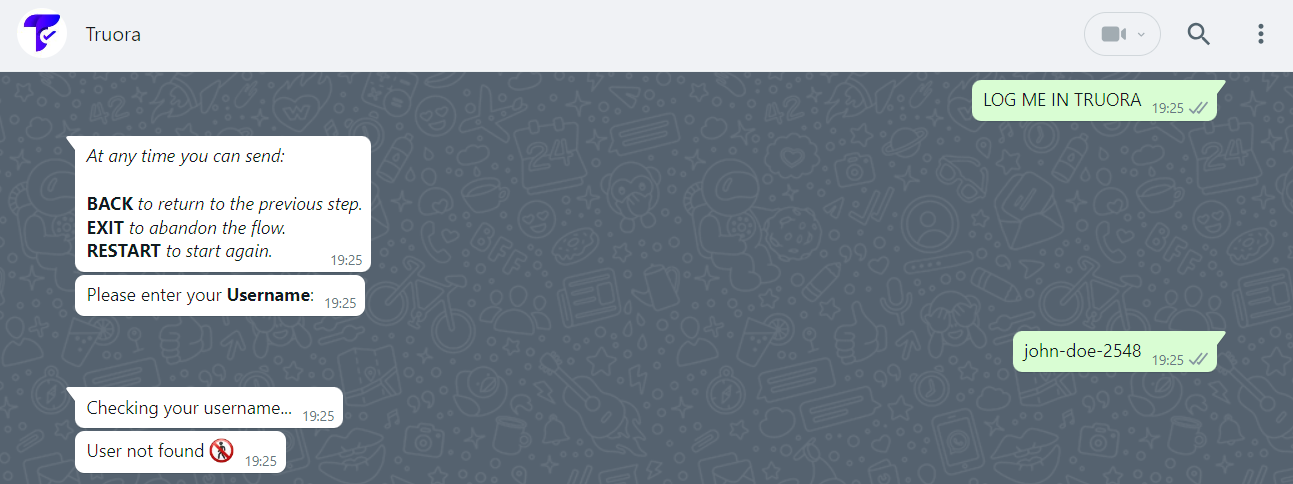
Nonexistent username provided - User not found:
-
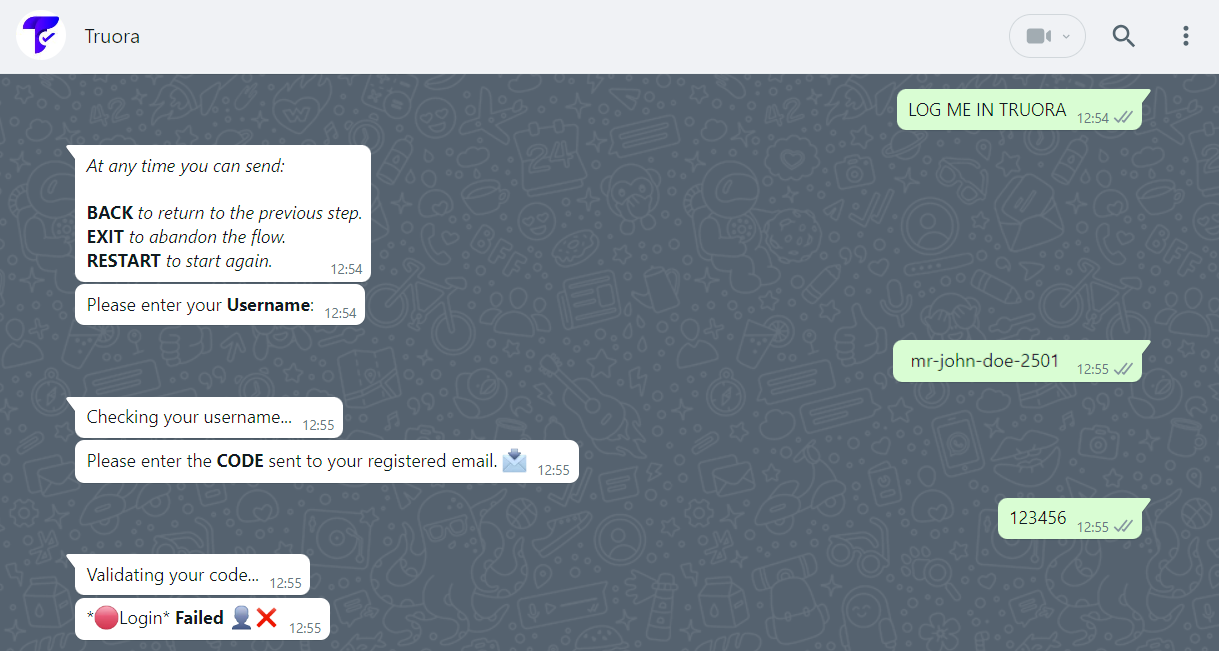
Existent username and incorrect OTP Code provided - Login failed:
Handle responses from the custom integration block.
By this point, we have successfully built a fully functional flow ready for publication. However, it is essential to explore a powerful tool within the Custom Integration block that can make your logic even more flexible while reducing visual complexity: the Response management
In this section, we will demonstrate how to transform our current flow into a more streamlined version, showcasing the versatility this option provides for managing API responses directly within the block.
Understanding Response Management The Custom Integration block offers the capability to branch your flow directly based on the variables it generates. This can be achieved in two ways: using the Rules Builder or the JSONLogic Builder.
The Rules Builder
The Rules Builder operates similarly to a standard Condition block; however, it is specifically designed to work with variables originating from your integration. Any Output values you have configured during the integration setup will be available here.
To streamline our flow, we will replace the external condition block by configuring the rules directly within the integration:
-
Open the conditionals section: In the Custom Integration block menu, go to the section for defining conditions.
-
If this…: Select “Request status code” (or your specific status variable), as this is the data point we will use to determine the next step.
-
Operator: Choose a comparison operator. In this case, select “is equal to”.
-
Value: Enter “200”, which represents the successful status code we are looking for.
Once configured, you will notice that the block now has two output branches (the green “if” and the red “else”). It functions exactly like a standalone condition block: the first branch follows your configured rule, while the “else” branch handles any other response that doesn’t match your criteria.
Now that your rules are set within the Custom Integration block, you can direct the flow based on the API outcome:
-
For the “Else” branch (Failure): Connect a Finish Chat block to the red arrow. Configure it to notify the user (e.g., “User not found”) and set the final verification status to failure.
-
For the “If” branch (Success - Status 200): Connect an Open Question block to the green arrow. This is where you will ask the user for the OTP Code sent to their registered email, exactly as we did in the manual condition example.
By doing this, you’ve successfully embedded the logic within the integration block itself, making your flow diagram much cleaner and easier to manage.
The JsonLogic Builder
The JSONLogic Builder is a more advanced tool for creating complex conditions using logic operators like AND and OR or conditionals that can’t be found in the Rules Builder.
For this section, we highly recommend reviewing our guide on How to use variables in your WhatsApp flow, which provides essential context for both WhatsApp and Web flows.
JSONLogic allows you to express conditionals as simple JSON objects. A basic structure looks like this:
Practical example
Let’s trigger a specific path only if the API call is successful AND the user has “admin” privileges.
-
Open the conditionals section: In your Custom Integration block, navigate to the conditions area.
-
Select JSONLogic Builder: Select the option “JSONLogic builder”.
-
Enter the Expression: Paste the following structure:
- Map your Variables:
-
Inside the first var quotes, type the @ symbol to trigger the variable dropdown and select Request status code.
-
In the second var, type @ again and search for the variable from your initial Open Question block. This allows you to use any flow variable within your integration logic.
- Save the Configuration: Click Save.
Your integration now handles a multi-layered condition: it checks if the API response is 200 AND if the username entered was “admin”. If both are true, the flow proceeds through the success branch; otherwise, it directs the user to the “else” path.
Our new flow
As a result, we can see that our flow has been significantly streamlined. By reducing the number of blocks and the horizontal space required, the diagram is much easier to read. Most importantly, it centralizes all response-handling logic directly within the Custom Integration block itself.
This approach not only makes the flow visually cleaner but also simplifies future maintenance, as all API-related conditions are managed in a single location.
Below is the final, optimized version of our flow and a quick test to confirm everything is working as expected:
-
Optimized final flow
-
Existent username, correct OTP AND username equals admin

Conclusion
By following this guide, you’ve learned how to leverage custom integrations within our flow builder to enable users to interact with your services via WhatsApp. Whether you’re connecting to your internal systems or third-party APIs, custom integrations provide a powerful way to extend your chatbot’s capabilities.
As we continue to enhance our platform, keep an eye out for upcoming improvements and new features that will make it even more versatile and user-friendly.
Related guides
If you want to learn how to use Custom integrations with external services inside our Flow Builder for Web flows, check out the following guide: